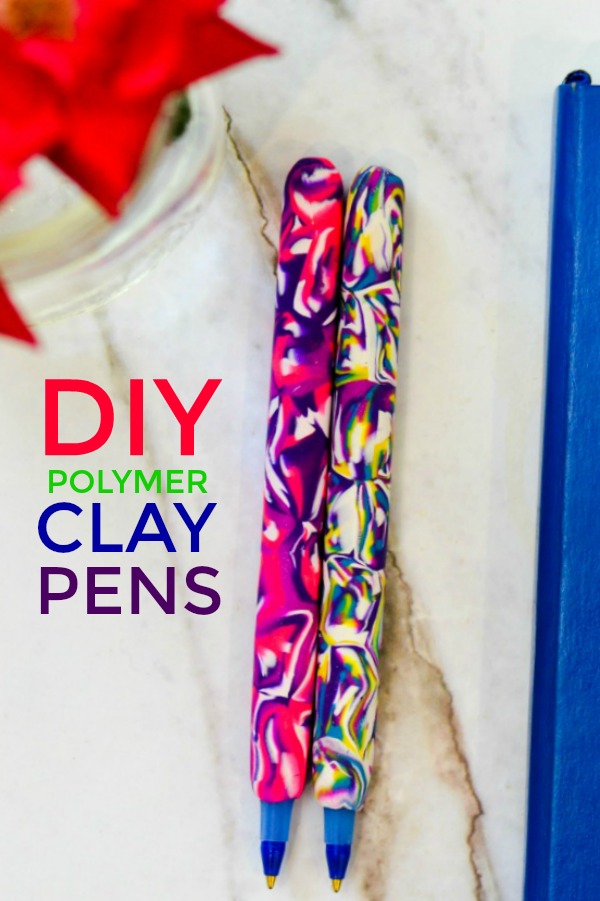
If you’ve hung around here long enough (thanks if you have!), then you know that Polymer clay is one of my favorite things to work with. I actually first discovered it when I was a Girl Scout troop leader and I took my girls to a local Craft Museum where they were taught to make pens decorated with Polymer Clay. I later tried my hand at Polymer Clay dishes and some polymer clay earrings. But I never went back to the pens. Until now. I have a super simple Polymer Clay Tutorial for you so that you can make your own fancy, unique pens.
Aren’t they so colorful and pretty?? And they fit all my crafty criteria. They look good AND they are useful. And as an added bonus, I have to tell you, there is something very therapeutic about rolling around some clay in your hands. Of course, as always, you get that special satisfaction that comes with knowing that you made something that if not for your hands and your amazing brain, would not have existed.
There’s not a lot of money or time that goes into the making of these pretty clay pens, either. I bought everything I needed from Amazon. I had to buy a new set of polymer clay and I bought some Bic pens (ps, it’s very important you use the Bic pens or some type of pen that you can remove and then replace the ink for. And also you have to KNOW that the pen won’t melt in the oven. So buy the Bic pens is what I’m saying or you’re on your own if they melt!). In total, I made five pens and I think it took me maybe an hour? Including the time it took to bake them. Easily done when you have a few spare moments!
Materials – DIY Marbled Pens – Simple Polymer Clay Tutorial
Sculpey Clay White***There is a small brick of white clay that comes in your Sculpey Clay Brights package, it’s small though. This larger brick is optional and I would say skip it if you don’t plan on making a ton of Pens or other Sculpey projects.
Do you need 36 pens for this project? Absolutely not. Did I buy 36 pens? Yes, by accident. You could totally grab a smaller package from anywhere, but Amazon is so convenient for me and it’s only about 6 bucks for 36 pens. Just make sure it’s THOSE Bic pens. The one you can use your teeth or fingernails to pry the ink stick out.
Steps – DIY Marbled Pens – Simple Polymer Clay Tutorial
I looked at a few different polymer clay tutorials before I landed on this option. There are others that are more technical, but this one is super easy and great for almost any age.
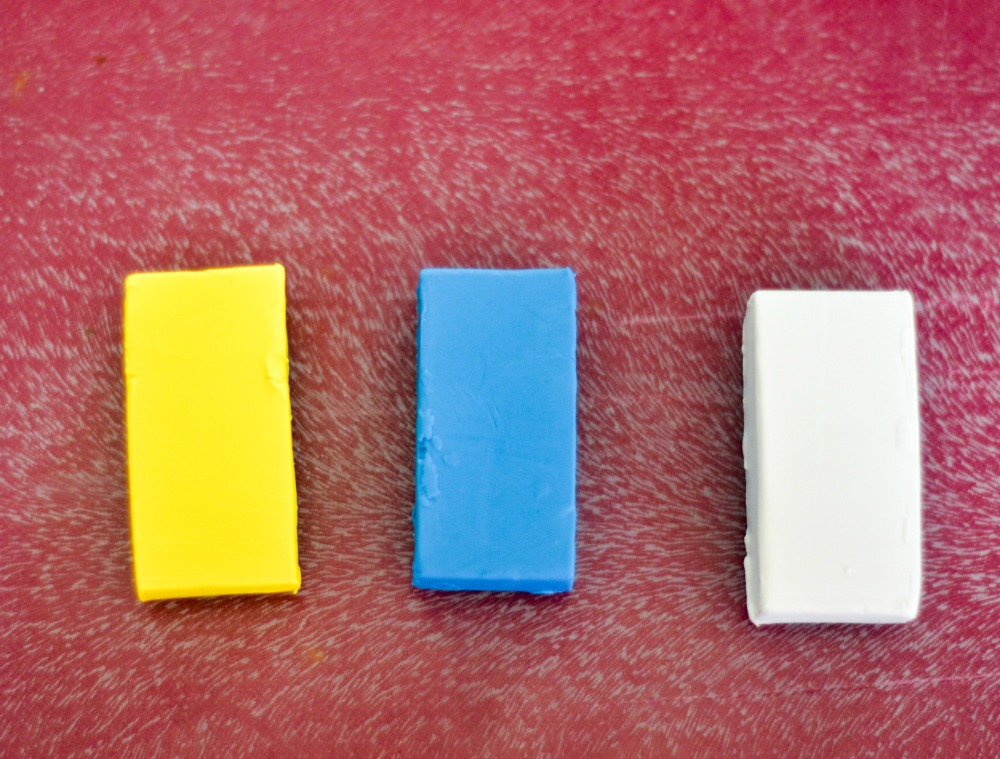
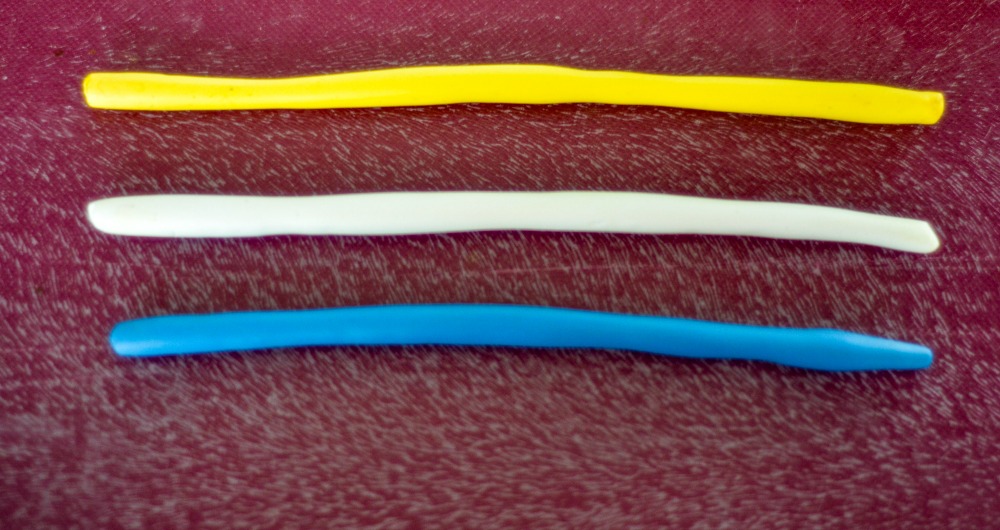
Step 1: Pick the colors you would like to work with. I started with just three colors, one of which was white. As I continued to make pens, I chose to use more colors. The pens that I used four or more colors for are my favorites. The one’s that I used three colors for are lovely, too. They have a lot more white in them and almost have an animal print vibe. If there were an animal that was blue, yellow and white. Maybe there is. I’m not a zoologist, so I wouldn’t know. Maybe some type of bird.
If you choose to do more than three colors, the steps in the process are still the same, you’ll just be twisting four or five snakes instead of three!
Break off pieces of each color, about a quarter of each little brick, and start conditioning each color. Conditioning is a fancy way of saying roll it around in your hands to warm it up and make it nice and pliable. One color at time! Don’t mix anything together yet!
Step 2:
Roll each of the colors that you chose into snakes. Or ropes. I prefer snakes because it sounds dangerous.
Step 3:
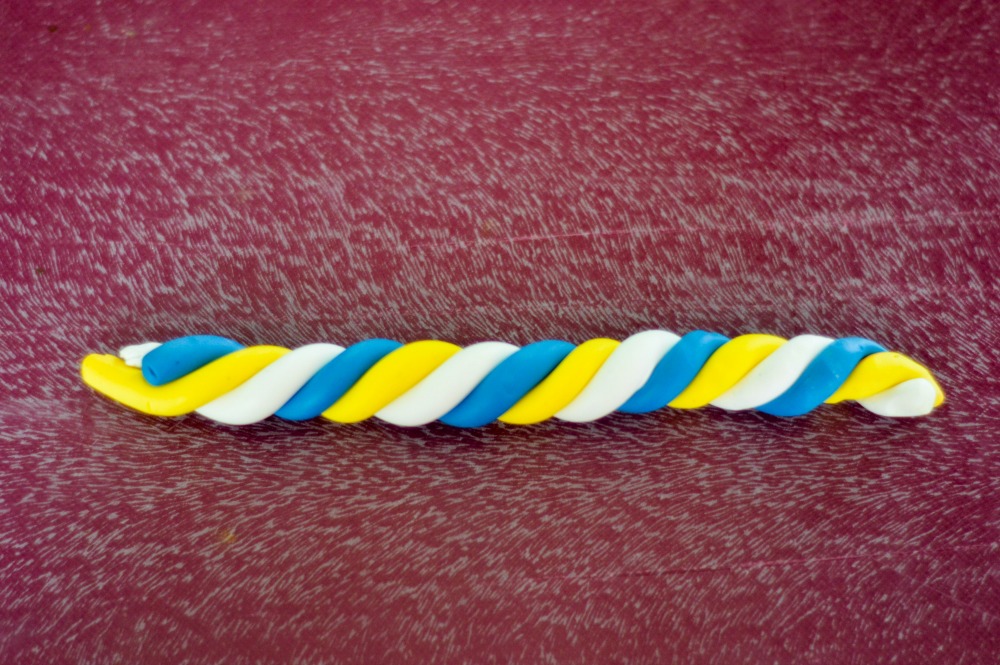
Twist the snakes together. See, way more fun than twist the ropes together, right?
Step 4:
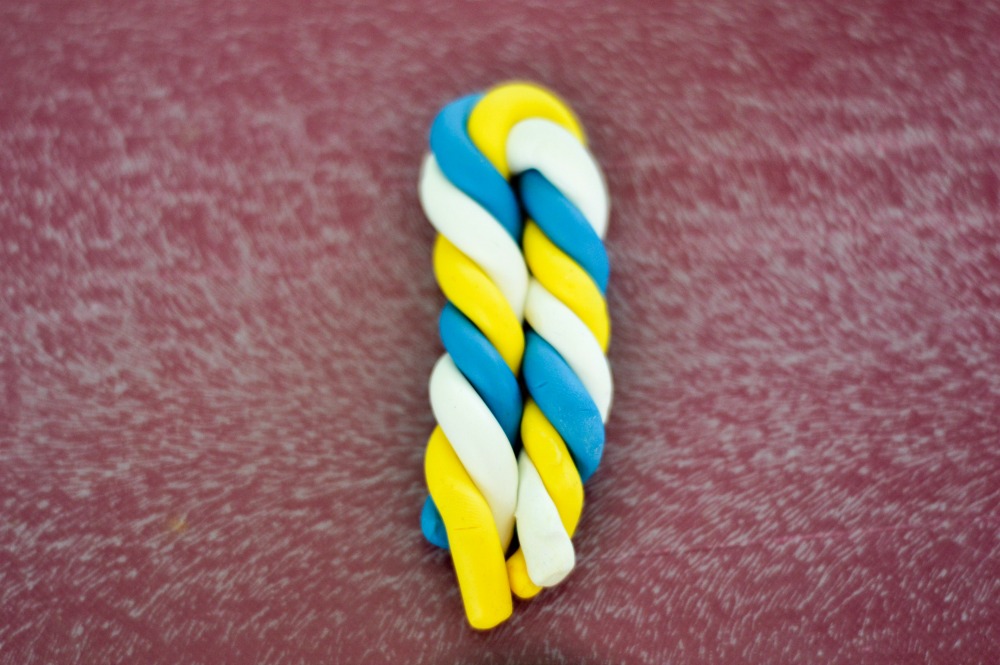
Fold your twisted snakes in half.
Step 5:
Roll into another snake.
Step 6:
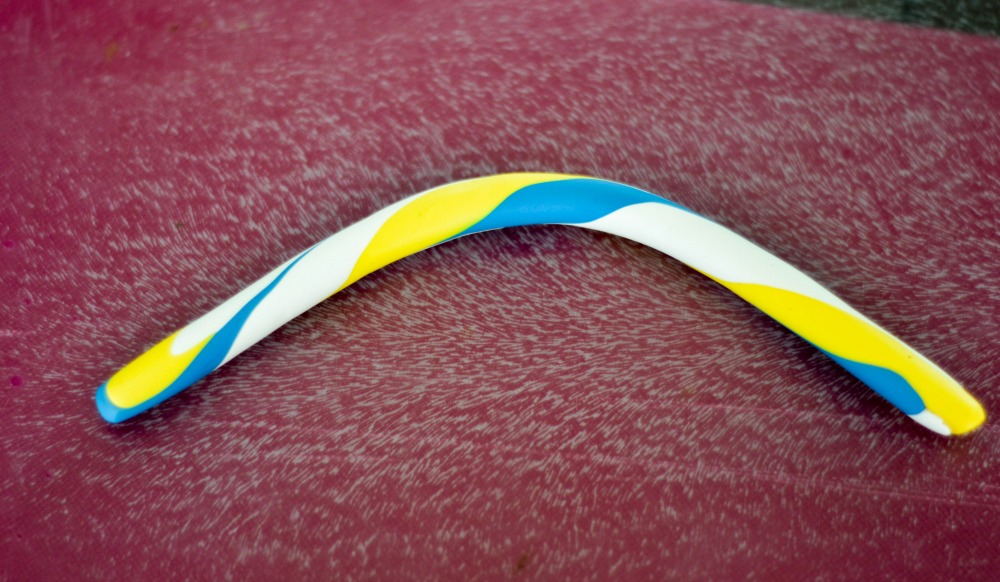
Repeat steps 4 and 5 one to two more times. This is going to fully blend your colors together. It’s important; don’t skip it! You want to end up with a snake that is about 1/4 to a 1/2 inch in diameter? I didn’t measure, but you want it to be a decent thickness.
Step 7:
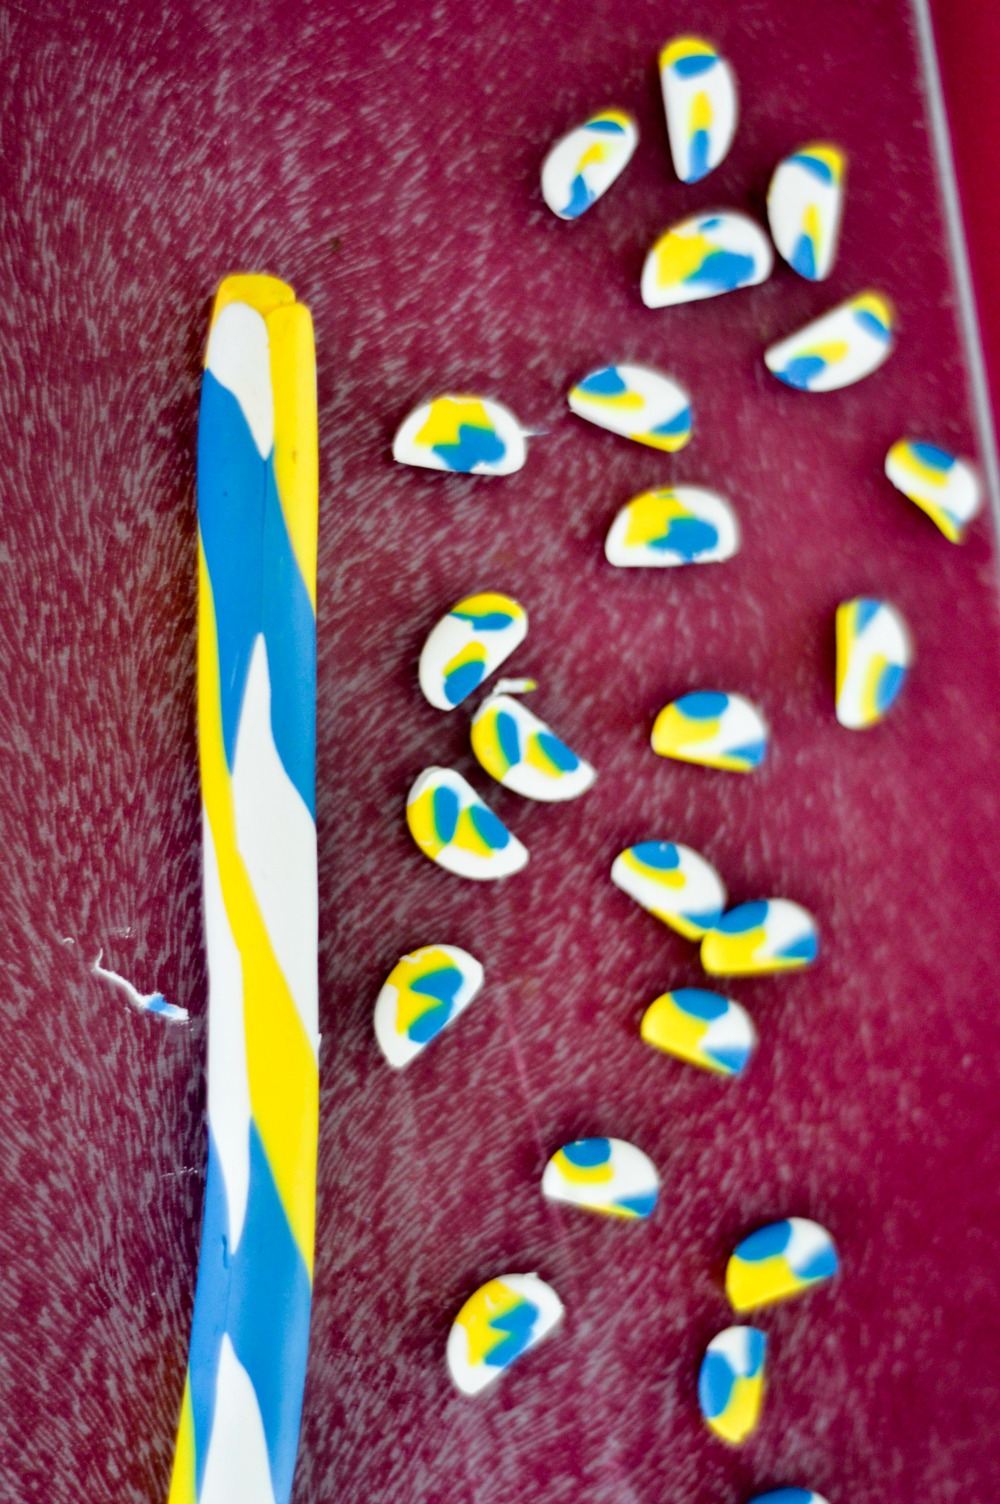
After repeating steps 4 and 5 (you did repeat them, right??) you’re going to slice some pieces off your snake. They should be thin. Not paper thin, but fairly thin. I used my kitchen paring knife to do this.
Step 8:
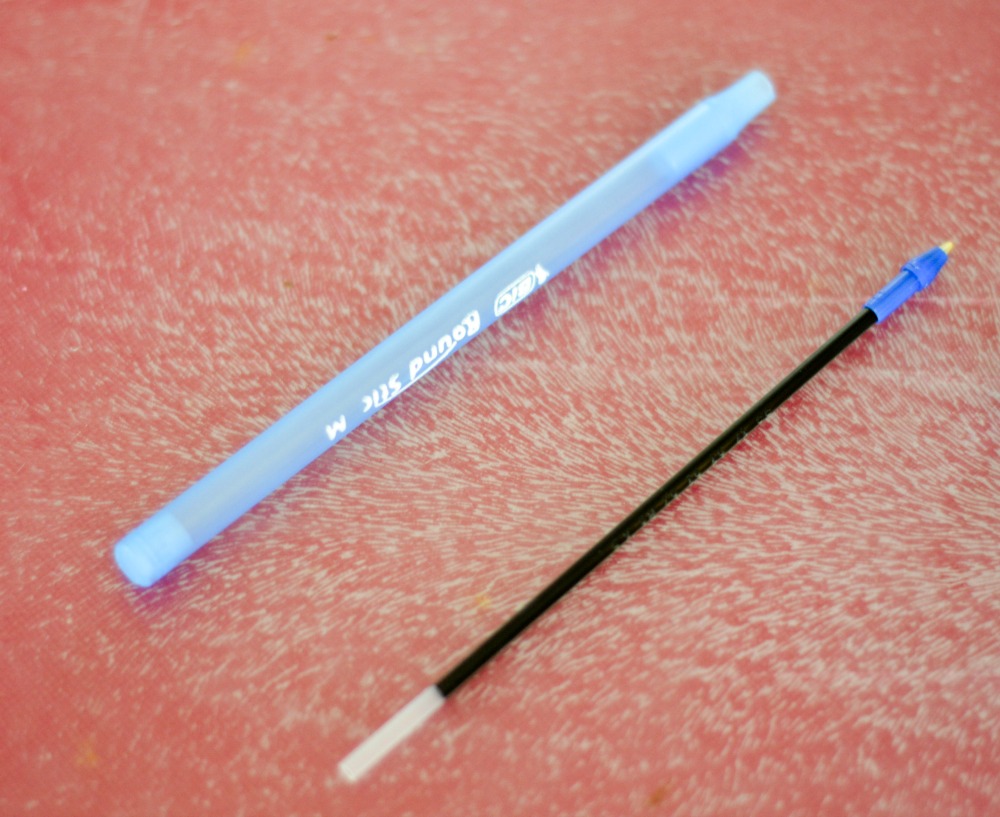
REMOVE THE INK THING FROM YOUR PEN. I am shouting that at you so that you don’t put it in the oven and have it melt everywhere. I used my fingernails to do this. I also, as an alternative, used my teeth to do this. Don’t use your teeth to do this. My mother would have killed me if she saw me.
Step 9:
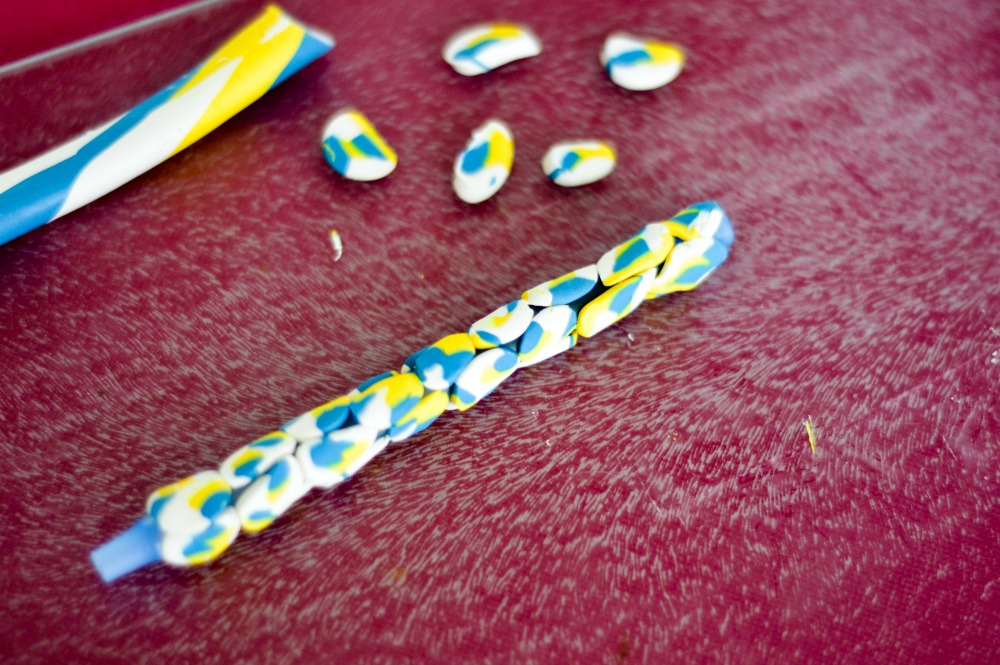
Stick your slices on your pen. Don’t worry if you leave some small spots open, they will fill in, I promise.
Step 10:
Roll your pen on a flat surface. Back and forth with your fingers, sort of gently, but enough to fill in and smooth out the clay. This takes a little bit of time. You want it to be fairly uniform in thickness, so keep an eye on that as you’re rolling. Make sure you’re not getting any fingernail marks. Keep an eye on the top of the pen. I curved my clay right up and over the top, but you may want to leave the top open. At the tip of your pen, you want the clay to taper a little, so pay particular attention there. But honestly, it’s mostly just messing around with clay, don’t sweat it, OK? Just get the pen into a nice smooth shape and you’re good to go!
Step 11:
Bake your pen in the oven as according to you clay instructions. For me, that was 15 minutes at 275 degrees. Let them cool! And then add the pen thingy back inside.
Here’s all the things I love about this project. It’s not super expensive. It’s completely functional. It’s super pretty. The pens are totally customizeable and each one is totally unique. Also, I actually love writing with a Bic pen EXCEPT for that they are so thin. The clay gives them a really nice thickness that makes them more comfortable to hold.
This is such a fun and simple polymer clay tutorial. It will be perfect if you have a rainy afternoon this summer. PS, these would make great gifts for teachers!
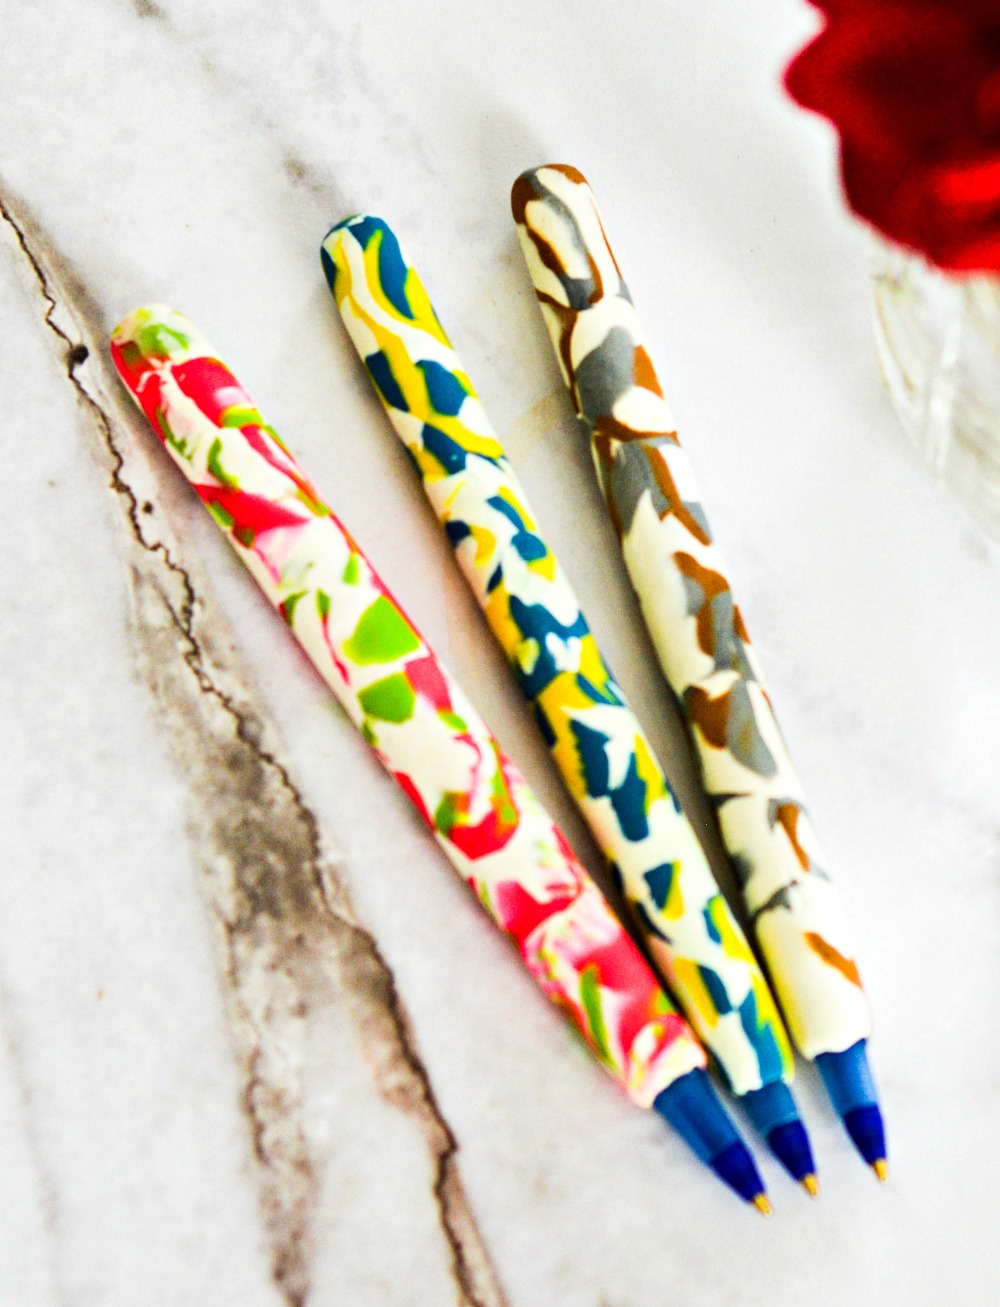
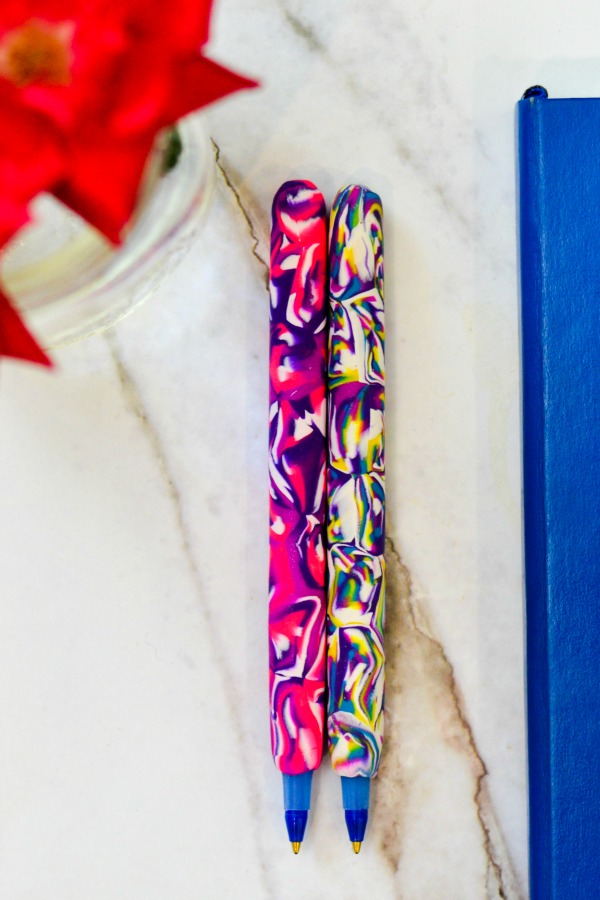
In case you’re curious what the pens that I only used three colors for came out like, there they are! Lovely, but I really love the super multi-colored ones that I used four or five different colors on.
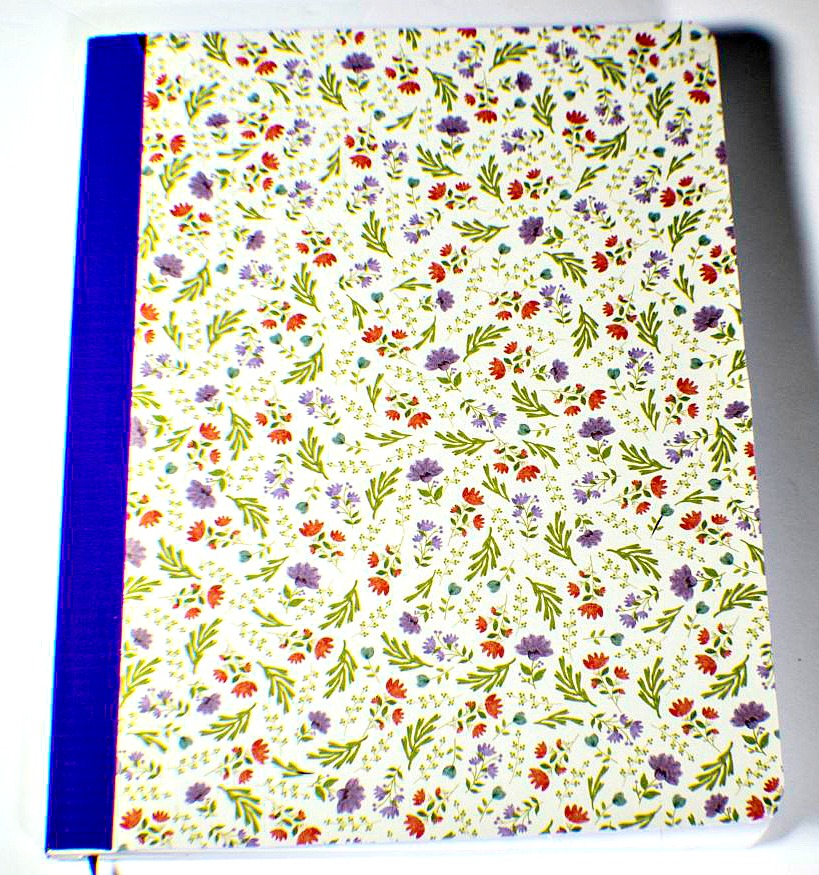
You know what would be super cute with these pens? A DIY Composition Notebook. My friend Diana from Sew Very Crafty made this one with Duct Tape:
I hope you give this project a try. This polymer clay tutorial in particular, because, it’s very simple, but it’s very artistic. I love that the end product is something that you could potentially use everday.
If You Liked It Then You Shoulda Put a Pin In It!