I cracked the code, guys. My Nana (who came here from Ireland when she was 16, a story I wrote about here that you should totally read because my Nana was pretty amazing) always baked Irish Bread for special occasions and most definitely for St. Patrick’s Day. It’s something I grew up with and besides being delicious, it holds a lot of memories. When Nana had a stroke and couldn’t knead the dough anymore, my mother took over making the Irish Bread. We are a large Irish family and we all love the bread, so it’s not like we could stop making the bread. The tradition had to carry on. But, there was always something that was just a little different about the bread. Not better or worse, just not Nana’s bread.

This year, I decided it was my time to bake the bread. There was only one problem. I asked my mother for the recipe and all I got was a list of things that go in the bread: Flour, salt, raisins, caraway seeds, yeast, butter and water. And that was it. No measurements, no instructions, nothing. I needled my mom into helping with a batch to guide me. I also roped in my daughter to help. Three generations baking bread that is many, many generations old.

Before we get to the recipe, I have to tell you, I’ve not felt my grandmother so present in my life since she passed away, as I did yesterday. We talked about her all throughout the day (Yes, the bread takes all day. It’s worth it.) and marveled at what a good cook she was. We laughed about how my mother remembered how easy- going Nana was, except on Irish Bread day. When Irish Bread was being baked, you had better not make any loud noises or let in any drafts, or else. We talked about how she lived with a Jewish family when she first arrived here as a Nanny/Cook/Housekeeper and how she loved working for that family and they loved having her. I don’t think I need to point out the symbolism of that and how it relates to our world today.

Authentic Irish Bread
5 1/2 c of All Purpose Flour
2 Packets of Yeast – not fast acting
About 2 Cups of water
3 Cups of Raisins
2 T Caraway Seeds
1 T Salt
4 T Butter
1 t Apple Cider Vinegar

- Put your Raisins in a large bowl and fill it with water. This will plump up your raisins. Nana probably did this overnight, however, I let them sit in the water for about an hour and found them plumper than not sitting them in water at all.
- In a large bowl, mix together two packets of yeast with a 1/2 cup of warm water until the yeast is dissolved. You do not want HOT water. You also do not want COLD water. It has to be warm.
- Into the yeast mixture, add salt, butter, apple cider vinegar and caraway seeds.
- Start adding in your flour, 1 cup at a time. I did this with my hands. That’s how Nana did it. Nana didn’t have a stand mixer and neither do I. So, hands it is.
- Keep alternating adding flour and the remaining water until the dough starts to pull away from the sides of the bowl. Ok, this is the part where it takes a little bit of artistry. You don’t want to add too little flour or your dough will be gloopy and wet. Too much dough and it will be super dry and hard to work with. The dough should be heading toward the dry side, but still sticky enough to stick to your hands and slightly firm to the touch.

- Add your raisins into the dough. Again, I used my hands and just sort of folded/kneaded them in. You’re going to think there are way too many raisins. I did, too and the first batch I made with only 1.5 c of raisins was basically white bread with one or two raisins per slice. No bueno. Remember that the dough is going to rise which will mean more room for the raisins to be distributed through.
- Allow your dough to rise for one hour in a warm spot. It actually should be about 85 degrees. What? Where are you going to find an 85 degree spot in your house in March? Well, the first batch we made at my mom’s house was set to rise in front of her wood burning stove. The dough rose perfectly. The second batch I made at my own house and I don’t have a wood stove. However, I found a great tip in an old cookbook. Take a shallow baking pan and fill it with hot water and place it on the bottom rack of your oven. Put your dough in the oven to rise (DON’T TURN THE OVEN ON) on the rack above the water. The oven will get nice and warm and your dough will rise!

- After about an hour, your dough should have about doubled in size. Now the fun part. Kneading! You’re going to knead your dough for about 5-10 minutes. I kneaded my dough right on the granite countertop (just clean the counter, it’s fine). Throw some flour down on the counter and coat your hands in flour. Plop the dough on top of the counter and start kneading. How do you knead? Well, you basically push the dough away from you with your palms, sort of flattening it out, then fold it in half, turn it a quarter turn and go at it with your palms again. Sprinkle the dough with flour if it gets too sticky. Repeat for 5-10 minutes. Good arm work out.

- Grease your baking pans. I use butter to grease my pans. I used two regular size baking pans and three mini pans.
- After kneading, you are going to separate your dough into the greased baking pans. To do this, you will sort of twist off a ball of dough that is a little smaller than a baseball and place it in your baking pan. The regular size baking pans will take two of these size balls, side by side and touching. As they cook, they will just join together as one loaf. Ahh, Harmony. If you are using mini loaf pans like I did, just make the balls a little smaller. You want your pans to be about halfway to the top with dough.

- Time to rise again. Pop these back in your warm spot (refill your hot water if you are using the oven method above). Let the dough rise for another hour until the dough has again doubled in size.
- After the dough has risen, preheat the oven to 375 degrees. AGAIN! DO NOT TURN THE OVEN ON IF YOU ARE LETTING YOUR DOUGH RISE IN THE OVEN! Add the bread to the oven once it has reached baking temperature.
- Let the bread bake for about 20 – 35 minutes. I know that is a crazy time difference, but our first batch cooked for 35 minutes and was no where near being over cooked while the second batch cooked for more like 25 minutes and if it had cooked a minute more I would have said it was over cooked. The second batch started to look browned on top at about the 20 minute mark and your smaller loaves may be totally done at the 20 minute mark. To check for done-ness, insert a wood skewer into the center of one of the loaves. If it comes out clean, you are good to go!


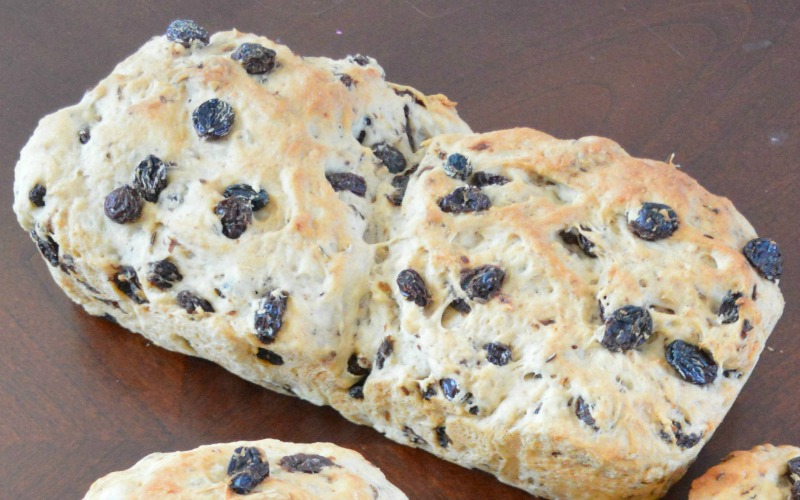
Yesterday, after the first batch of bread came out lacking majorly in raisins, I was disappointed. I really wanted to nail this bread. I was so happy when I brought the second batch, still warm, to my mom’s house this afternoon and got her seal of approval. Certified “Just Like Nana’s”. The code has been cracked. The texture is right, the crust is right, the raisin ratio is right. It’s like a little bit of Nana in a loaf pan. I told my mom it was like eating a memory. Which is totally weird, but also completely accurate. Am I the only one who gets that? What family recipes do you have that bring your loved one’s right back to you? And don’t forget to read the story of Nana and Grandpa from Ireland. You can click the pic below. There’s also a recipe for corned beef. Which apparently is NOT something Irish people actually eat, according to Nana, an actual Irish person.
