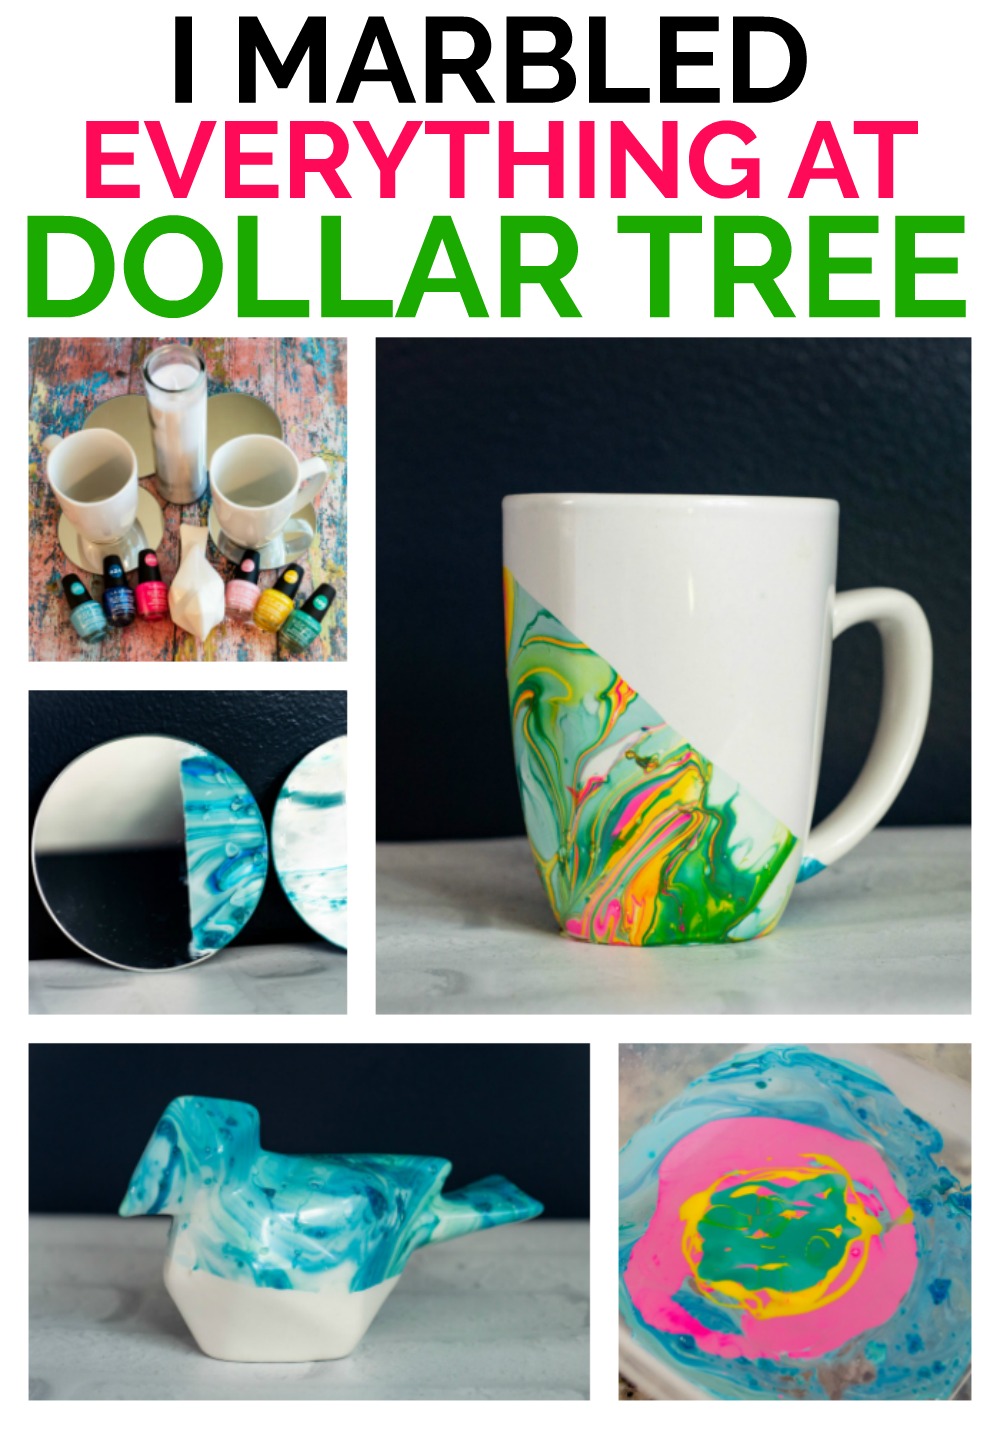
I have the bug for making easy crafts after doing some Pinterest deep dives last week like this one about nail polish crafts. Nail polish marbling is cheap and easy, even if it is a smidge messy.
Marble the Whole Dollar Store with this Nail Polish Marbling Tutorial
So I ran myself to the dollar store because you know I love a good Dollar Tree DIY. I probably didn’t need to buy nail polish, but I did.
They have colors that are PERFECT for this craft and I also grabbed a bunch of things to marble.
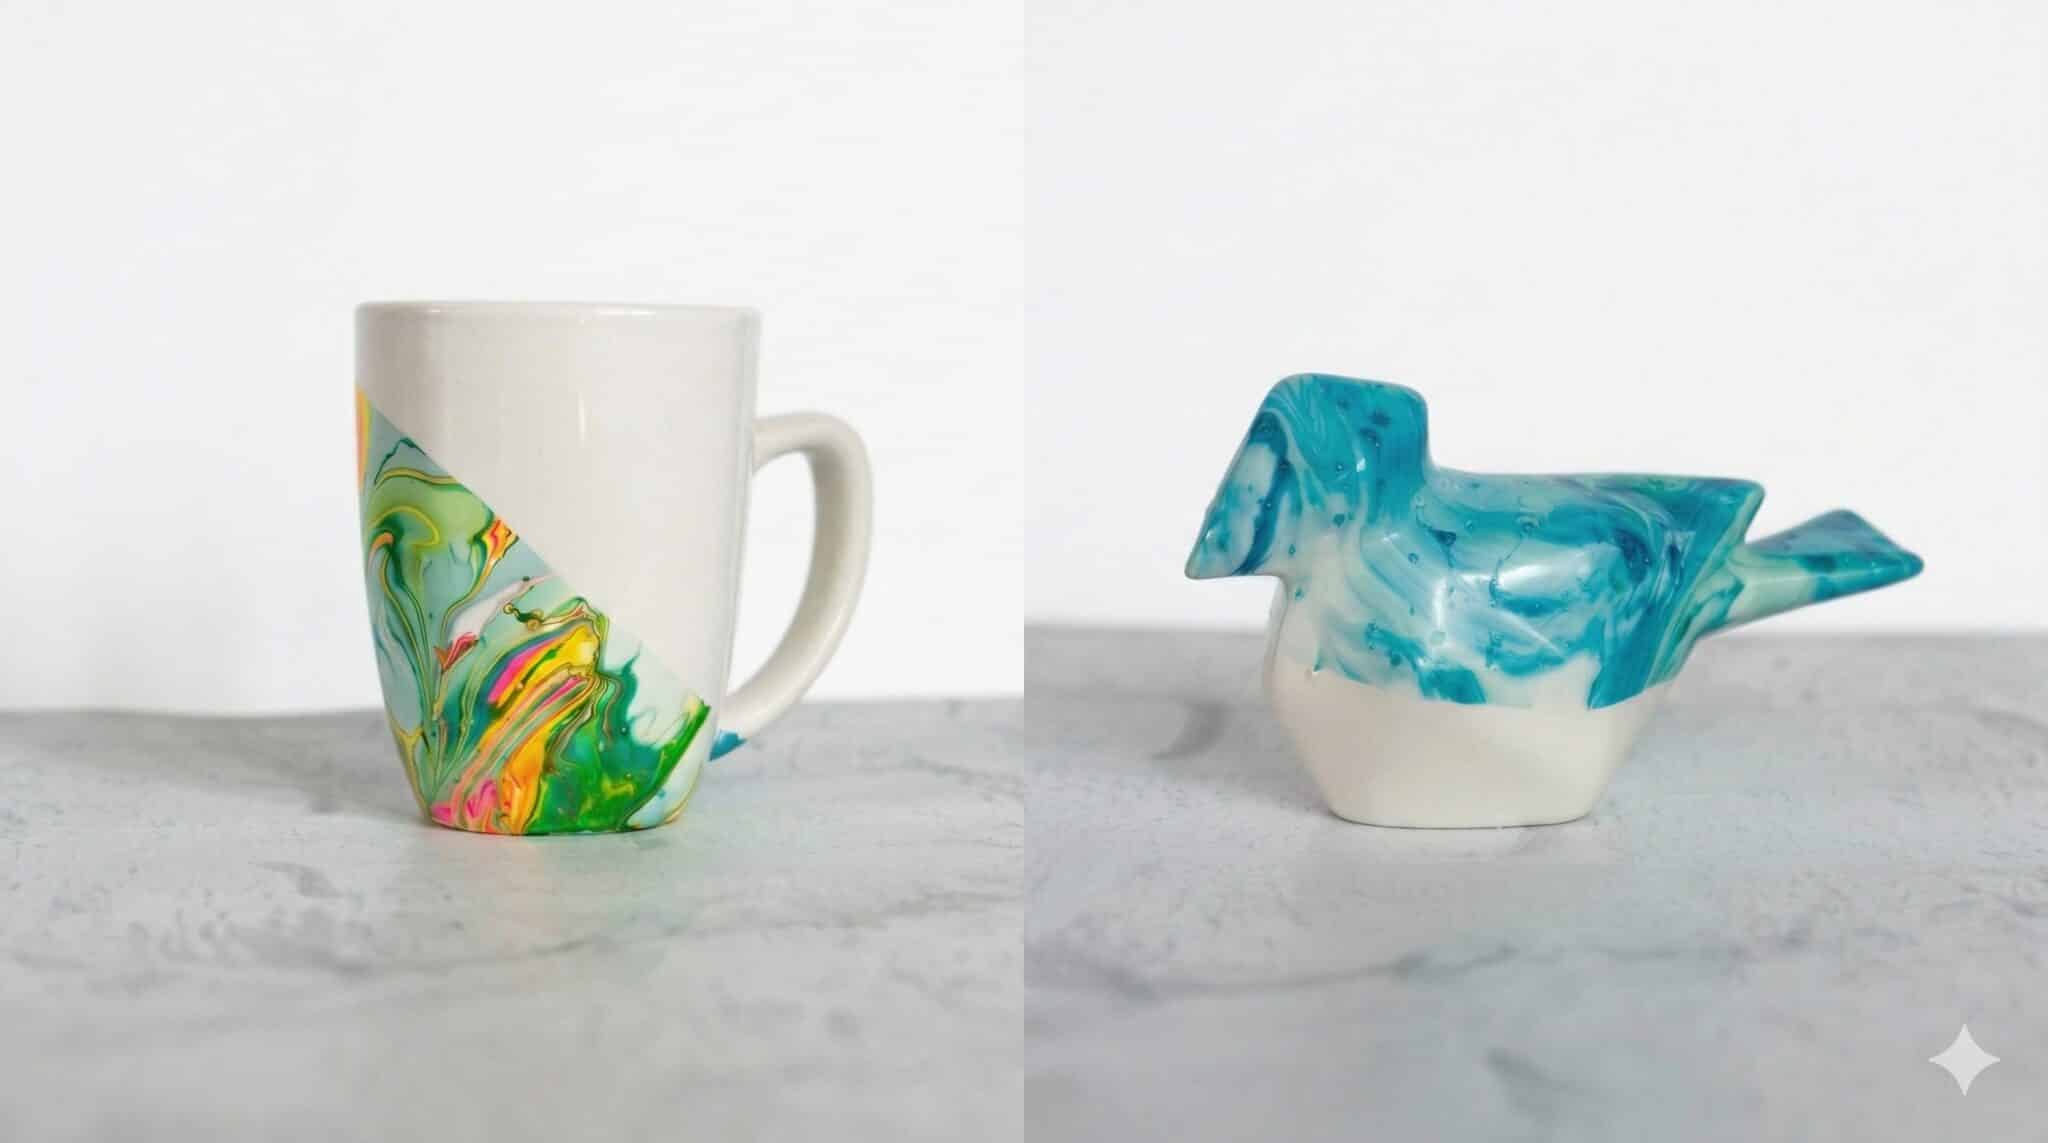
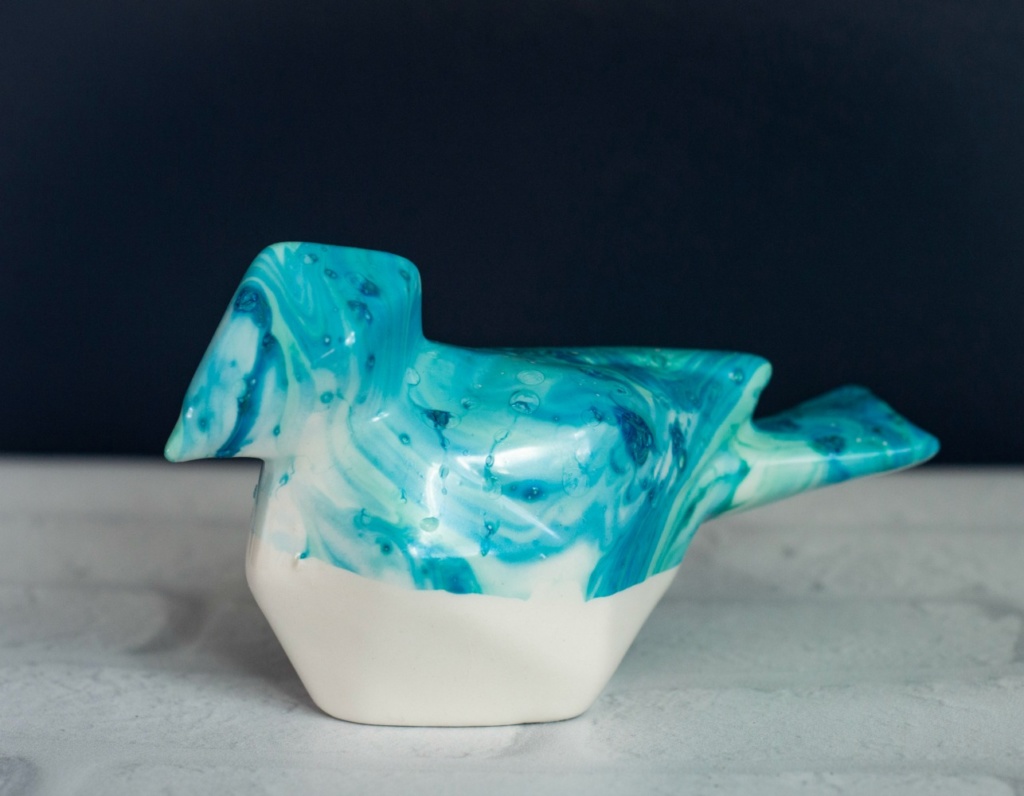
Some of the things I bought to marble were a success. The little ceramic bird came out great. One mug, gorgeous.
The mirrors… they are cute. They are acceptable. The candle? Complete fail. Don’t worry, I’ll show you the failures, too.
And I’ll do my best to tell you why I think they failed so that hopefully you’ll escape that fate.
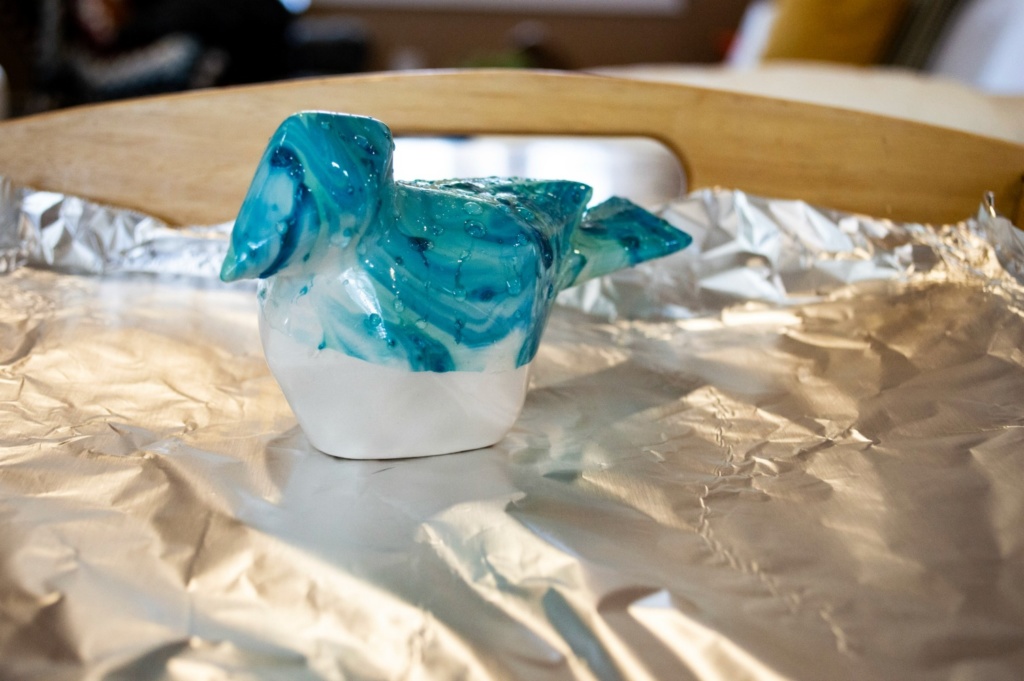
Here’s the humble little bird before he got marbled.
I’m pretty sure he ended up at the dollar store because he has some bumps and imperfections, but I have a thing for birds, so I grabbed him first.
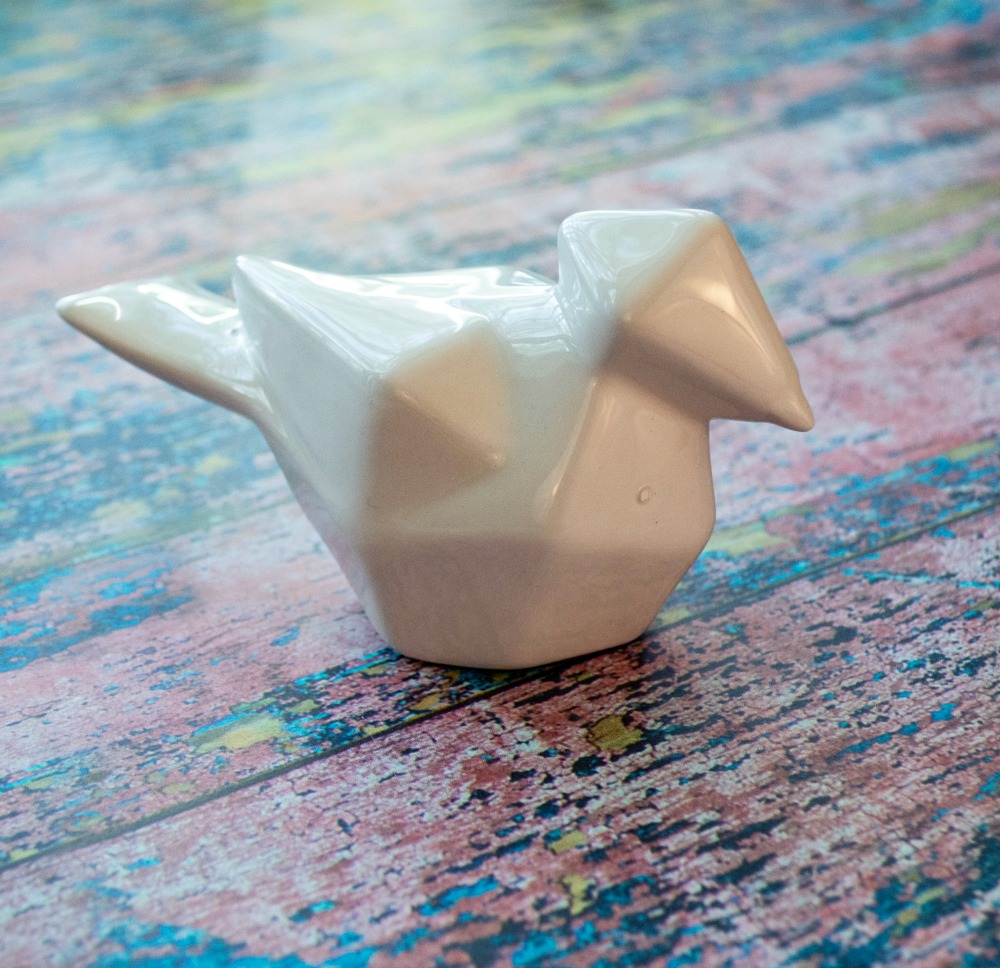
I also marbled him first and he was super easy because he has a hole in his underside, so I stuck my finger in there and gave him a dunk.
Let’s get to the How To though, before I get too far along in marvelling at my handsome bird.
How To Marble with Nail Polish
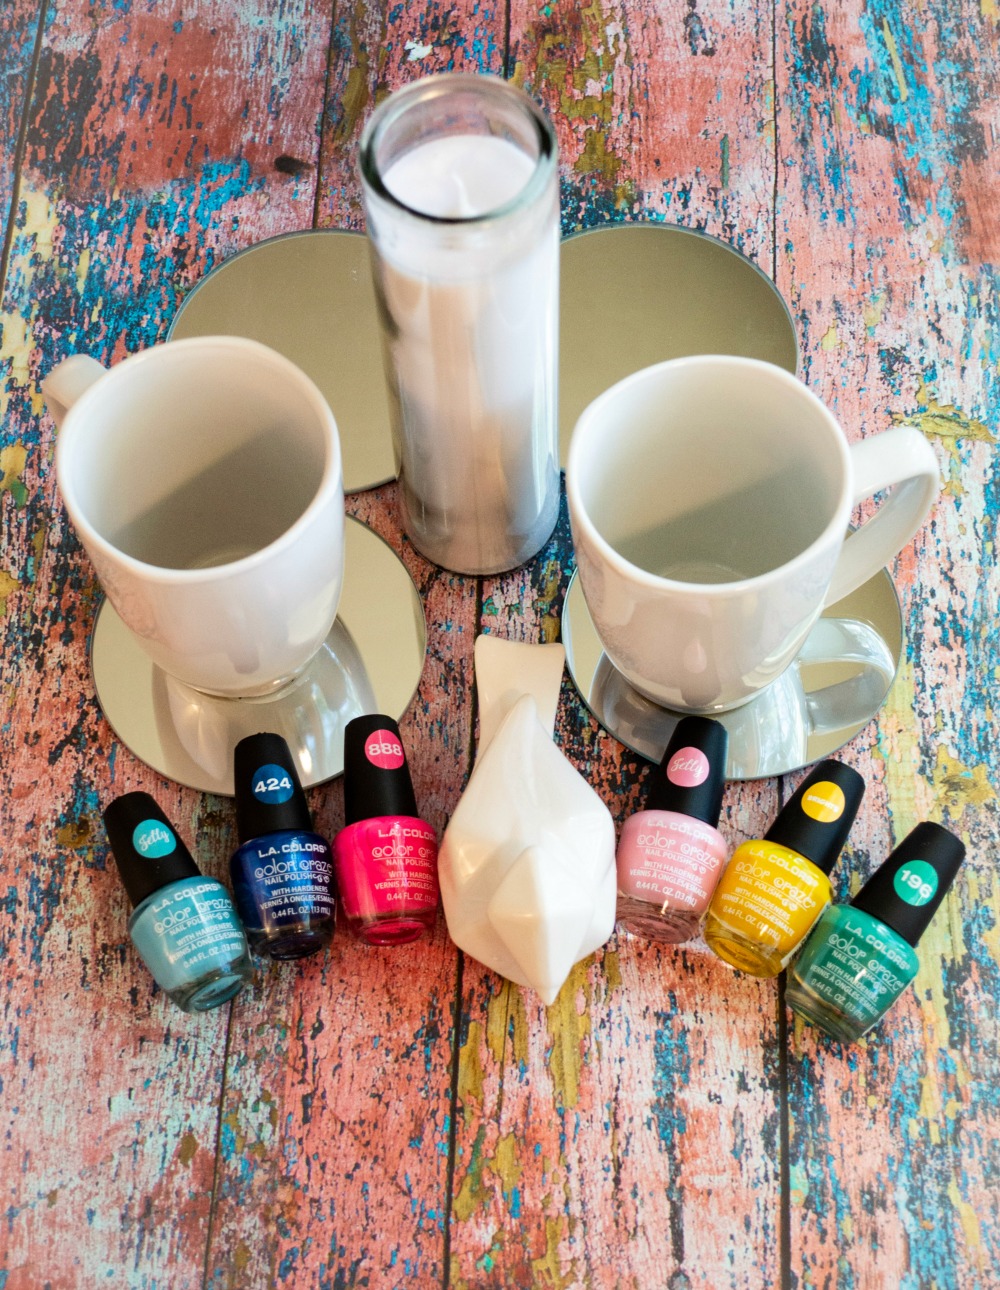
Step 1 – Gather Your Supplies
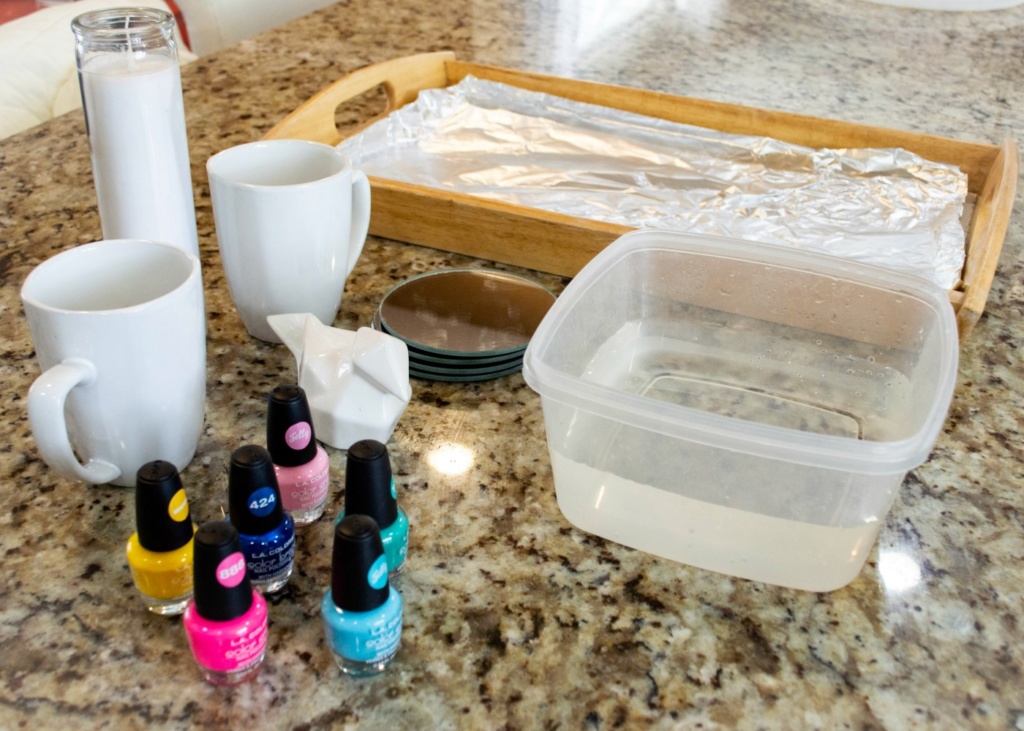
For marbling with nail polish, you don’t need much. You’ll need:
- Some pretty nail polish colors,
- Some stuff to marble
- A container big enough to dunk your stuff that you’re marbling
- Cool Water (some people say hot, I tried cool and hot water, I preferred cool)
- A place to allow your marbled stuff to dry (I used a tray covered with tin foil for the least mess possible)
- Not pictured, but you’re going to need something disposable like wood craft sticks or plastic knives to swirl your nail polish colors together
Step 2 – Add Your Nail Polish to the Water
**Special Note** Now that you’ve added your nail polish to the water, you want to work fairly quickly. The polish will start to dry and I’m pretty sure that’s when you get problems like clumping. You will need to dump the water and polish out and start fresh every few minutes.**
I knew I wanted the bird to be various shades of blue, so I added a few drops of each blue color to the water.
I added one color on top of the other.
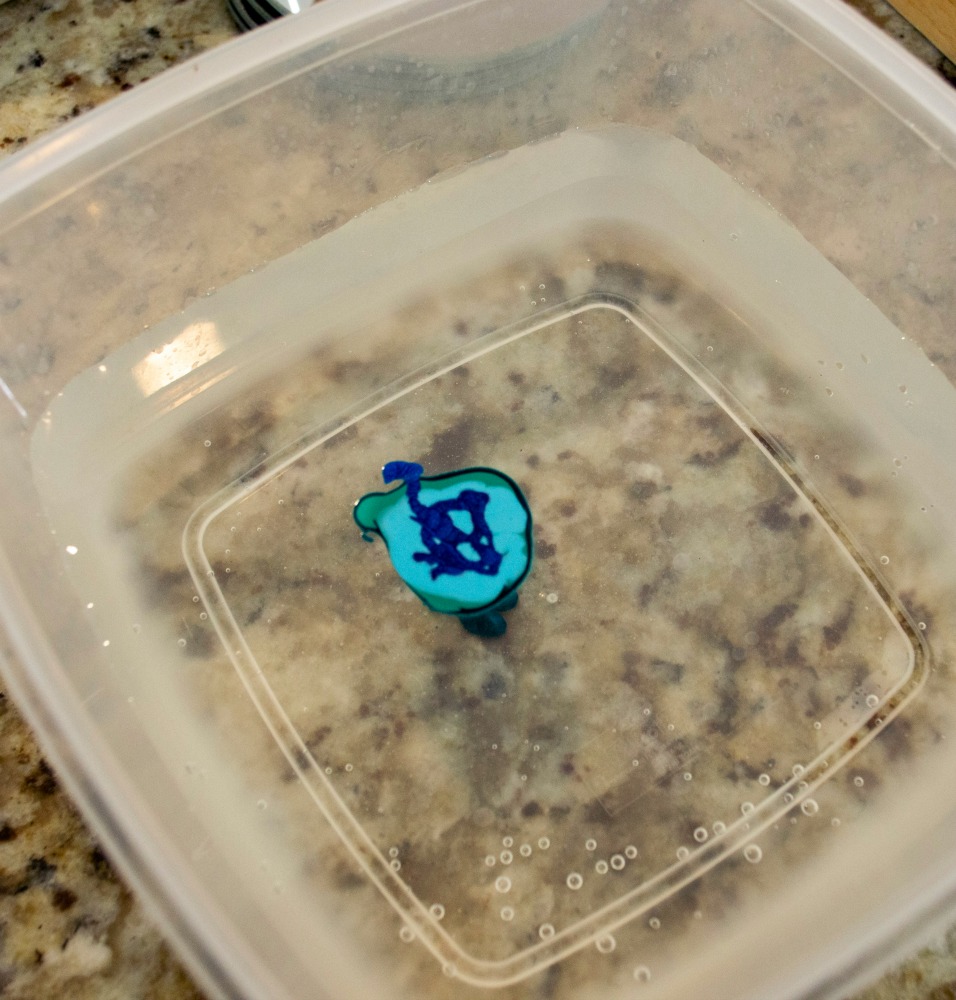
Step 3: Swirl the Colors Together
Grab your disposable craft stick or plastic knife and swirl the colors together.
Just a couple of passes through. You don’t have to go crazy swirling, you just want them gently mixed.

Generally, you will be able to dip one to two things before you need to change the water and polish. I did end up adding more colors to the blues above and then quickly dunked the mug, but then I had to change out the water and add more polish before I continued.
Here are the pinks and yellows that I added:

Step 4: Dip Your Items into The Nail Polish-y Water
Now you’re ready to dip your stuff in the water. I started with the bird. Flipped him over and gave him a quick dunk, about half of his body, right into the nail polish/water mixture.
It’s a quick motion, in and out of the water which, I think, is why I got that nice line.
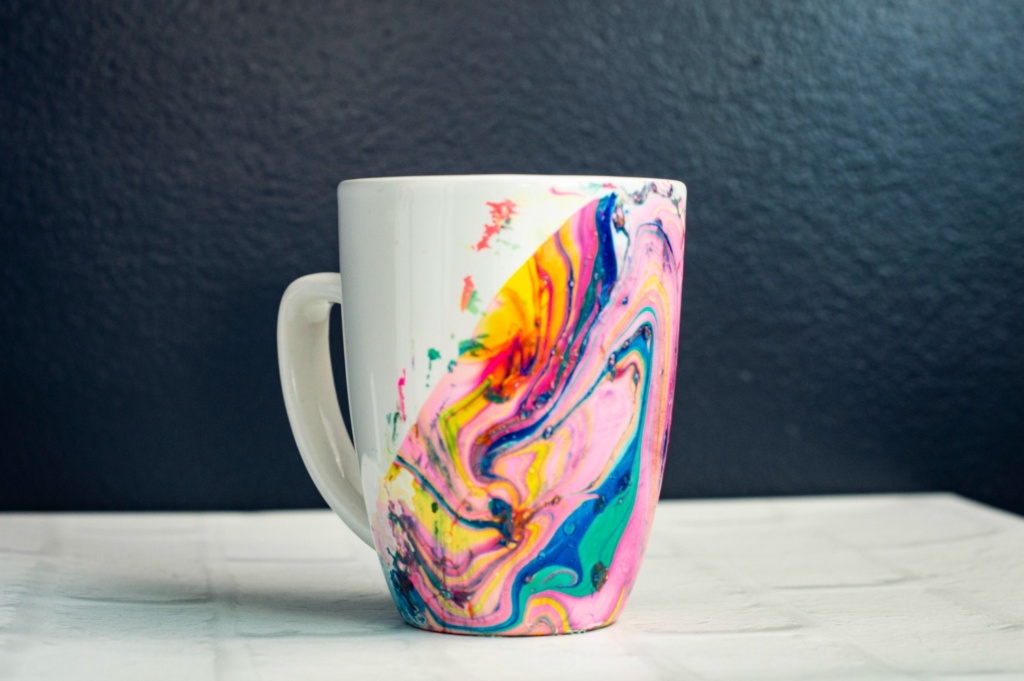
And this is the first mug, the second thing that I marbled, after adding the pinks and yellows as shown above:
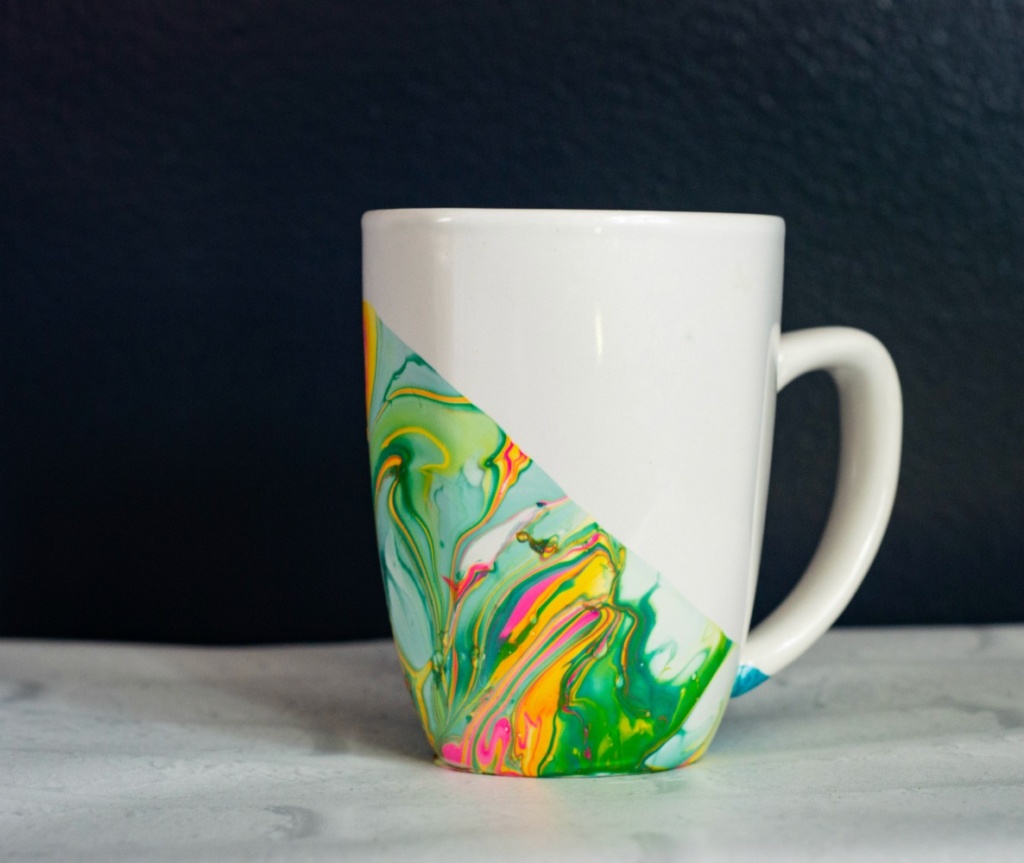
When I dunked the mug, I held it by the handle and tilted it and then dunked it to about an inch below the lid. I did not want to dunk too far with the mug because I didn’t want to be putting my lips where the nail polish would be when I drank from the mug.
After I finished the bird and the mug, I had a couple of fails, which I’m going to show you in a minute. One of the fails is the other mug, which I dunked too far and you’ll see below why I didn’t like that.
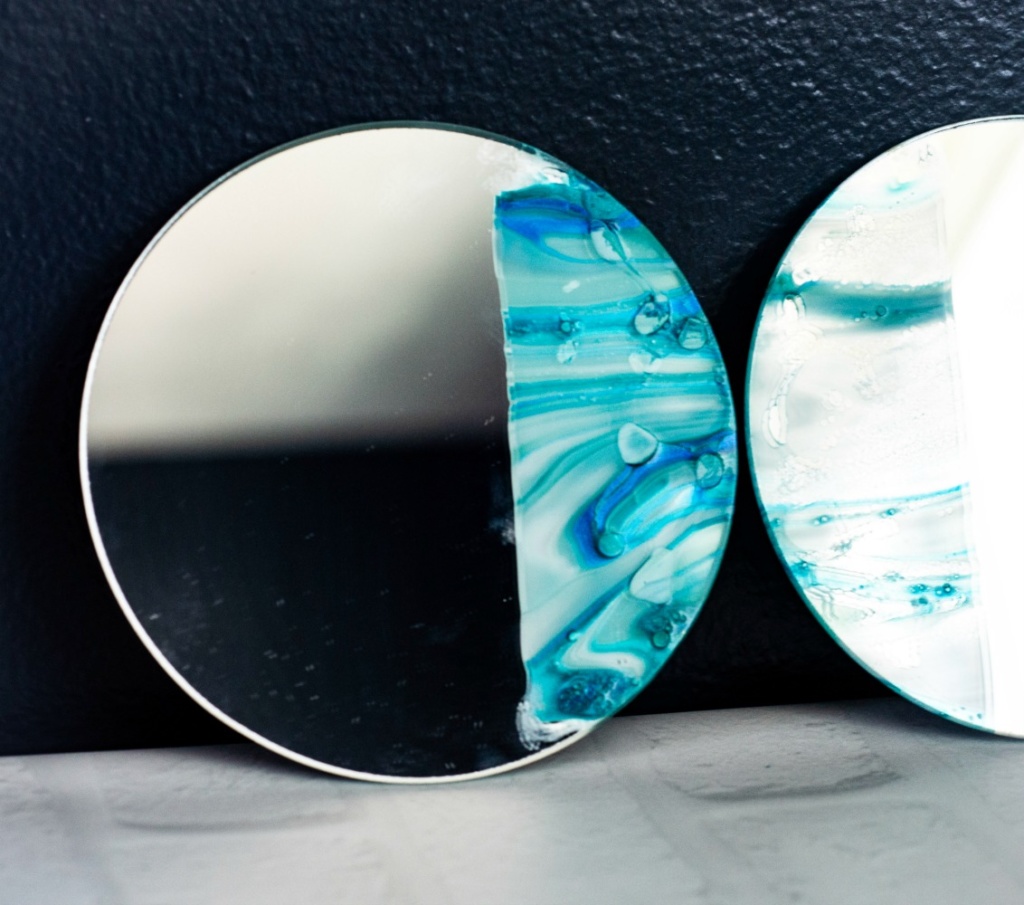
After dunking three things, I switched out the water and did the little mirrors I got and those came out cute, although mirrors are super difficult to photograph.
Step 5: Let Them Dry
I had my tray set up with tinfoil and ready to go before I started. Because you are going to have messy drippy nail polish that needs a safe place to dry.
Optional Step 6: Seal Them
If you’ve marbled something that isn’t going to need frequent washing, you can probably get away without sealing it. The nail polish is fairly sturdy.
The mug that I made, however, I’ll be sealing with dishwasher safe Mod Podge and then I’ll still just hand wash the mug. Just to be on the safe side.
The Fails
Ok, I promised you the fails. First up is the mug fail. I thought it would be cute to have a set of sort of matching mugs. But, by the time I was ready to do the mug, I really needed to change the water and add more nail polish, so there are a few problems with that.
I’ll show you and then tell you.
There are a lot of things to like with this mug. It’s really pretty. The colors are vibrant. But there are spots that got a little clumpy.
One of the problems with it is that it really doesn’t match the first mug at all. That’s because I tried to dunk it in the same nail polish/water mix as the first mug, but I had waited too long and it got clumpy. So I had to change the water and add in more nail polish.
Trying to replicate the same colors would have been very difficult. Which, I could have lived with if it weren’t for the big problem.
The big problem is that I dipped this too far into the water. I got nail polish all the way up to the rim of the cup and even if I did seal it, I still don’t want to drink off of where nail polish is. You know what I mean?
I also spilled a bit onto what should have been just the white part of the mug. Oh, well, you cannot win them all.
And I really didn’t win against this candle:
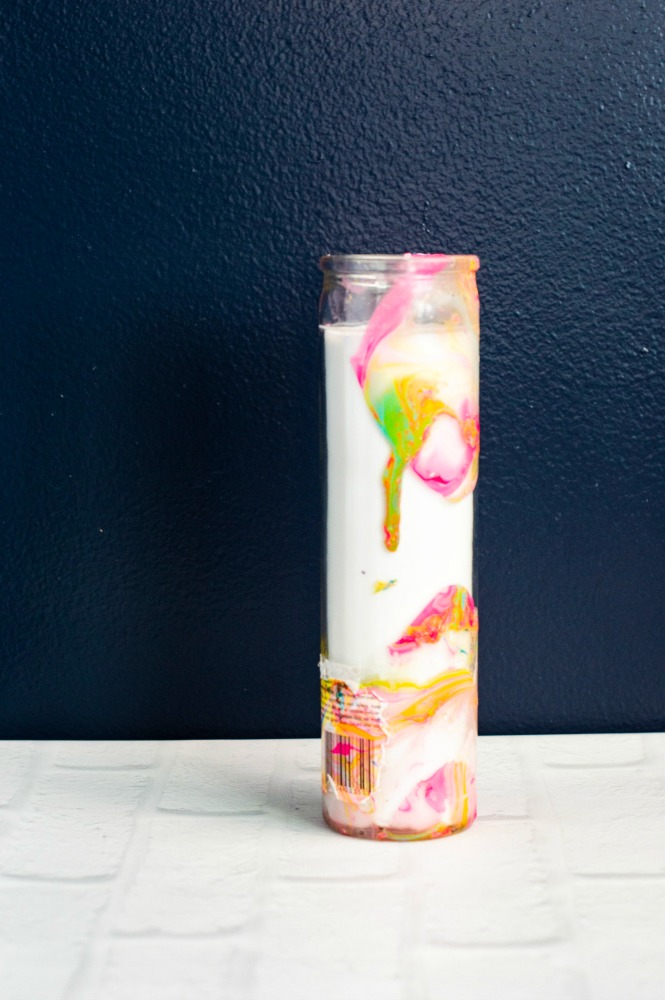
Let’s count all the ways I messed this candle up:
- It is way too tall for the container I tried to dunk it in. This should have been a red flag from the beginning.
- It’s clumpy which tells me I should have changed the water and nail polish before I even attempted this.
- I didn’t even bother to take the tag off of the back. Lazy crafter!
I may salvage this candle and do a Custom Photo Candle. Those are a no fail craft!
Now What?
I have one more crazy easy nail polish craft that I’m going to share with you as soon as I complete it. And then I’m off on another crafting adventure!
What about you? What are you up to crafting? Are you going to try some nail polish marbling?
Make More Crafts That Make People Say WHERE DID YOU GET THAT?!

My 10 Favorite Craft Projects
If you loved this craft, you’ll love “Thanks, I Made It!”
I pulled together my 10 all time favorite craft tutorials that I’ve made for myself and get tons of compliments on!
There are super simple to follow tutorials in an eBook format, so no annoying ads :-)!
There’s even a bonus tutorial on Macrame knots that will you get started with macrame even if you have no clue what you’re doing!
If You Liked It Then You Shoulda Put a Pin In It!