Did you know you could BUY pressed flowers from Amazon?
I discovered that last week and of course, I immediately found tons of pressed flower crafts to try and now I’m sharing the first one with YOU!
Before we get to the tutorial, I have to tell you, after just two craft projects, this is one of my ALL TIME FAVORITE materials to craft with. I’m so excited to use it again.
(Definitely use your leftover pressed flowers for these pretty pressed flower canvases!)
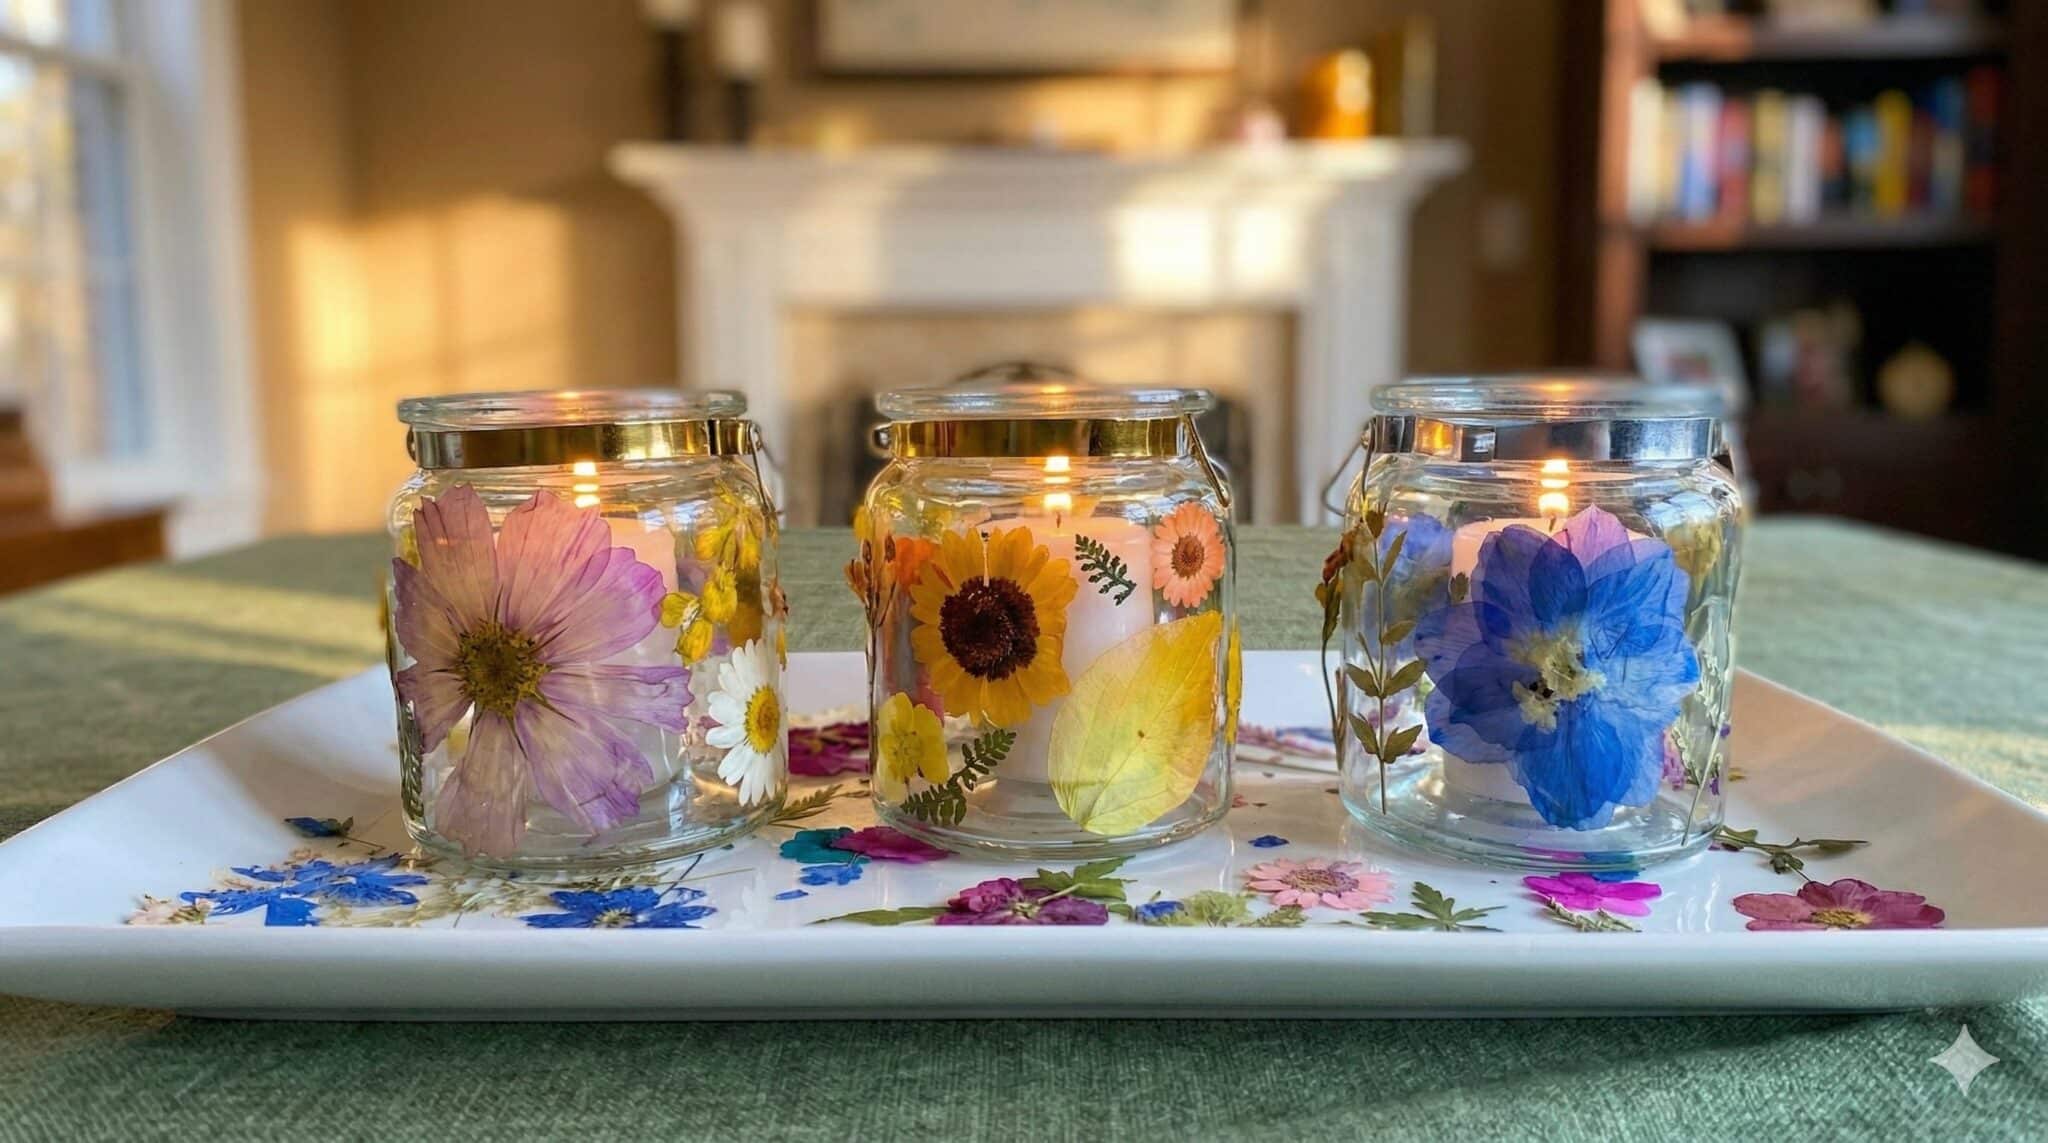
But first, Pressed Flower Votive Candleholders for your crafting pleasure!
Materials for Pressed Flower Votive Candleholders
Before you run off to go grab these materials, a couple of notes.
There are lots of options for pressed flowers. I’m going to link to the ones I liked. There are 167 flowers in it. You can make 3 of these lanterns with a lot less flowers than that. But if you want extra for other projects, get the bigger pack. It will also give you more color options.
You *could* probably use mod podge for this, but I have to say I love how the Clear Elmer’s worked on this.
I can’t find similar glass jars on Amazon, but I got mine from the Dollar Tree. Any glass jar that fits a votive size candle will be just fine.
I also got my votives at Dollar Tree.
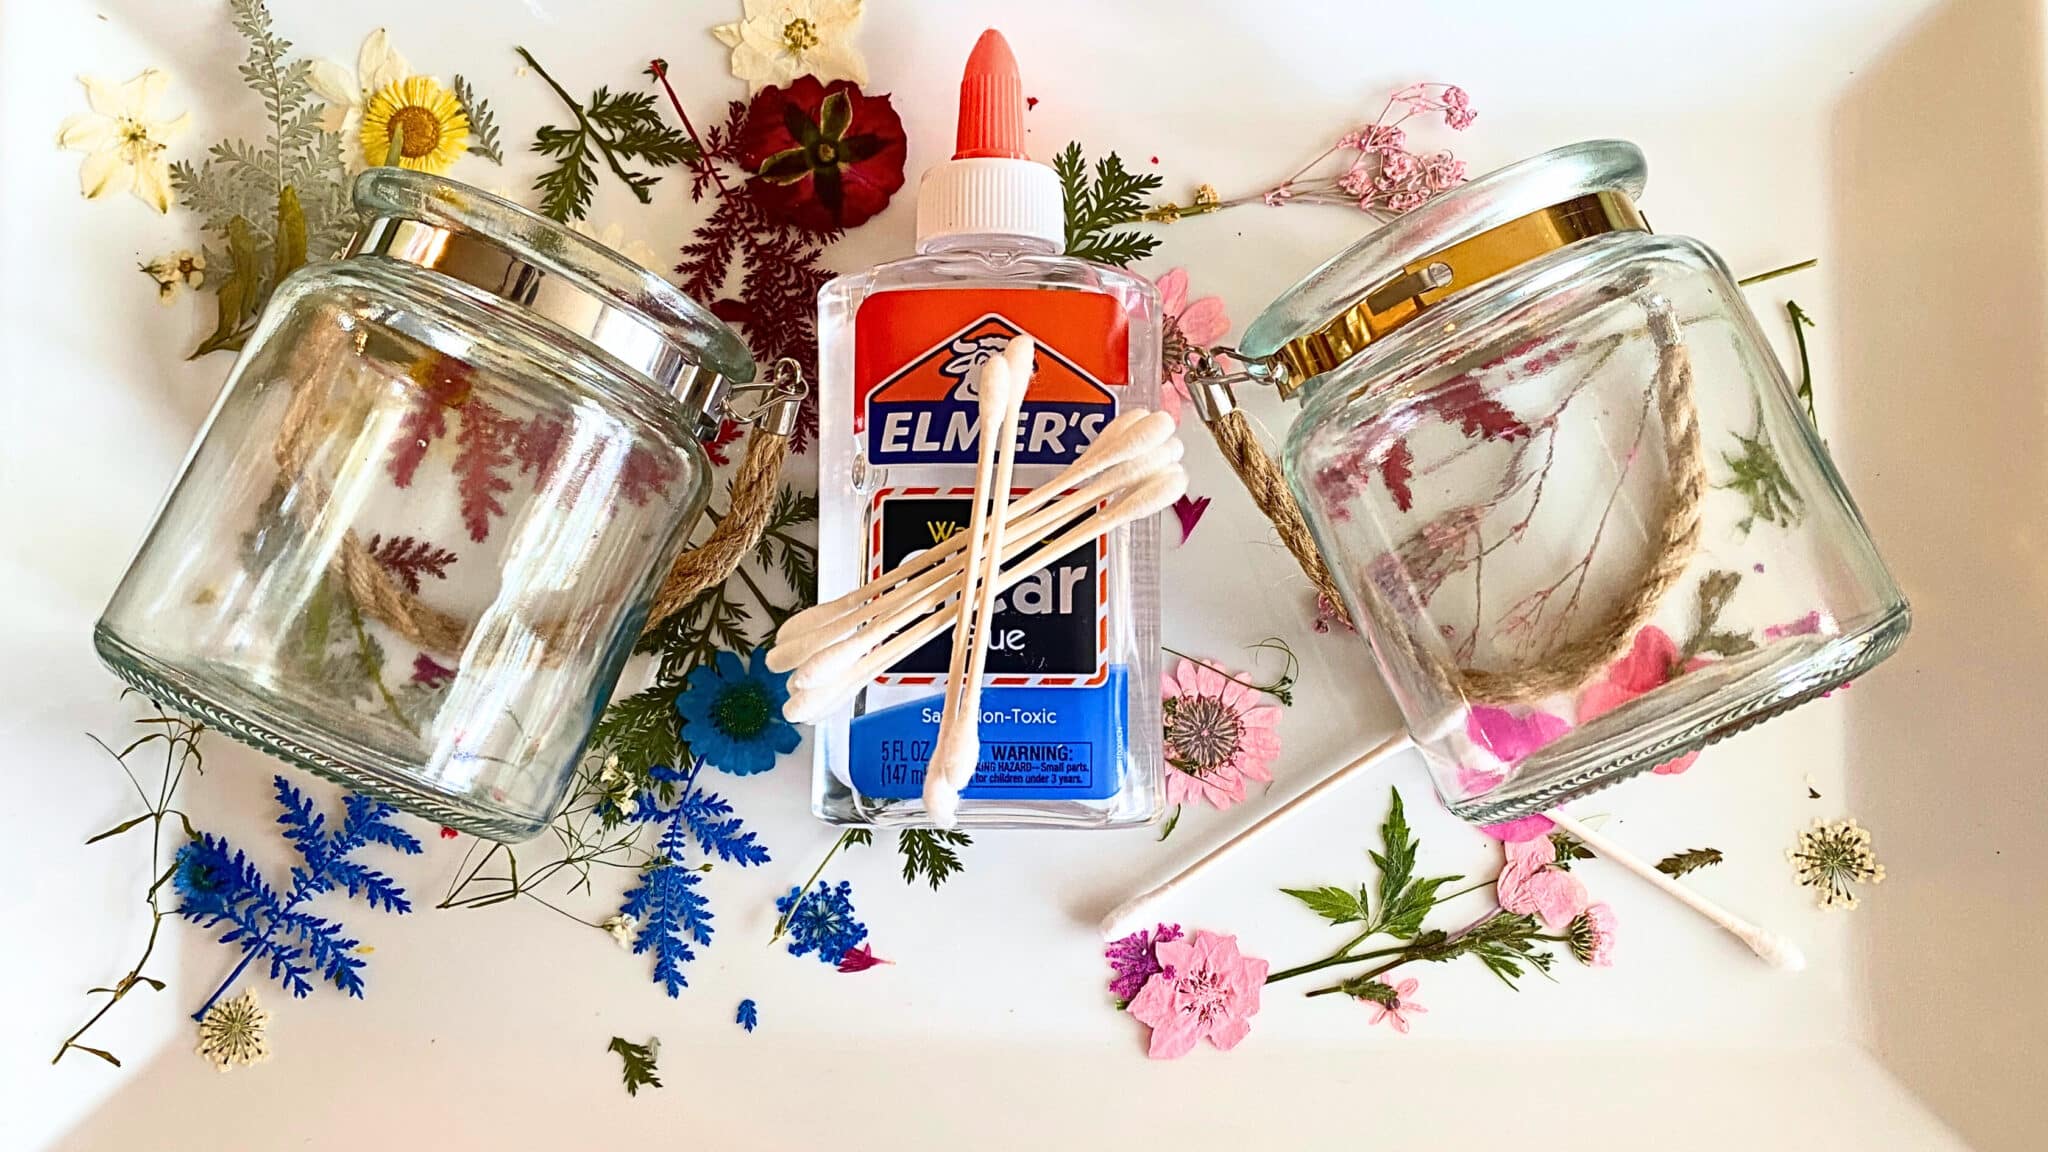
- Pressed Flowers
- Elmer’s Clear Glue
- Q Tips
- Glass Jars
- Candles
Step by Step Pretty Pressed Flower Lanterns
Ok got your stuff? Let’s make these lanterns.
It’s insanely easy, but there are a couple of tricks that I picked up as I was making them that might prove helpful to you.
Step 1: Add some glue
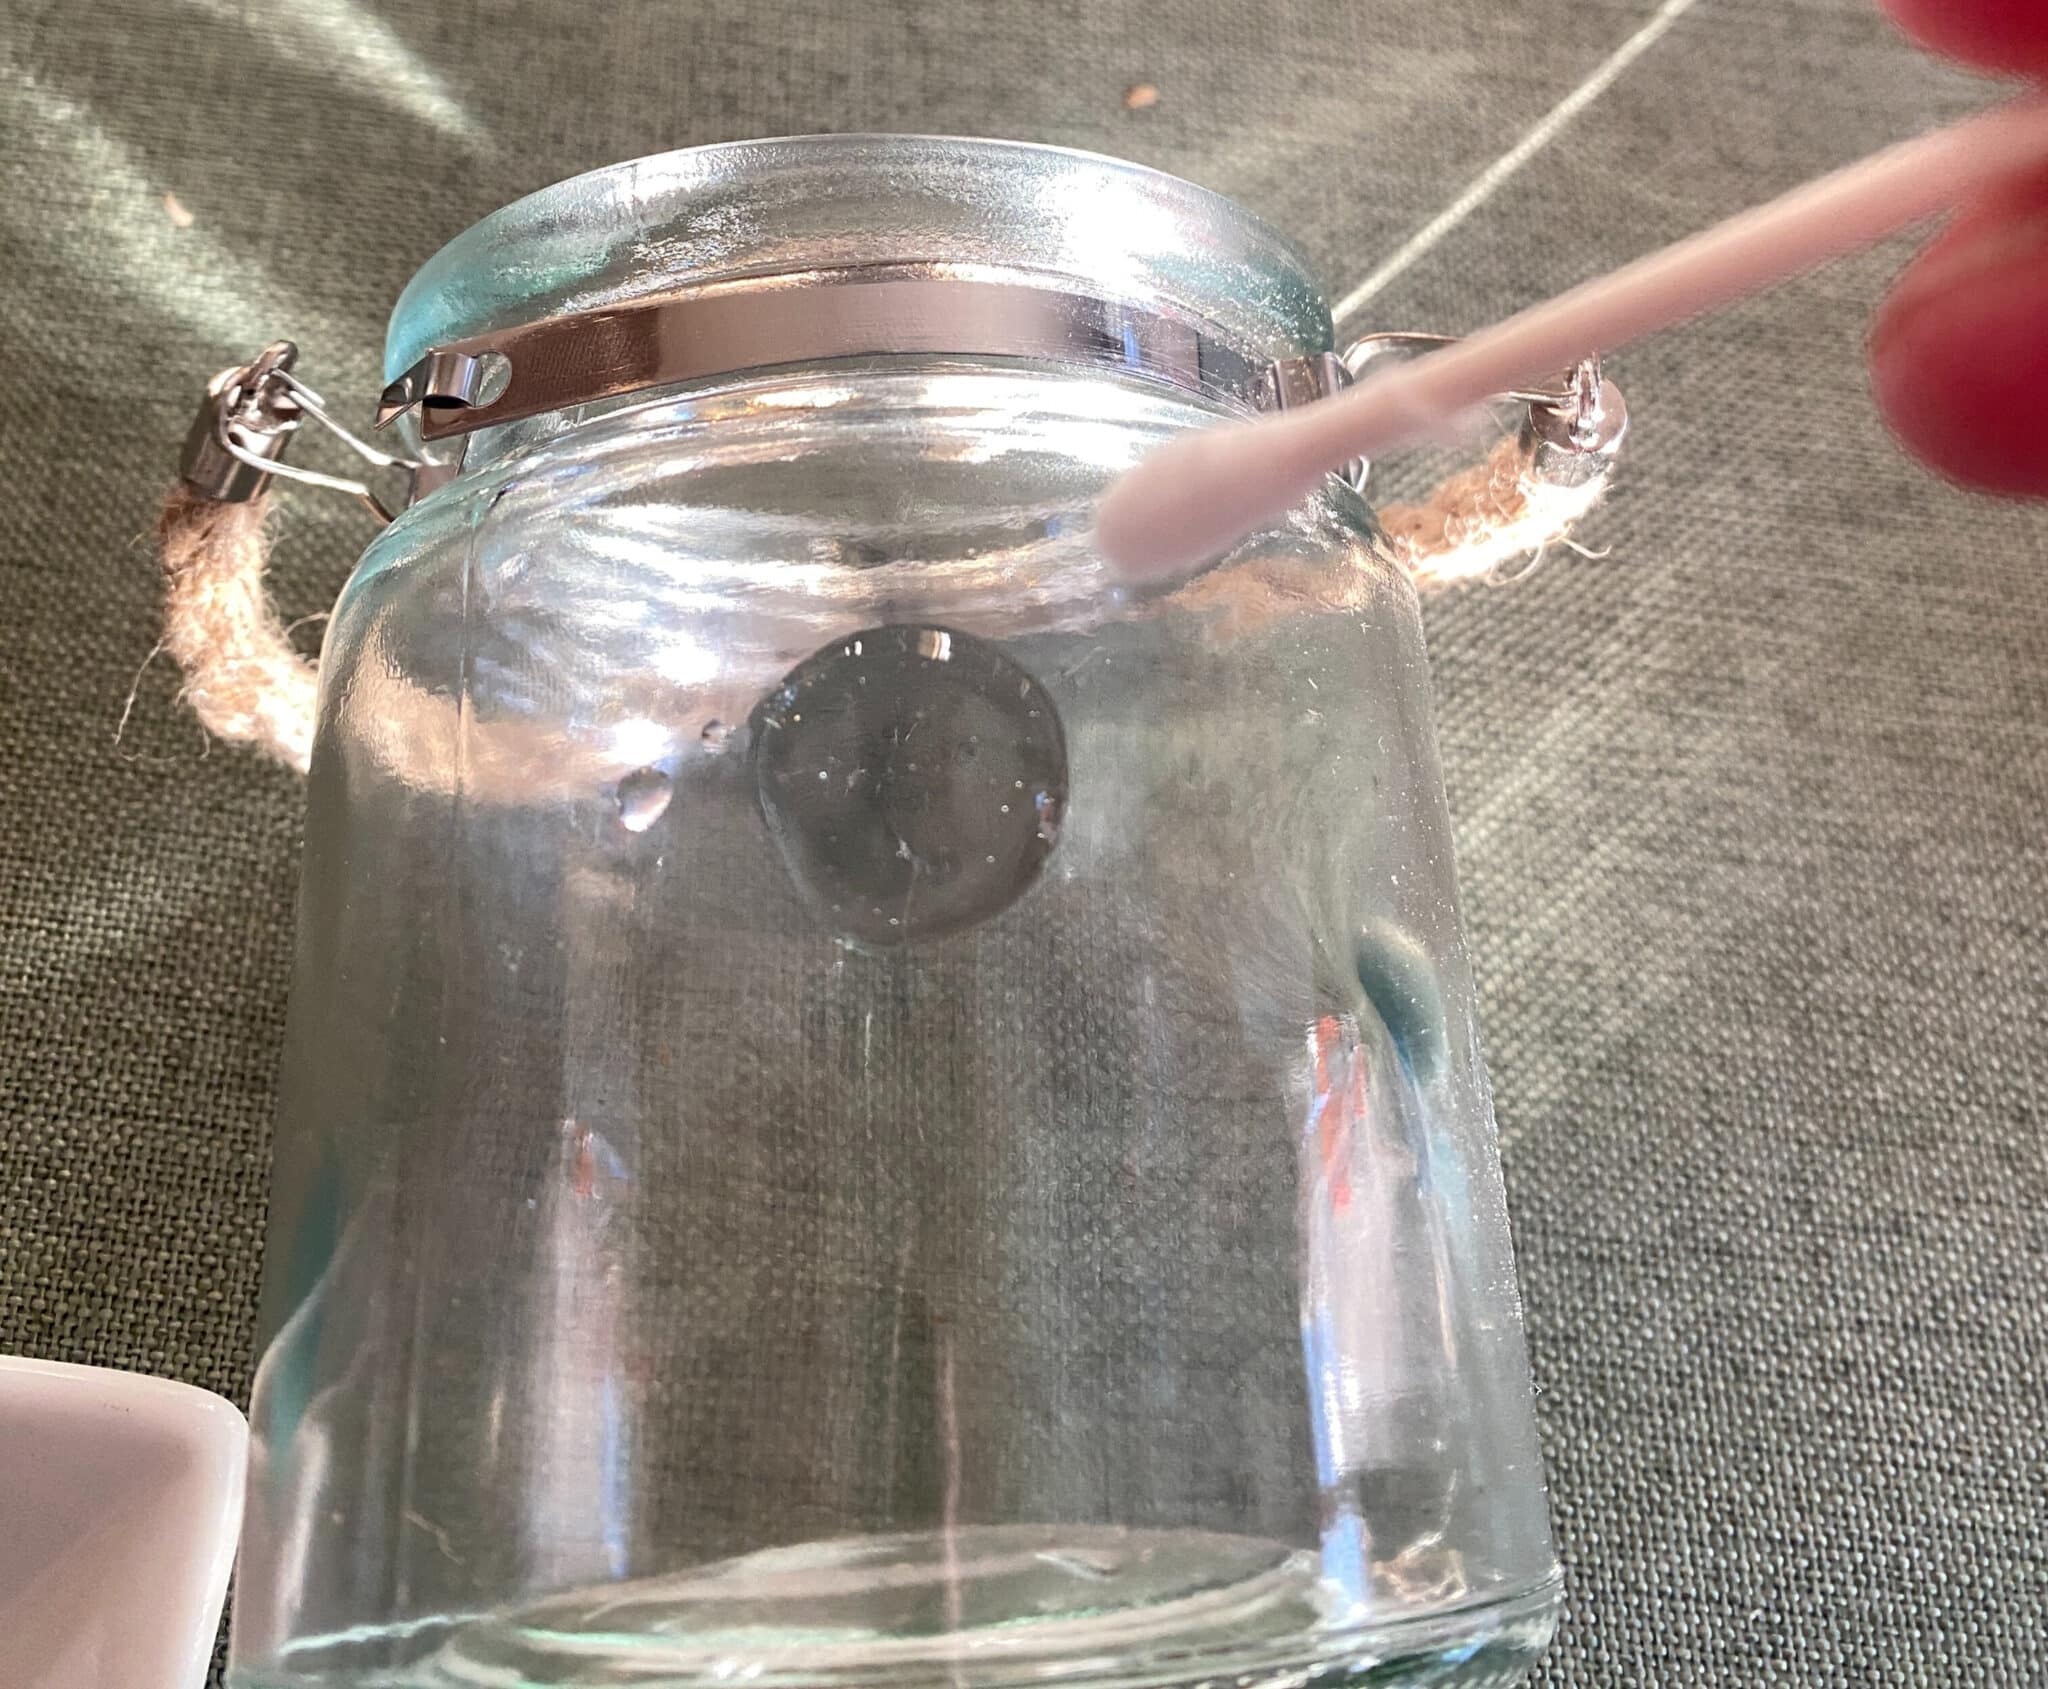
Add some glue to the glass jar.
I liked doing this first because it gives you somewhere to aim when you’re placing the flower.
Don’t worry about adding to much, this glue is SUPER forgiving. You’ll use the excess to smoosh the flower into anyway.
If you happen to find you used WAY too much and want to wipe some off, just have a damp paper towel handy.
I misjudged how much glue to use several times, but it never effected the finished product. I wiped up what I could and the rest kind of just disappears as it dries.
Step 2: Pick your first flower
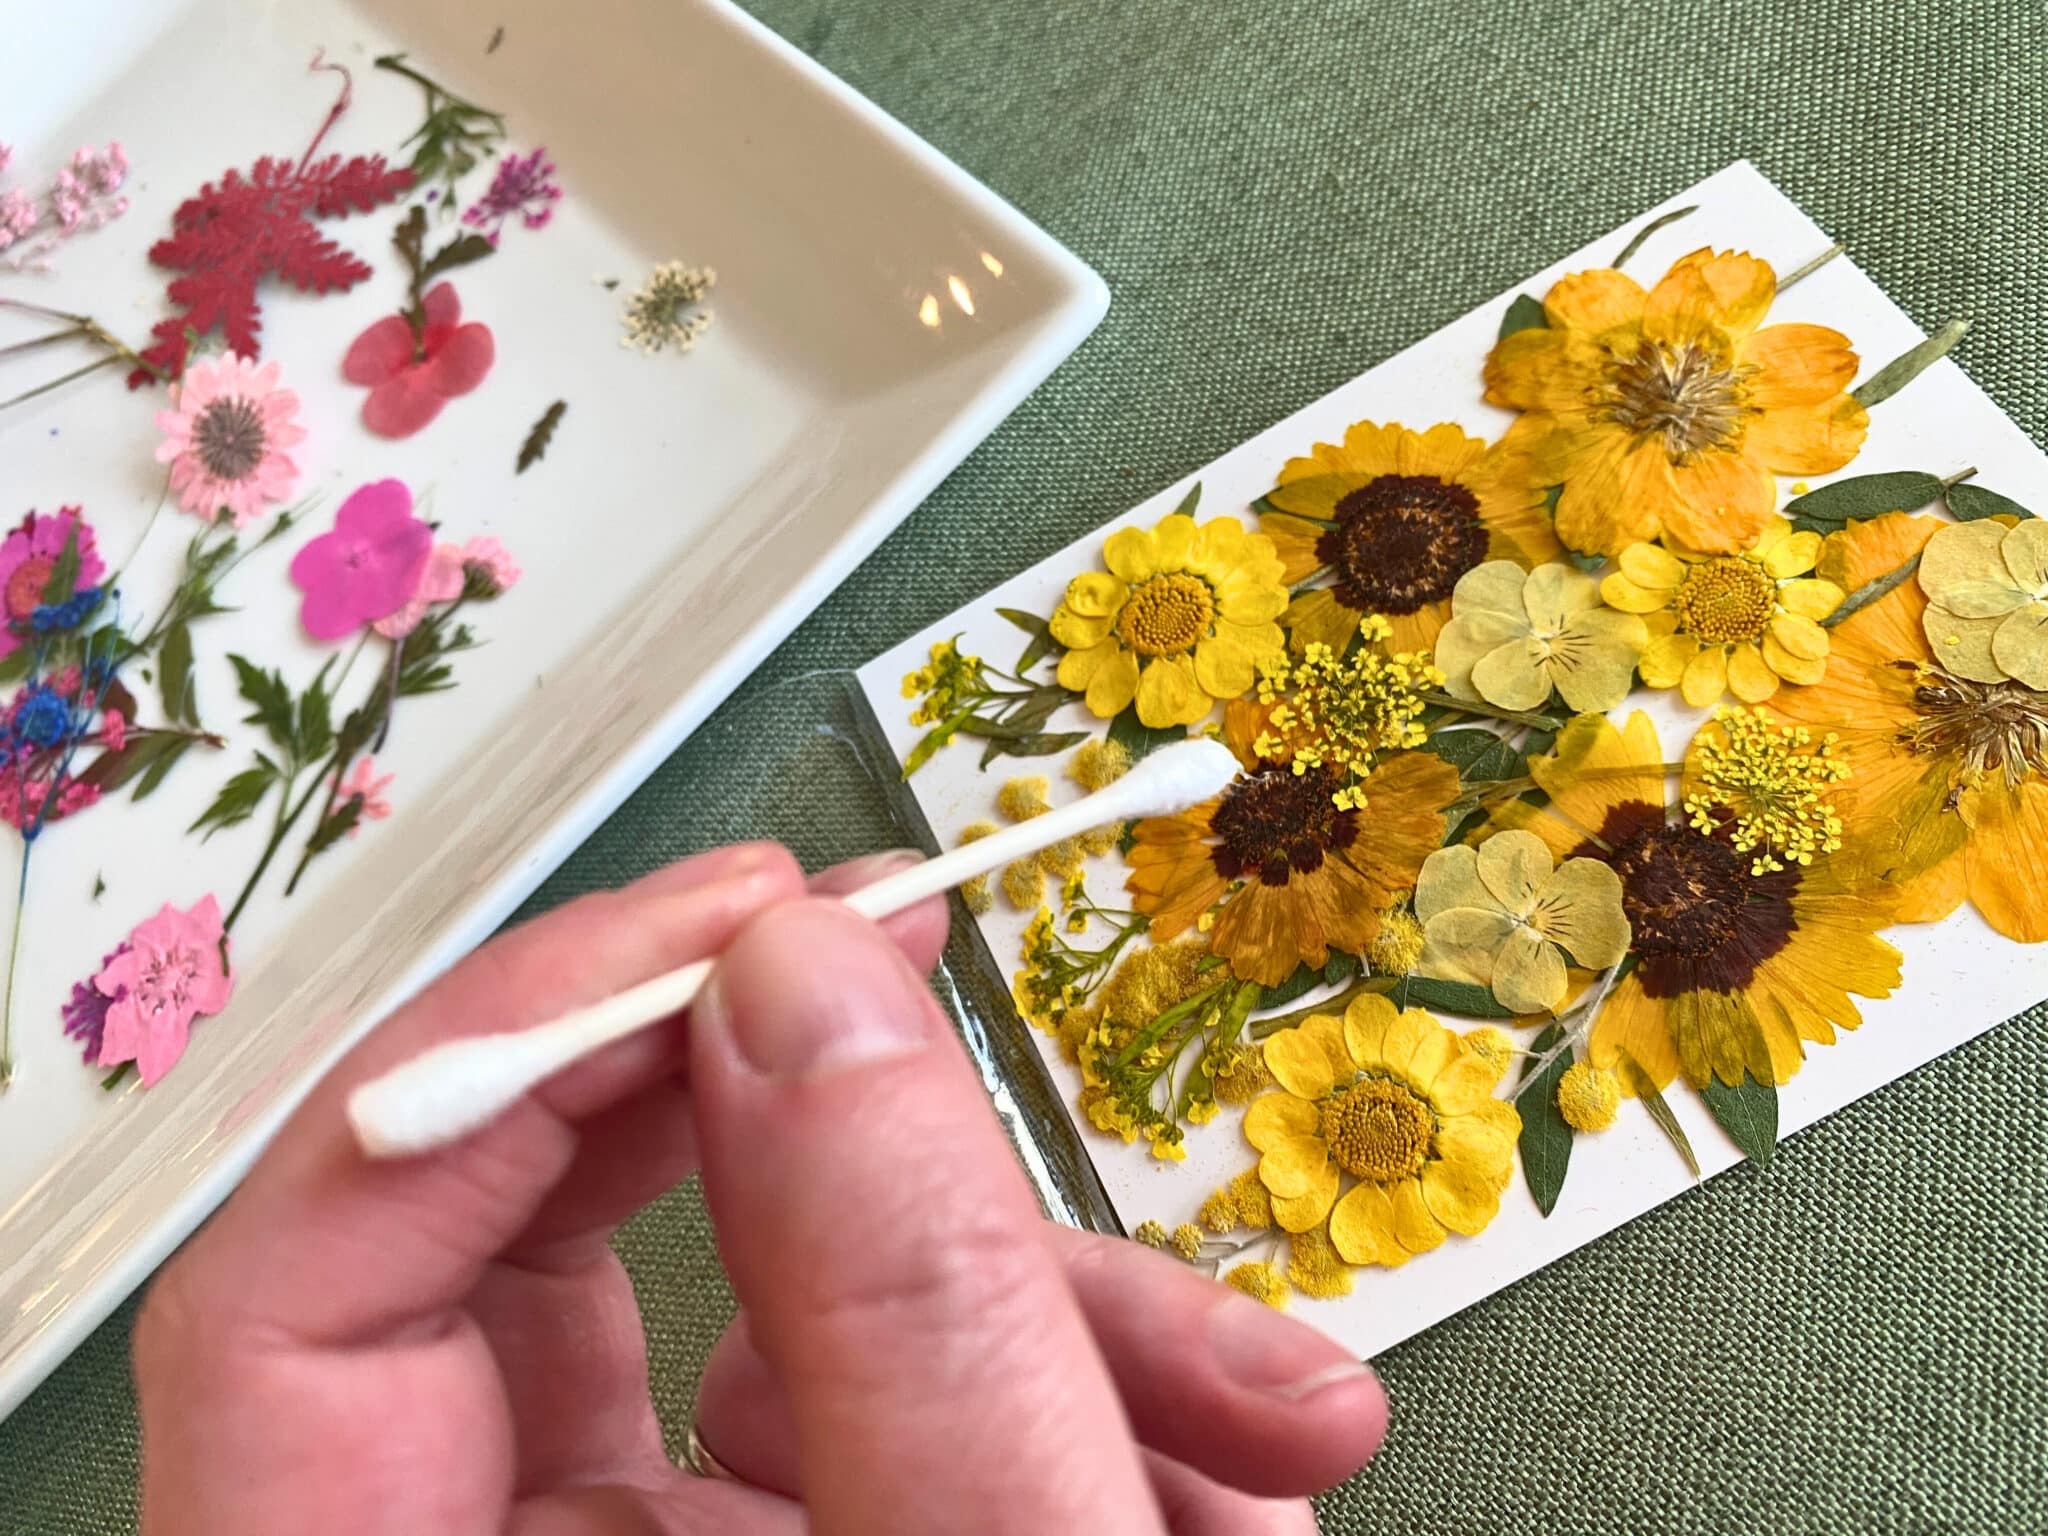
Here’s my tactic for picking the first flower.
I wanted a big flower and I wanted a lot of color. So I started this jar with a BIG yellow flower.
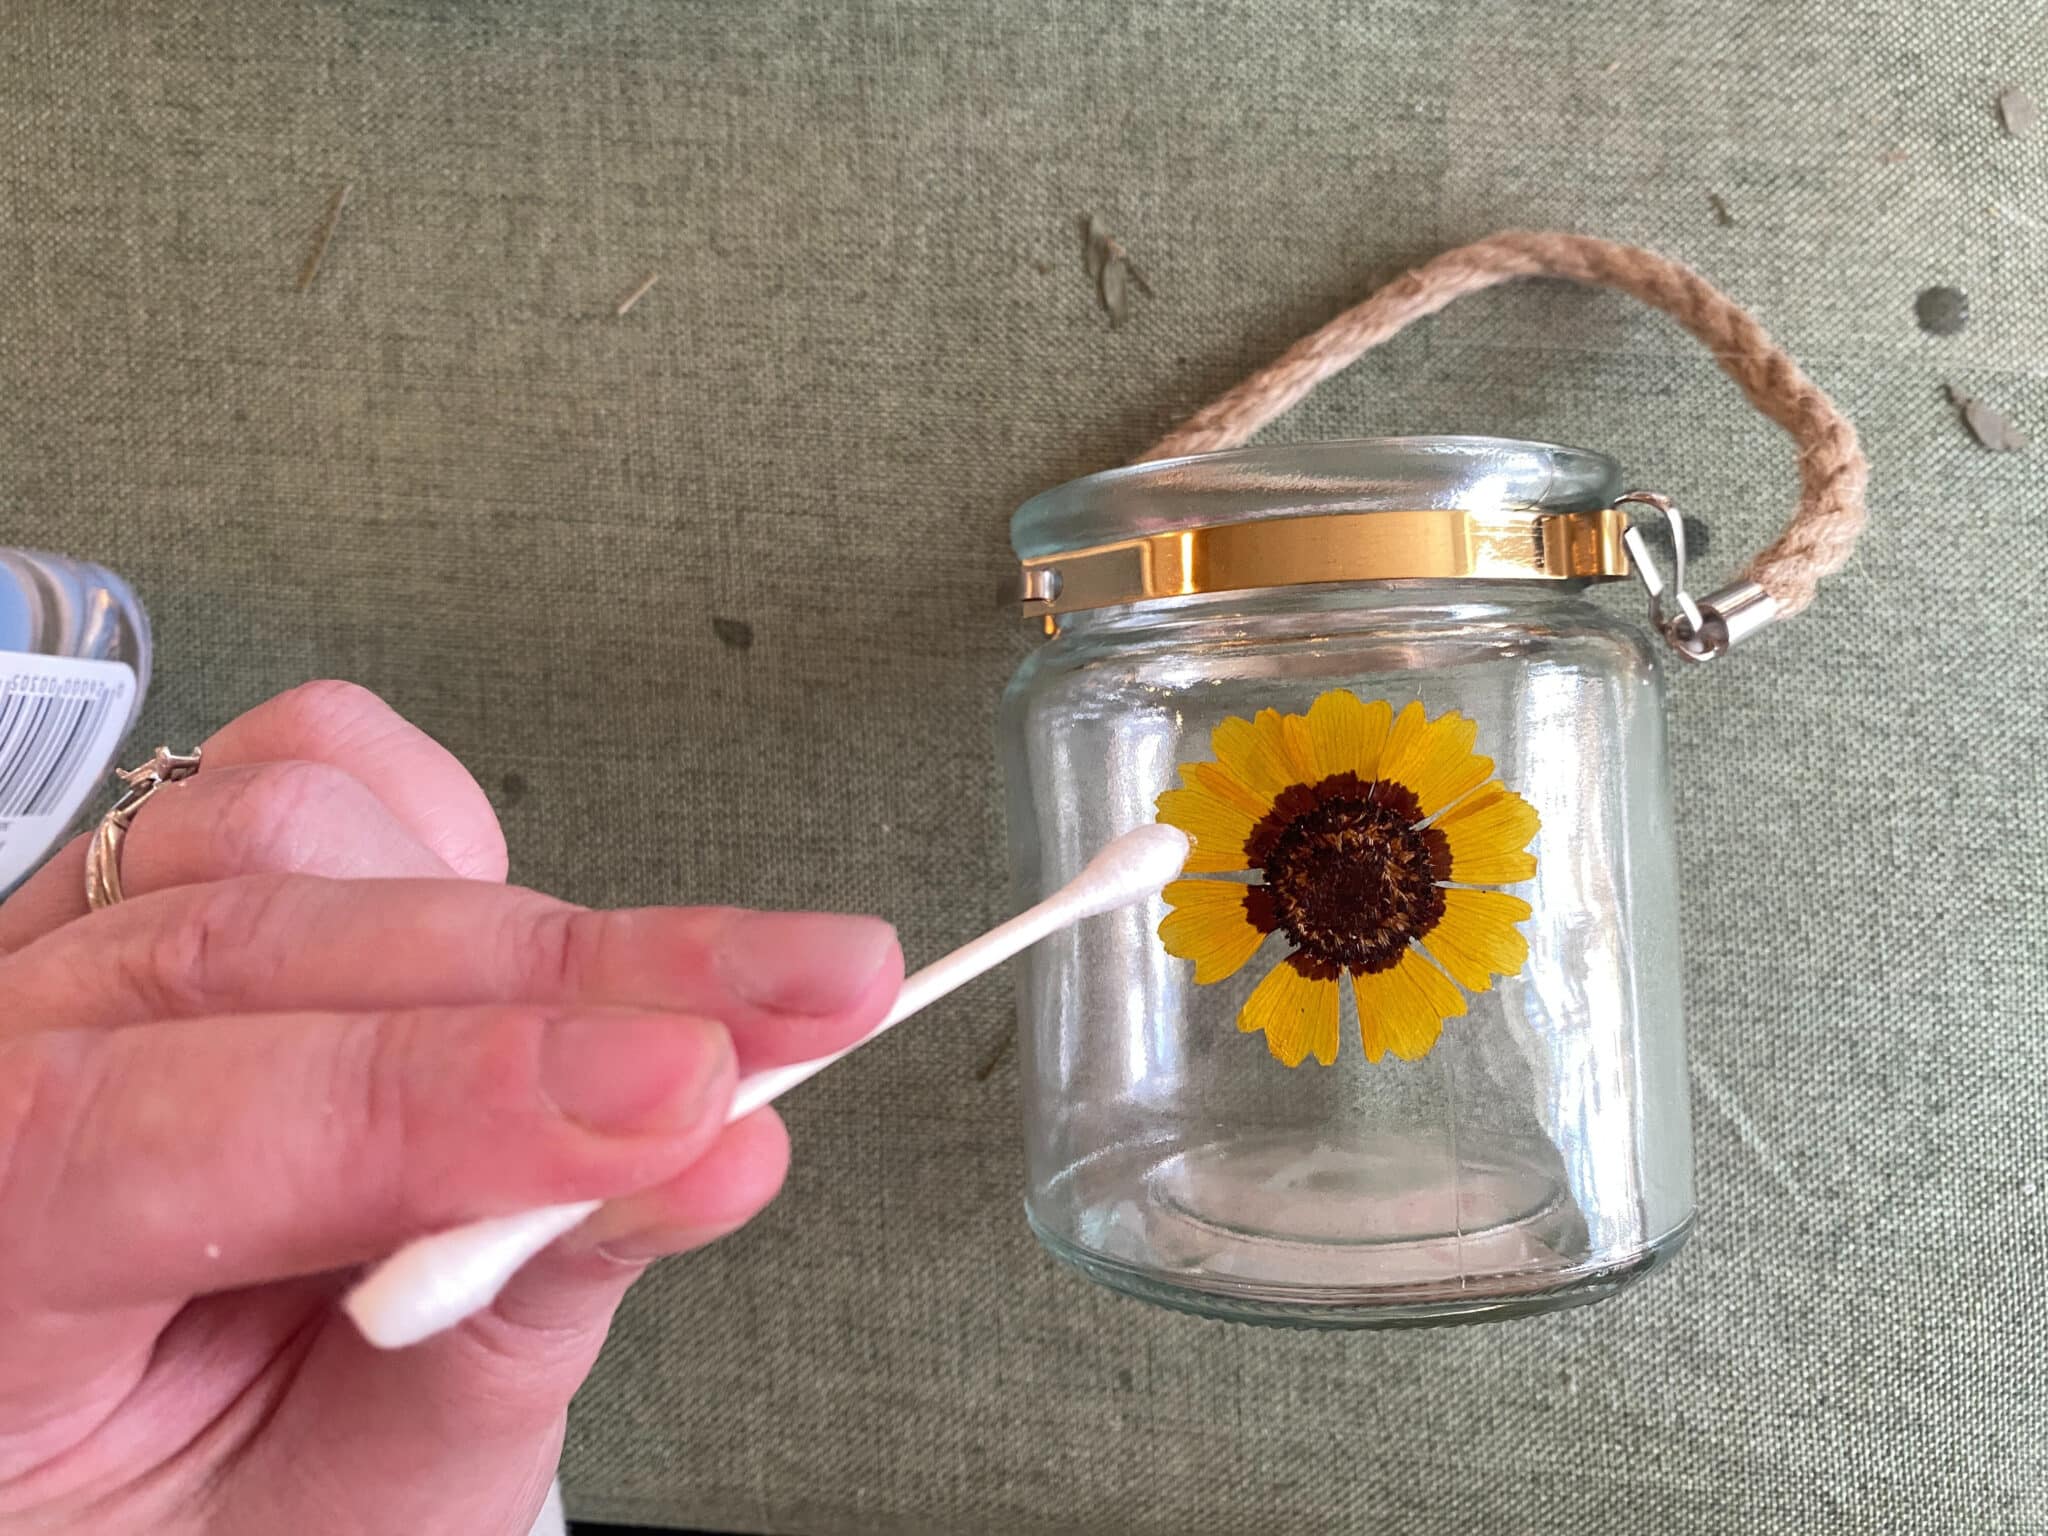
I put a tiny bit of glue on the end of the Q tip and used that to pick up the flower I wanted and then placed it on the spot of glue I added to the jar.
These flowers are very delicate. It’s not that they will just crumble in your fingers, but they are hard to maneuver with just your fingers. The Q tip does the trick.
What’s great about the glue is that it doesn’t dry super quick, so you have time to move things around a bit if you like.
Step 3: Glue down the flower
There’s two things you’re doing in this step.
Placing the flower on the glue, but you also want to add some glue on the flower so that you can start to glue down the petals.
Remember, these are REAL dried flowers, so that aren’t completely flat. There will be pieces that stick out a bit.
You are more than welcome to leave them sticking out a bit if you’d like, but I wanted mine glued down.
So, I used the Q tip to smear more glue on the petals. Gently.
I didn’t get every petal to lay flat on this first pass, but I went back after the initial glue had dried and added some more glue where needed.
Step 4: Add more flowers
Now you’re just filling in the rest of the jar with your flowers.
This is where you get to be artsy! Pick colors you love. Place them with your heart.
You can not get this wrong, I promise.
When everything is placed and fully dry, add your candles!
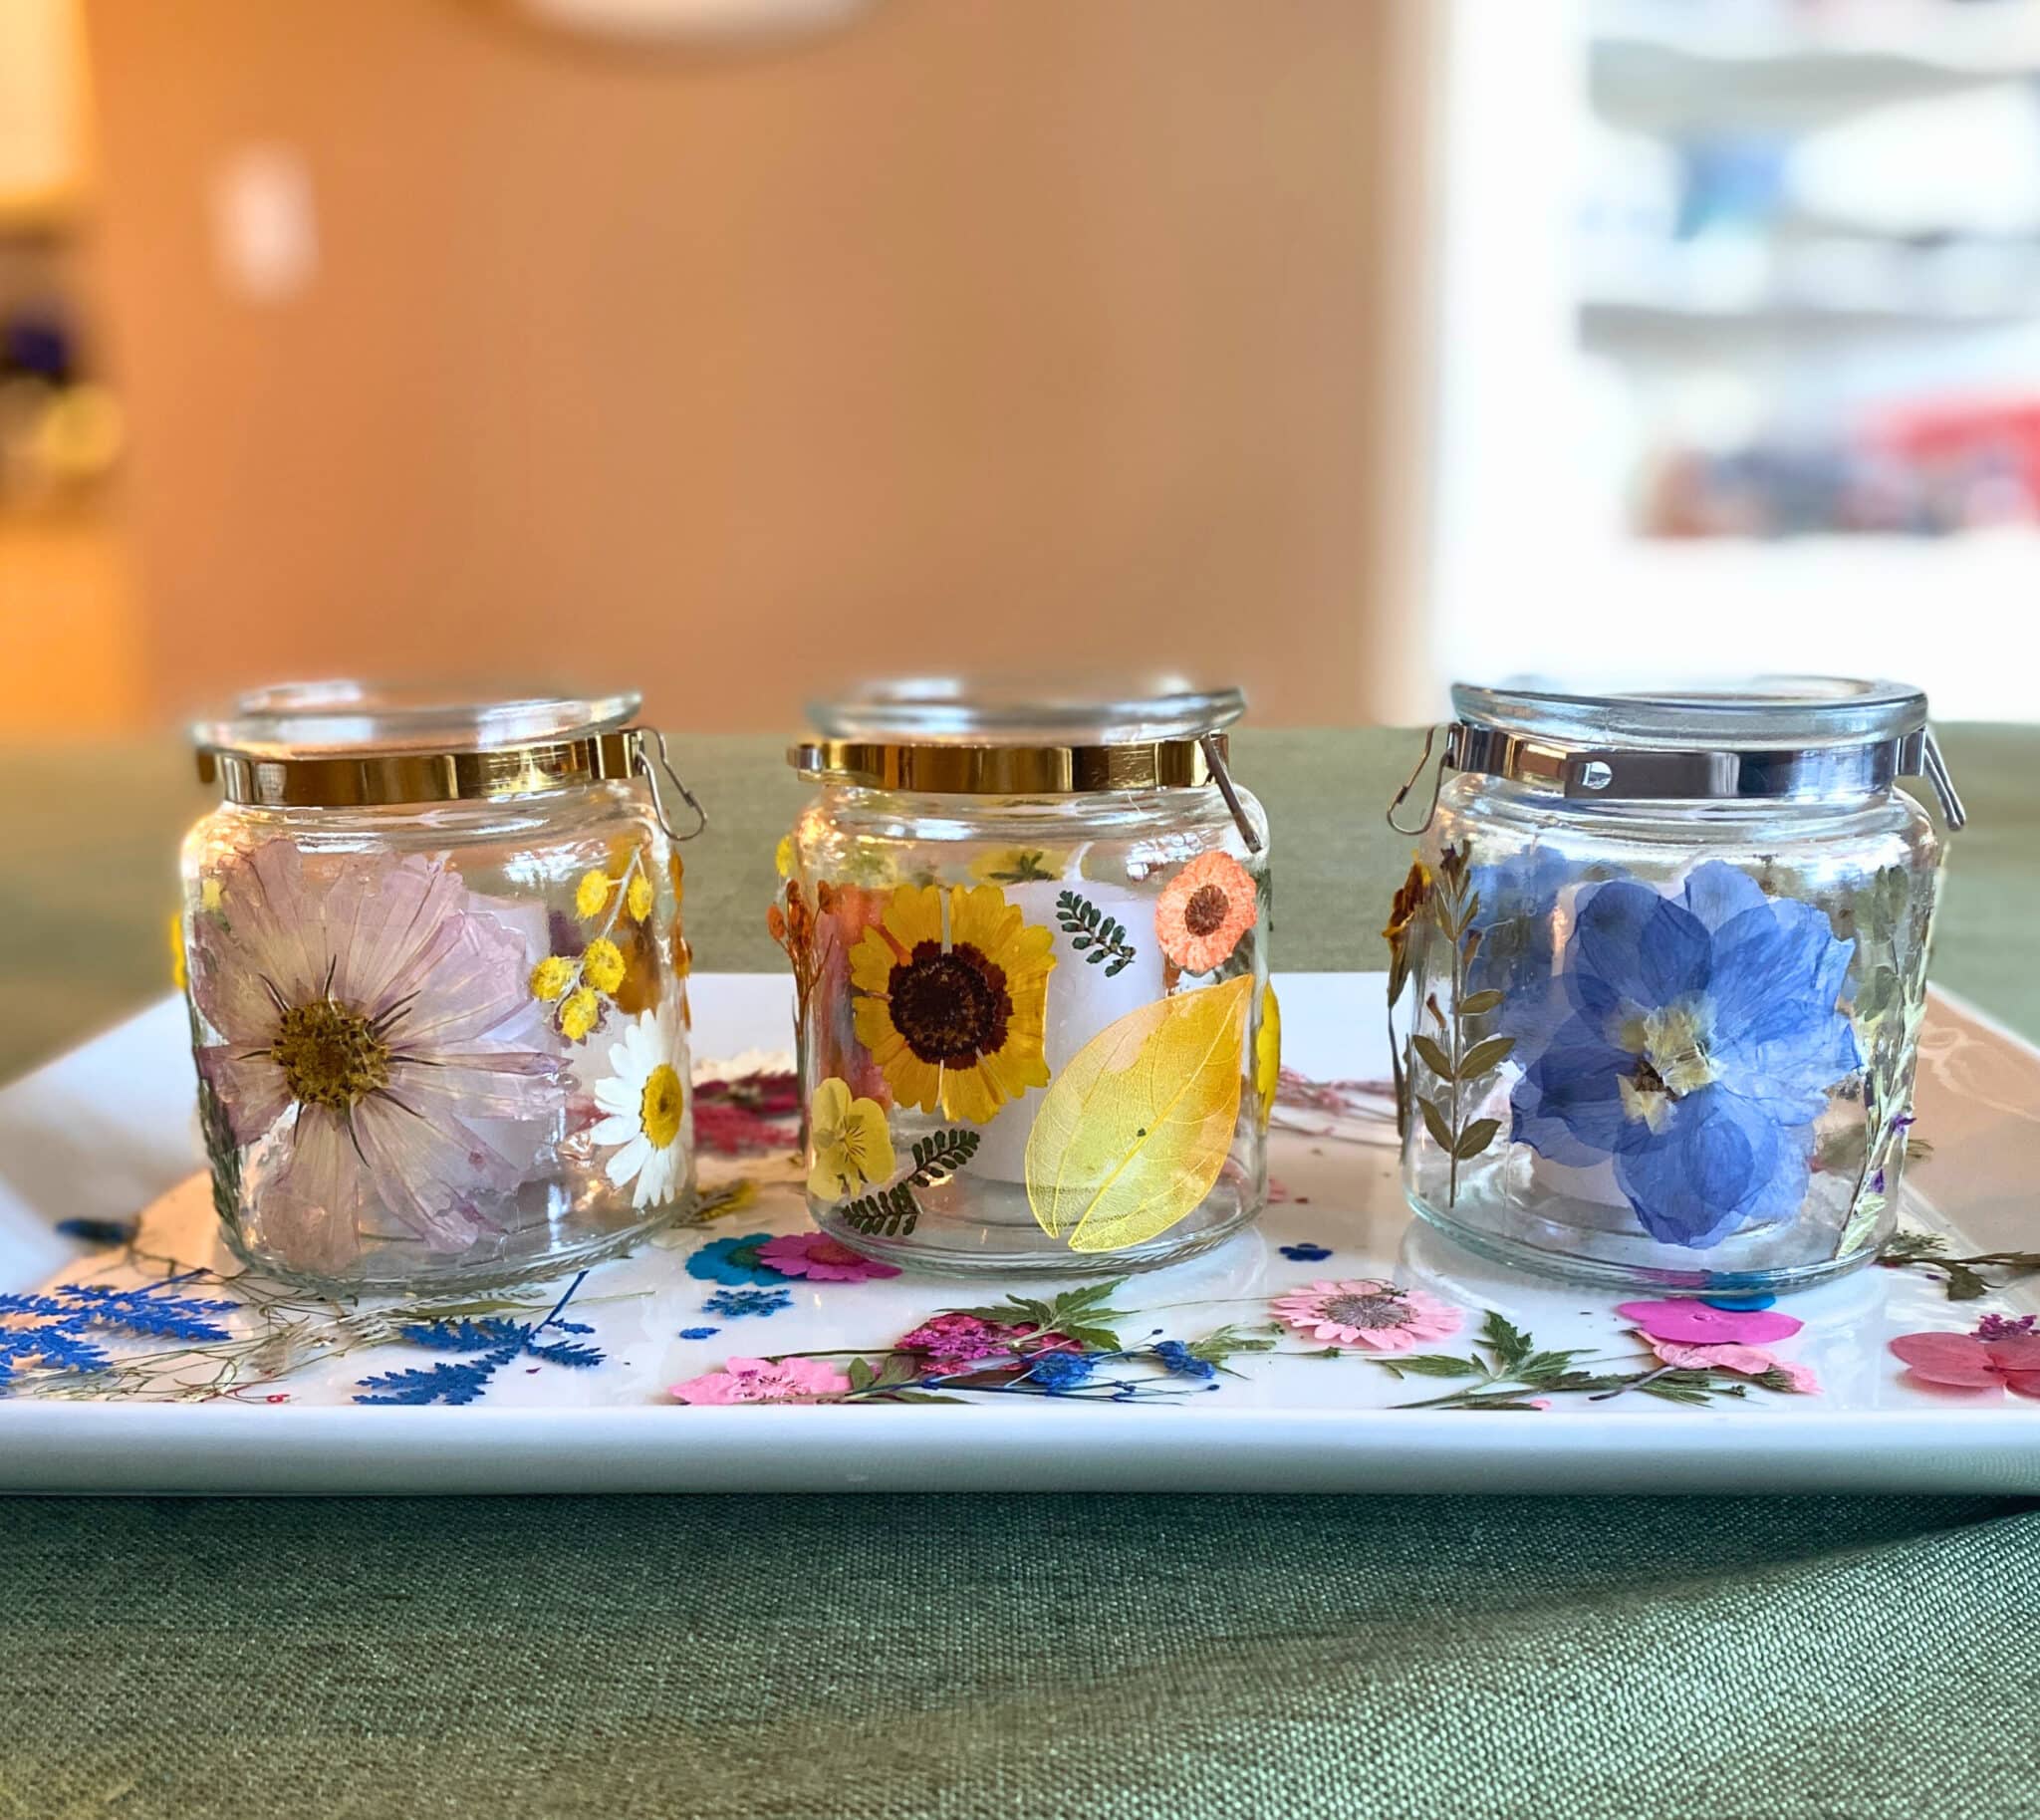
The Finished Pressed Flower Lanterns
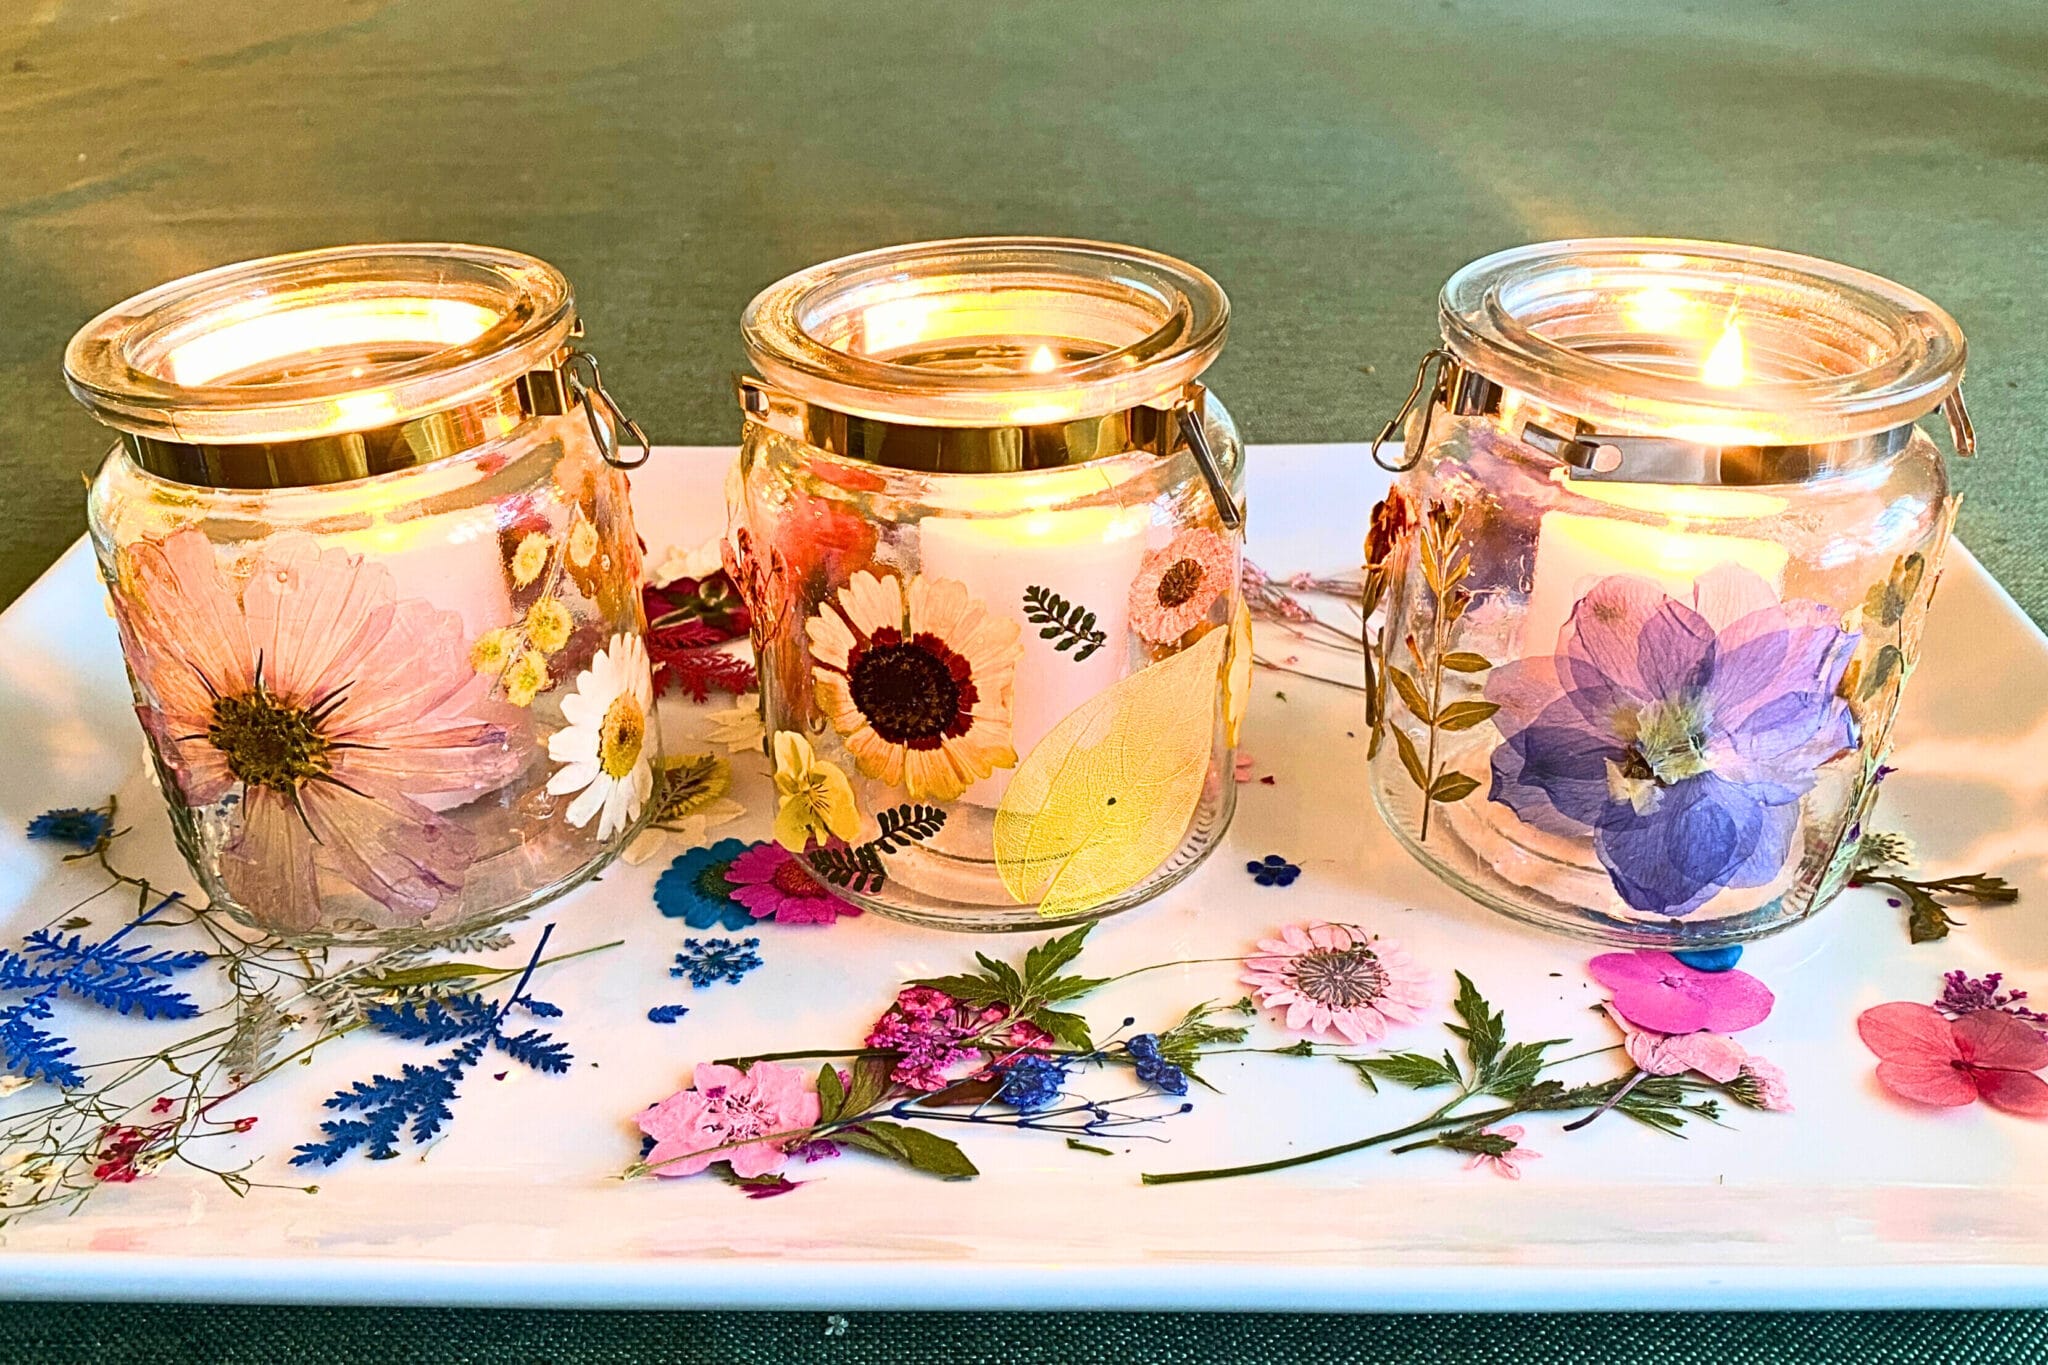
I really do adore how these came out.
I can see this as a fantastic project for a bridal shower or even a floral themed wedding. They would be really cute favors to bring home.
Give them a try!