I feel like throughout the winter I have had a deficiency of creative juices.
As spring starts to approach, I’m getting back in that crafty mood. I’m not a wreath person (I say that every time I make a wreath and I’ve made a lot of wreaths.
(See here, here, here, here, here, here and here), but I do love a great, simple, springy wreath for the front door. So I have a DIY Simple Spring Wreath for you to view and (hopefully!) make.
***Disclosure – This post contains affiliate links. If you click on one and make a purchase, I may receive a small commission***

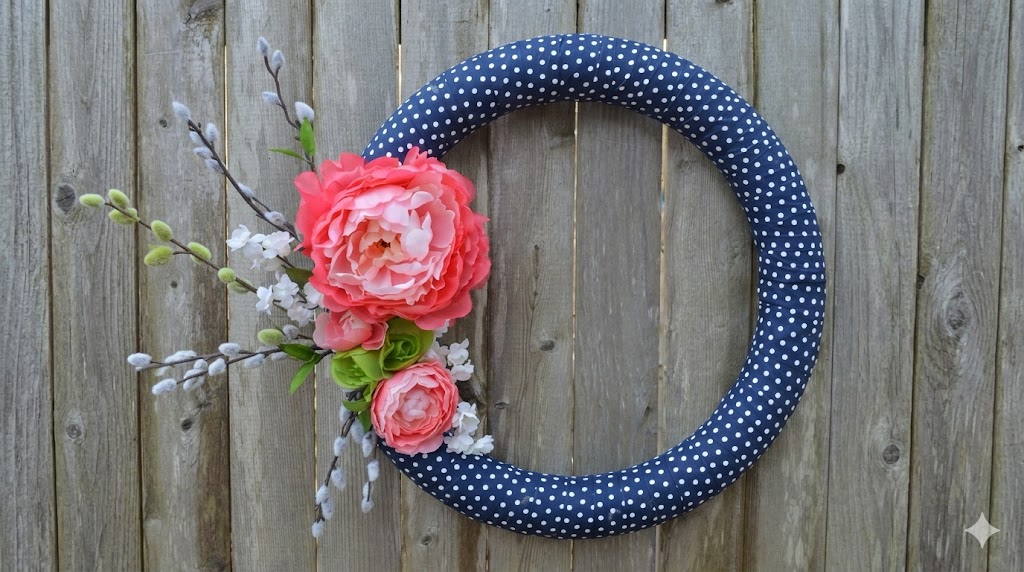
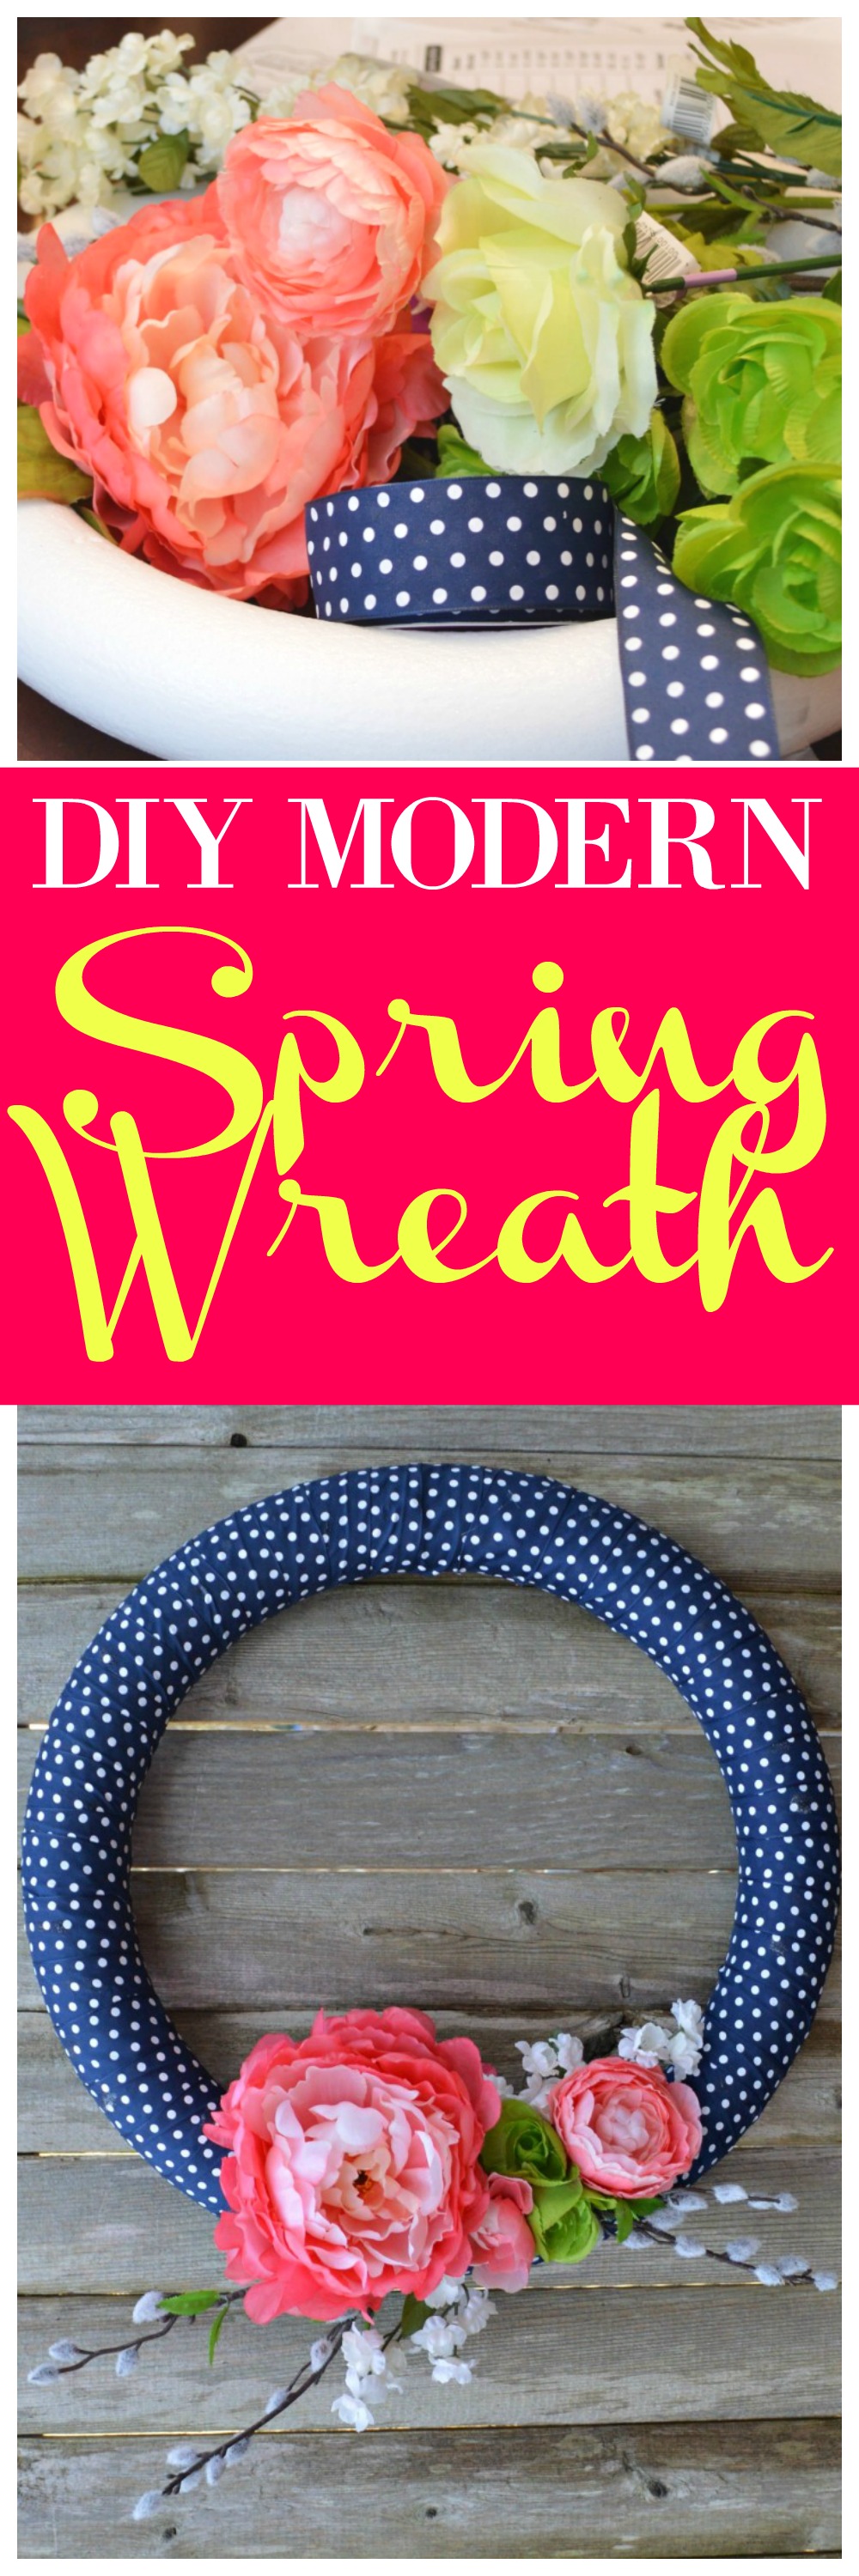
I love how slightly preppy but also romantic this beauty is. And when I say simple, it’s by far the easiest wreath I’ve ever made. Not, however, the least expensive.
Here is what I needed to make the wreath:

DIY Simple Spring Wreath
Supplies:
- 1 – 14″ Wreath foam – I used a styrofoam one from Michael’s and got for 50% off (about $4.50)
- Silk Flowers Stems – Confession. I’ve never bought these before. I have an aversion to fake flowers. I love these though. I got a beautiful, large Peony and one smaller peony, some pretty green smaller buds, some pussy willows and then a couple of sprigs of little white filler flowers. I also got a rose that I didn’t end up using. They were not cheap, however. I ended up spending close to $20 on flowers alone. I did have a bunch of leftover flowers though.
- 2-3 Rolls of 4 yard, 1 1/2 inch thick, Grossgrain Ribbon – I don’t think you *have* to get grossgrain, but I did and I enjoyed working with it. My recommendation here is do a solid or a pattern, but don’t pick a pattern that will annoy you if it doesn’t line up properly throughout the wreath. Because it won’t line up properly around the wreath. It’s some type of law of Physics. Or Math. My polka dotted ribbon was $2.99 and on sale for 50% off. You do the math. I’m all mathed out.
- Glue gun and glue gun sticks
Step 1:
Begin wrapping your wreath form with your ribbon, hot gluing as you go. Try not to use too much glue as it will sort of seep through the ribbon. Continue until the wreath form is completely covered. I used *exactly* two rolls. It was a little weird.

Step 2:
Apply your flowers and stems to the wreath using hot glue. This is where your inner artist can come out to play. The general plan is to start with the biggest, prettiest flower and fill in around, but go with your heart and know that you can always gently rip it off and re-glue it if you have to. Nothing to fear!
Step 3:
Once your flowers are applied and the glue is dry (a matter minutes if you’re not used to working with a glue gun. Also, if you’re not used to working with a glue gun, sorry about the glue gun burns. That happens. It’s part of the craft game. No pain, no gain) you will want to apply a loop of string or something to the back of the wreath so that you can hang it. I just tied a little loop and hot glued it to the back of the wreath. Don’t overthink it.
Step 4:
Just kidding, there is no step 4! Hang up your wreath and pat yourself on the back while you practice saying, “Oh, thank you! I actually made it myself!”
Not that that’s why we craft. But it is a little why we craft, right?
If you Liked It Then You Shoulda Put a Pin In It!
PS!! Want more wreath inspiration? Check out this post with some gorgeous spring wreaths to drool over: