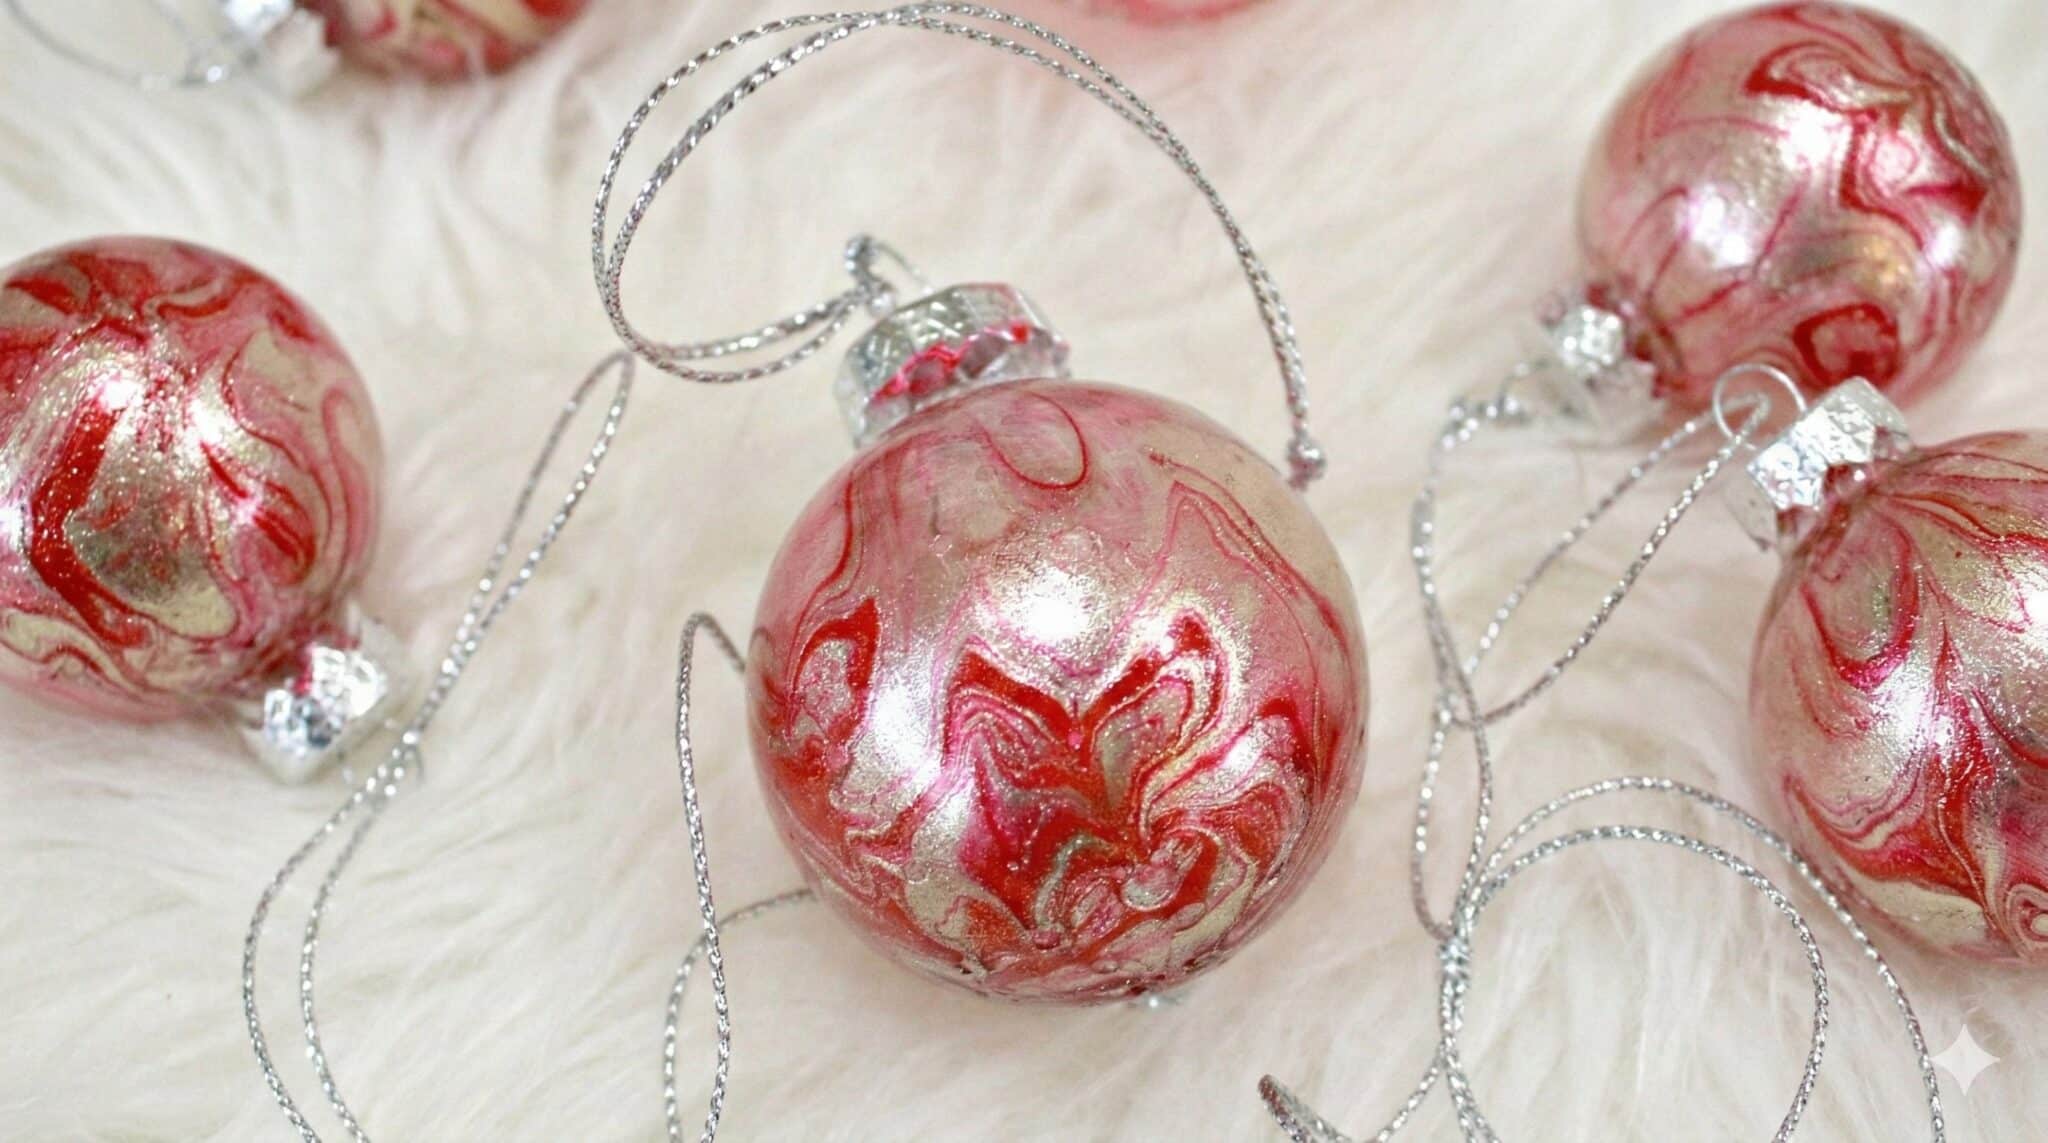
I’m into the whole handmade Christmas thing this year. I made these wood burned ornaments a couple of weeks ago and this week it is some super cool DIY Marbled Christmas ornaments for the tree.
As you know, I have certain criteria for the crafts that I pick; they have to be useful as well as beautiful (at least to me!) and these tree ornaments fit both categories.
They might not be useful all year long, but they will decorate my tree for years to come!
And, of course, they offer my favorite part of crafting, the feeling you get from knowing you *made* something!
***This post contains affiliate links. If you click on one and purchase something, I may receive a commission!***

Pretty, right? I have a vintage silver foil Christmas tree that I think these would be perfect for.
I love these because they are easy to make and it is very hard to mess them up. You could mess them up by picking the wrong colors to marble them, but if you don’t like the colors, just rinse them before they dry and start fresh with a new color.

How to Make DIY Marbled Christmas Ornaments from Your Old Nail Polish
Before we get to the tutorial let’s talk for a second about the set up that’s going to happen here. Because you’re dealing with nail polish and a tub of water.
It can get messy.
You’re going to want to think about things like, is it a good idea to do this on the dining room table? What can I cover my kitchen counters with for when I inevitably spill something. Or drip something. Or drop a glass ornament that I don’t want shattering all over the counter?
You see where I’m going with this? Crafting is messy, ok? It’s part of the fun. Ok, no it isn’t, but at least I’ve warned you to plan for it.
Here we go.
Materials:
- Nail Polish – I used a red-ish/pink and a pretty gold nail polish. The cheap polish is better than the quick dry, expensive stuff!
- Plastic Cups or other plastic vessel that you can dip the ornament in. It should be something you don’t mind either throwing away or reserving only for craft use. I wouldn’t use anything that might touch food after this project.
- Clear Ornaments – I used mini ornaments, but they are available in lots of different shapes and sizes. I’ve linked to a set on Amazon.
- Wooden skewer – For stirring your nail polish.
How To Marble Christmas Baubles
- Fill your plastic cup with water. I tried hot water and then I tried cold water. Cold water seemed to be easier to work with. I’ve read tutorials that say you have to use hot. What can I say? Cold worked for me. Do what works for you!
- Before you start, figure out where you want to let your ornaments dry. I opened my bottom cabinet doors, lined up some paper towels on the bottom and then taped the ornaments to the open cabinet so they could hang out and dry.
***Note – The next couple of steps need to be done fairly quickly. The longer you let the polish sit, it will start to set and then it becomes difficult to work with.***
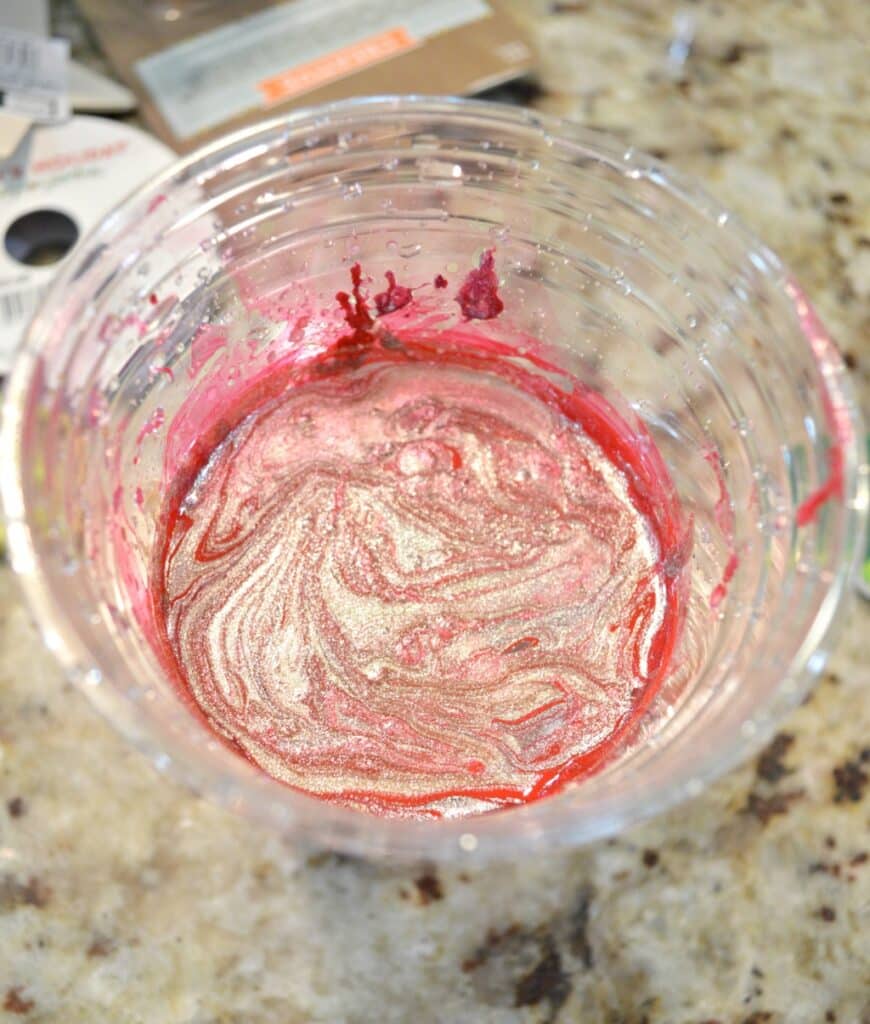
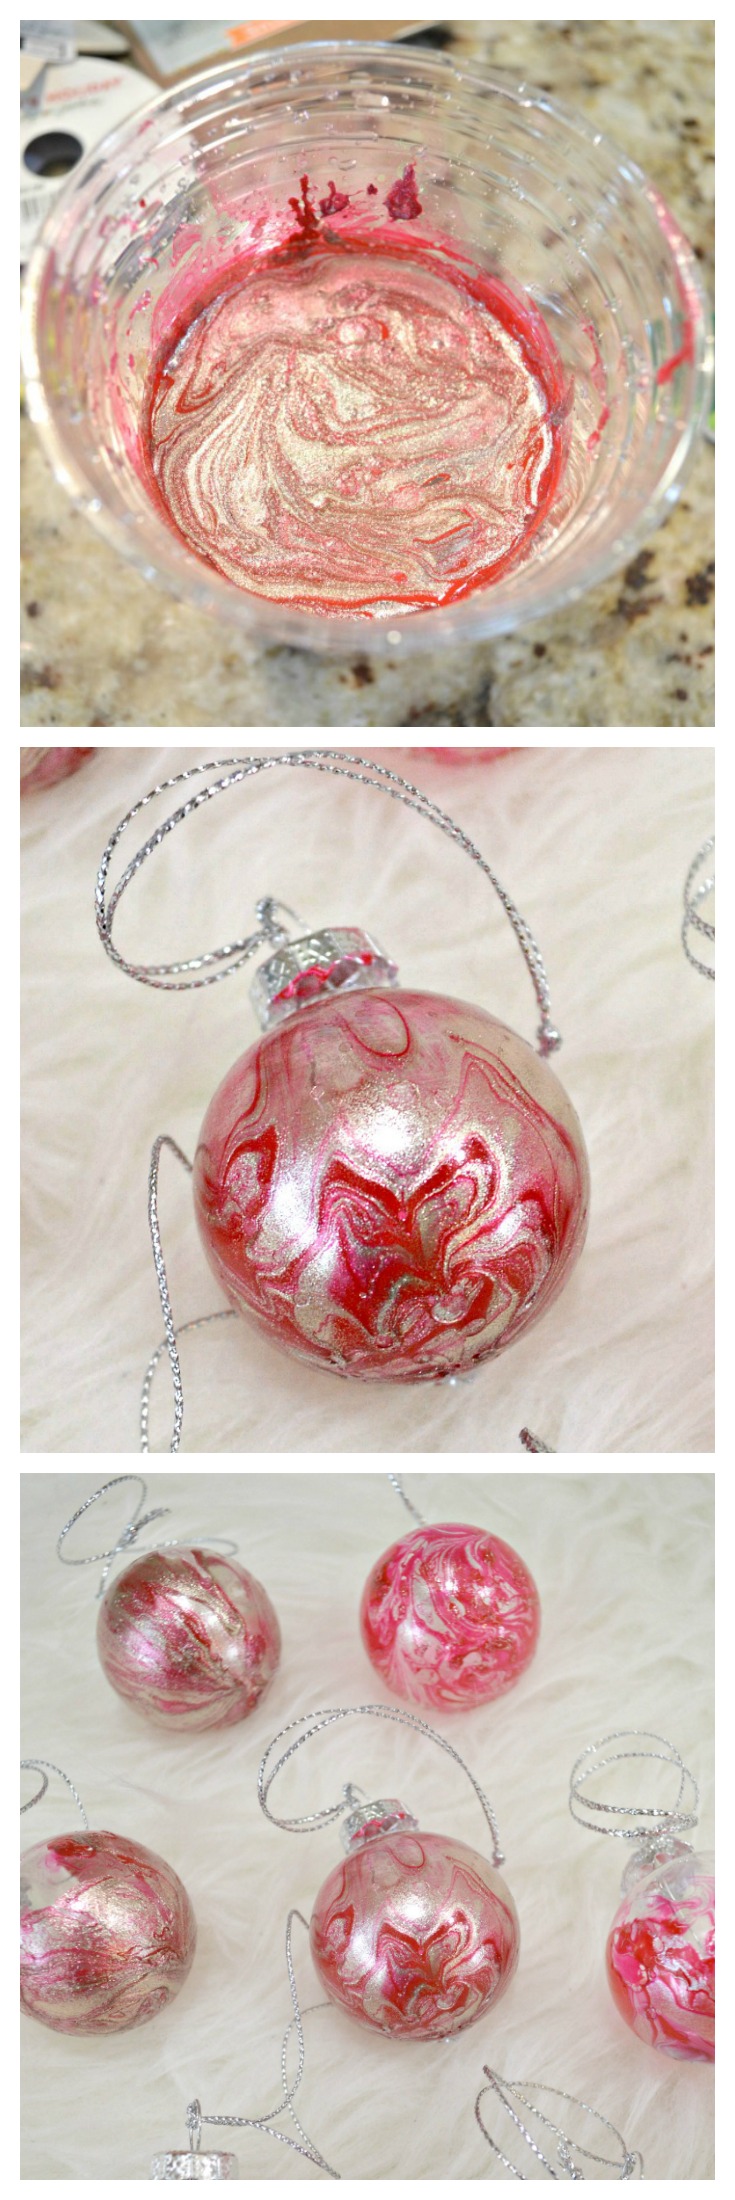
3. Drip in a bit of each color of nail polish and swirl it around using your skewer. Mine looked like this:
4. Dip your ornament into the polish/water. In and out. You don’t need to let it sit in the water. Just a quick dip. Change out your water and nail polish about every two ornaments so that the polish doesn’t get too clumpy.
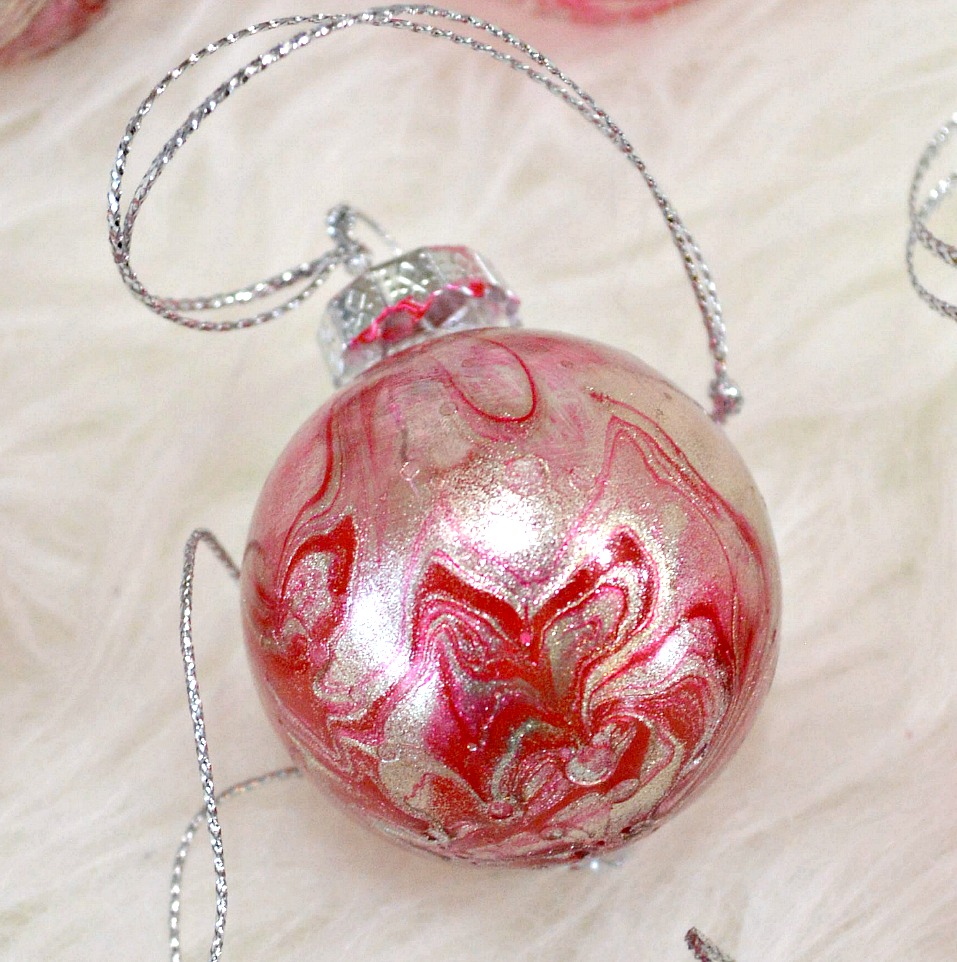
5. Allow the ornaments to dry and then hang from your favorite tree!
And that’s it! The one downfall I have to warn you of for this craft is the smell. I hate the smell of nail polish and it seems to be even smellier when added to water. Maybe I should add a clothespin to the list of materials! All in all these were fun to do.
I wouldn’t suggest for under, say 8 years old because it can get a little messy and I think I would probably cry if I spilled a cup of watery nail polish all over the kitchen.
And that is just not the Christmas spirit I’m going for!
I’ve got a whole post for you on Nail Polish crafts that you can check out if you’re looking for more ideas!
If you love this post, put a pin it!

Hi Jamia! How fun! What a great tradition. I’ve had those ornaments for several years now and they have not chipped at all. And I do not treat them kindly, either. I have dropped and broken mine, but chips have not been a problem.
Send me pics when you are done!
Marybeth
My son and I make ornaments every year and look forward to this being our 2018 project. I was wondering if the nail polish CHIPS over time? Was thinking some kind of clear protective coat on the finished ornaments might make sense?
Hi Mary Rose! Yes, I think plastic would work. I haven’t tried the crayon route, but I have seen lots of tutorials for that on Pinterest. I’d love to see how yours turn out!
Marybeth
Do you think plastic would work too? I have kids n don’t want glass ornaments? These look very cool I’m going to try this out. I wonder if you could do this with melted crayons so it could be kid friendly?
Hi Rhonda! I’m thinking about making some again this year, maybe I’ll try that method. Thanks for sharing!
Marybeth
We did an ornament exchange last year at work and I actually did some of these, although it didn’t dawn on me to dip the bulbs, so I put the nail polish on the inside of the bulb, I also used plastic bulbs and sat them upside down in the container the bulbs came out of.
Hi Brenda! I’m so glad you’re going to try them! I would love to see pics!!
Have fun!
Marybeth
Love the ornaments that you made. I’m going to try it and I’ll send you pictures as well. Thank you for sharing.
Hi Darlyne!
I don’t see why it wouldn’t work on plastic. Nail polish shouldn’t have a problem sticking to plastic, I don’t think. Make some and come back and show me pics! Have fun!
Marybeth
I have a huge case of clear plastic ornaments,and wondering what i can do to them…will this work on the clear plastic, or just glass ornaments..They are Beautiful!.
Hi Erin!
Hmmm, I didn’t have that problem, but I’m wondering if maybe the nail polish is too thick? It does work better with cheap nail polish. Not the fast dry or gel ones. I wonder if you poured a little water in the nail polish to thin it out? Let me know if that helps at all!
Marybeth
Hi I’ve had a little trouble that i’m hoping you can help me out with. How do you get the nail polish out of the bottles quickly? Every time i try it doesn’t come out very well and when i dip the ornaments in all the polish stays on the bottom of the bulb. What am i doing wrong?
Thanks for the help Erin
Hey Darcy!
Awesome! Send me pics when you are done!!
Marybeth
Gorgeous! I’m going to pin this.
Hi There!
I used glass ornaments for this project.
Marybeth
Hi Denise!
I didn’t measure. I’m not a measurer, I’m more of an eye-baller. I poured some in, poured in a little of the gold color, gave it a swirl and if I felt like it needed a little more, I added a little more. If I had to guess, I would say I started with a teaspoon of each? Maybe a little more than that.
Good luck!
Marybeth
how much nail polish do you use for o e cup of water.
Hi, thanks for the tip. Did you use glass or plastic bulbs?
Hey Pamela!
I used a Solo cup sized cup and filled it about 3/4 of the way. It doesn’t have to be an exact amount.
Thanks for stopping by!
Marybeth
How much water do you use? Your cup didn’t look full or very big.
Hi Nancy!
I have not tried that, but if you try it, let me know how it goes!
Yeah, the smell is rough. :-(.
Easy is my specialty! There’s lots of other easy tutorials on the site. Let me know when you’re ready for your next project and I’ll give you links to my favorites!
And I would LOVE to see pics of your ornaments if you can send them to me!!
Thanks so much for stopping by!
Marybeth
Hi,
Could you do the marbling on the inside by pouring the mixture into the ornament and the letting it drip out? Maybe that would cut down on the smell, which I agree is awful! Otherwise I would have a house full of these, they are so pretty!
(BTW—just came on your site today, thank you so much for easy! I’m getting too old for difficult DIY but I still love to do handmade.)
Hi Raquel,
You basically pour the nail polish into the water and swirl it with a toothpick. The nail polish should stay sort of at the top of the water.
Marybeth
do you mix the water with the nail polish?
Hi Teresa!
I left the top on. 🙂
Marybeth
Did you leave the top on it or take it off?
Hi Andrea! Hmmm, was your water warm-ish? Did you use fast drying nail polish? The non-fast drying works best and the cheaper the better, lol. Let me know if either of those does the trick… I do remember having a little clumping when I did these and that was when I knew I had to change out the water. I think I ended up changing out the water every couple of ornaments. Let me know how you do! Thanks, Marybeth