I needed a new wreath because I have sort of a thing with wreaths. I make them fairly often and then I end breaking them.
They fall off the door or sometimes I break them on purpose because I want to repurpose an element that I used on it. So, I can’t remember the fate of my last DIY Wreath, but my door has been bare for a while. Time for a new one!
***This post contains affiliate links. If you click one and make a purchase, I may receive a commission at no additional cost to you!***
Thanksgiving is right around the corner and so I wanted something related to fall. But, as per usual, I’m kind of late to the fall game, so I started brainstorming ideas on how to make this particular wreath a little more “evergreen”. I don’t mean evergreen like Christmas wreath, I mean evergreen as in I can use it all year. I should have just said that. Terrible choice of words.
I wanted a multipurpose DIY Wreath that I could use all year. Better? Yes, it is.
I came up with what for me is kind of a genius idea. And the secret ingredient is a tiny bit of velcro. And some hot glue.
So Simple DIY Wreath 3 Ways
This wreath is ridiculously simple to make and pretty much fool proof. It’s not the least expensive wreath I’ve ever made, but considering it’s suitable for all seasons with just a rip of some velcro, it’s definitely cost effective. These would be a great craft to make and sell.
You’re going to need a few crafty supplies:
Materials

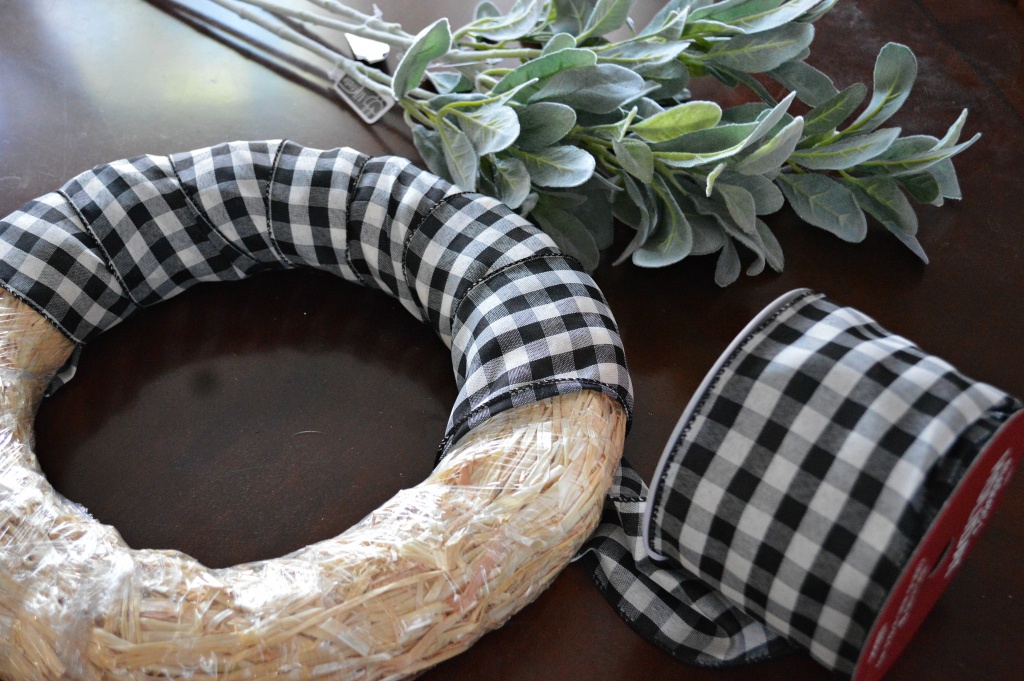
Wreath Form (I used a straw one, but you could do a foam one or even a pool noodle)
Ribbon (I used this one and I LOVE it, I would definitely suggest a thick ribbon with a wire edge. It was more expensive, but I got it at 50% off, so watch for a sale!)
Lambs Ear (From the floral section at Joann’s, but it’s available on Amazon, too.)
Decorations (what does this mean? I’ll show you in a second)
Velcro (I used the kind you’re supposed to sew, but I didn’t sew, I hot glued. I’m far better with a glue gun than the sewing machine)
Ok, so I chose a pretty pink peony, a chic gold pumpkin and a Christmas-y bauble. Those are the three things I used to make this wreath one that I can use all year round. I figure that pink flower could easily go from Spring all the way through Summer. If I happen to find something else more summer that works, I can totally add it into the mix easily.
My decoration items are large. You can go smaller scale with yours. Fair warning, the size of the pumpkin that I used means that it bumps the glass of our storm door if I hange it on the front door. So this will be indoor wreath for me when I’m using the pumpkin. Keep that in mind when you are choosing your decor pieces for your wreath.
And just a word about your choice of ribbon. I like a more modern looking wreath, so a simple pattern like this black and white check is perfect for me. A polka dot would be great, too. Whatever you choose, choose something that will work all year. Neutral colors so that you can add a pop of color with your decor item is the best choice for this.
Directions for DIY Wreath 3 Ways
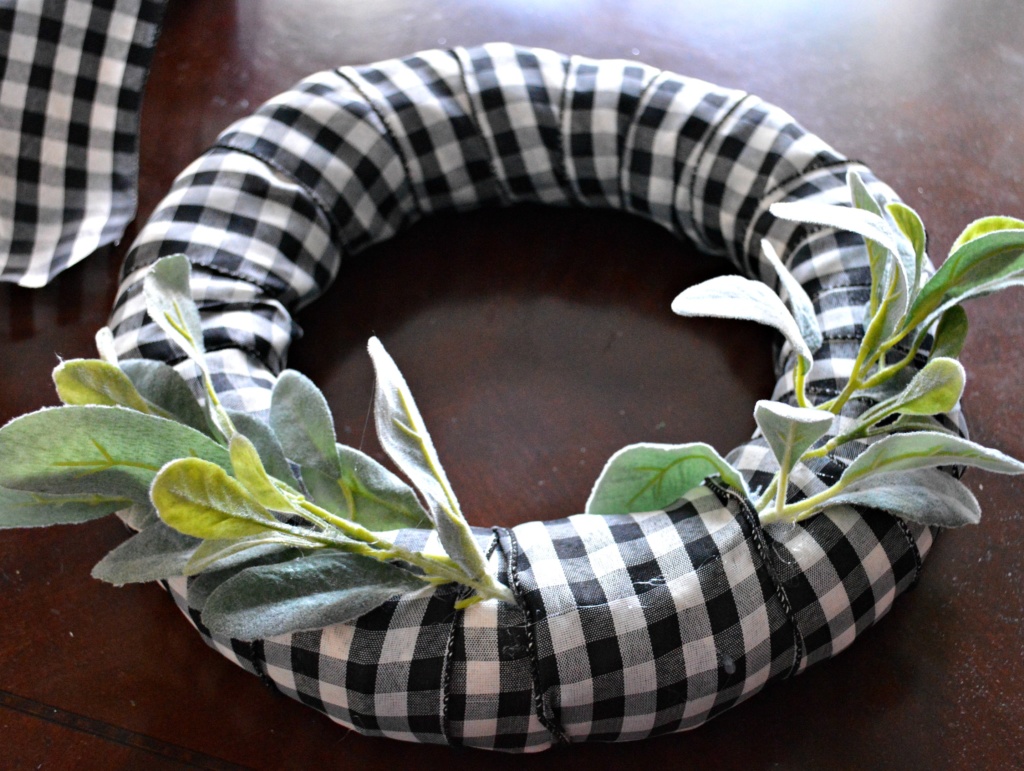
- Wrap your ribbon around your wreath form. Quick tip, if you’re using a straw wreath, don’t remove the plastic from it. It’s far easier to work when you keep the straw on. I wrapped my ribbon by basically overlapping the ribbon by about half.
- When you’re finished wrapping your wreath, secure the last bit with some hot glue. Do this on the back of the wreath. The hot glue can leave sort of a dark spot on the ribbon, so keep that hidden if you can.
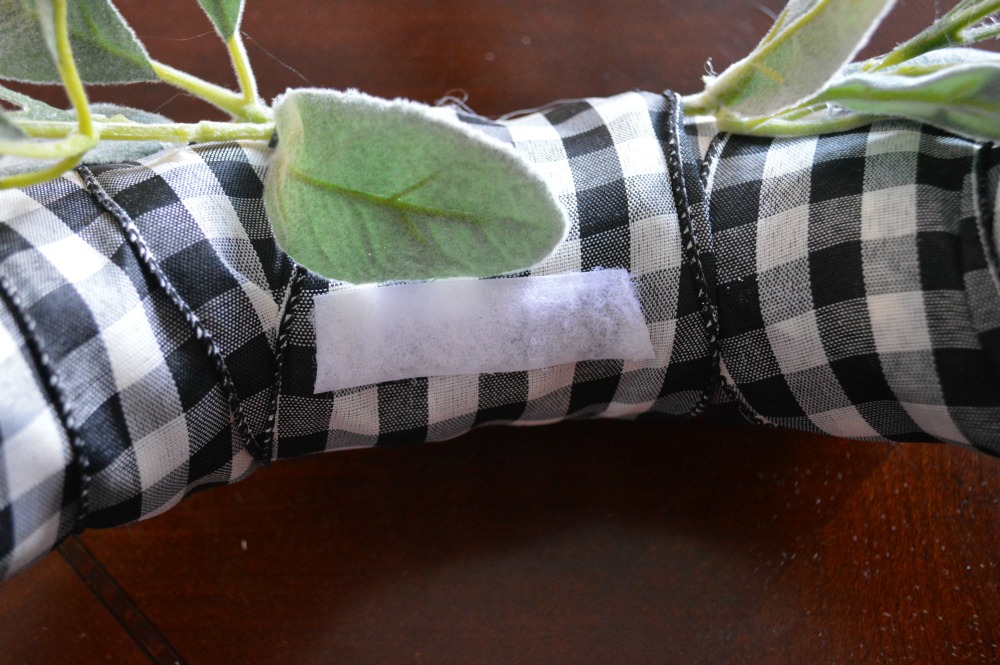
- Add your lambs ear to the bottom of your wreath. This is up to you how and where you choose to add it, so play around with it a little. I like mine at the bottom. You might like yours bottom/left. Or bottom/right. Or top? I don’t know, this is your call! So try a few different options before you start gluing it down. I used scissors to remove the stems from my lambs ear, but if you have a floral wire snipper, that would work much better. I also ended up pulling some groups of leaves off of my extra piece of lambs ear and adding them for extra greenery in any sort of bare spots. This is the art part of “arts & crafts” where you kind of just have to play with it until you love how it looks. Use your glue gun to affix the lambs ear once you’ve decided where it should go.

- Here’s the genius part. Grab your velcro and attach a strip to the wreath with your glue gun. You’re then going to grab three pieces of the opposite side of the velcro and attach them to your decor pieces. See where I’m going with this? You can change the wreath seasonally by simply un-velcroing the decor piece!

You know hve a wreath you can use all year long. There’s nothing saying that you couldn’t continue to add to the decor pieces, too. The velcro makes this the most versatile piece of DIY decor in your home.
Here are the three that I came up with:
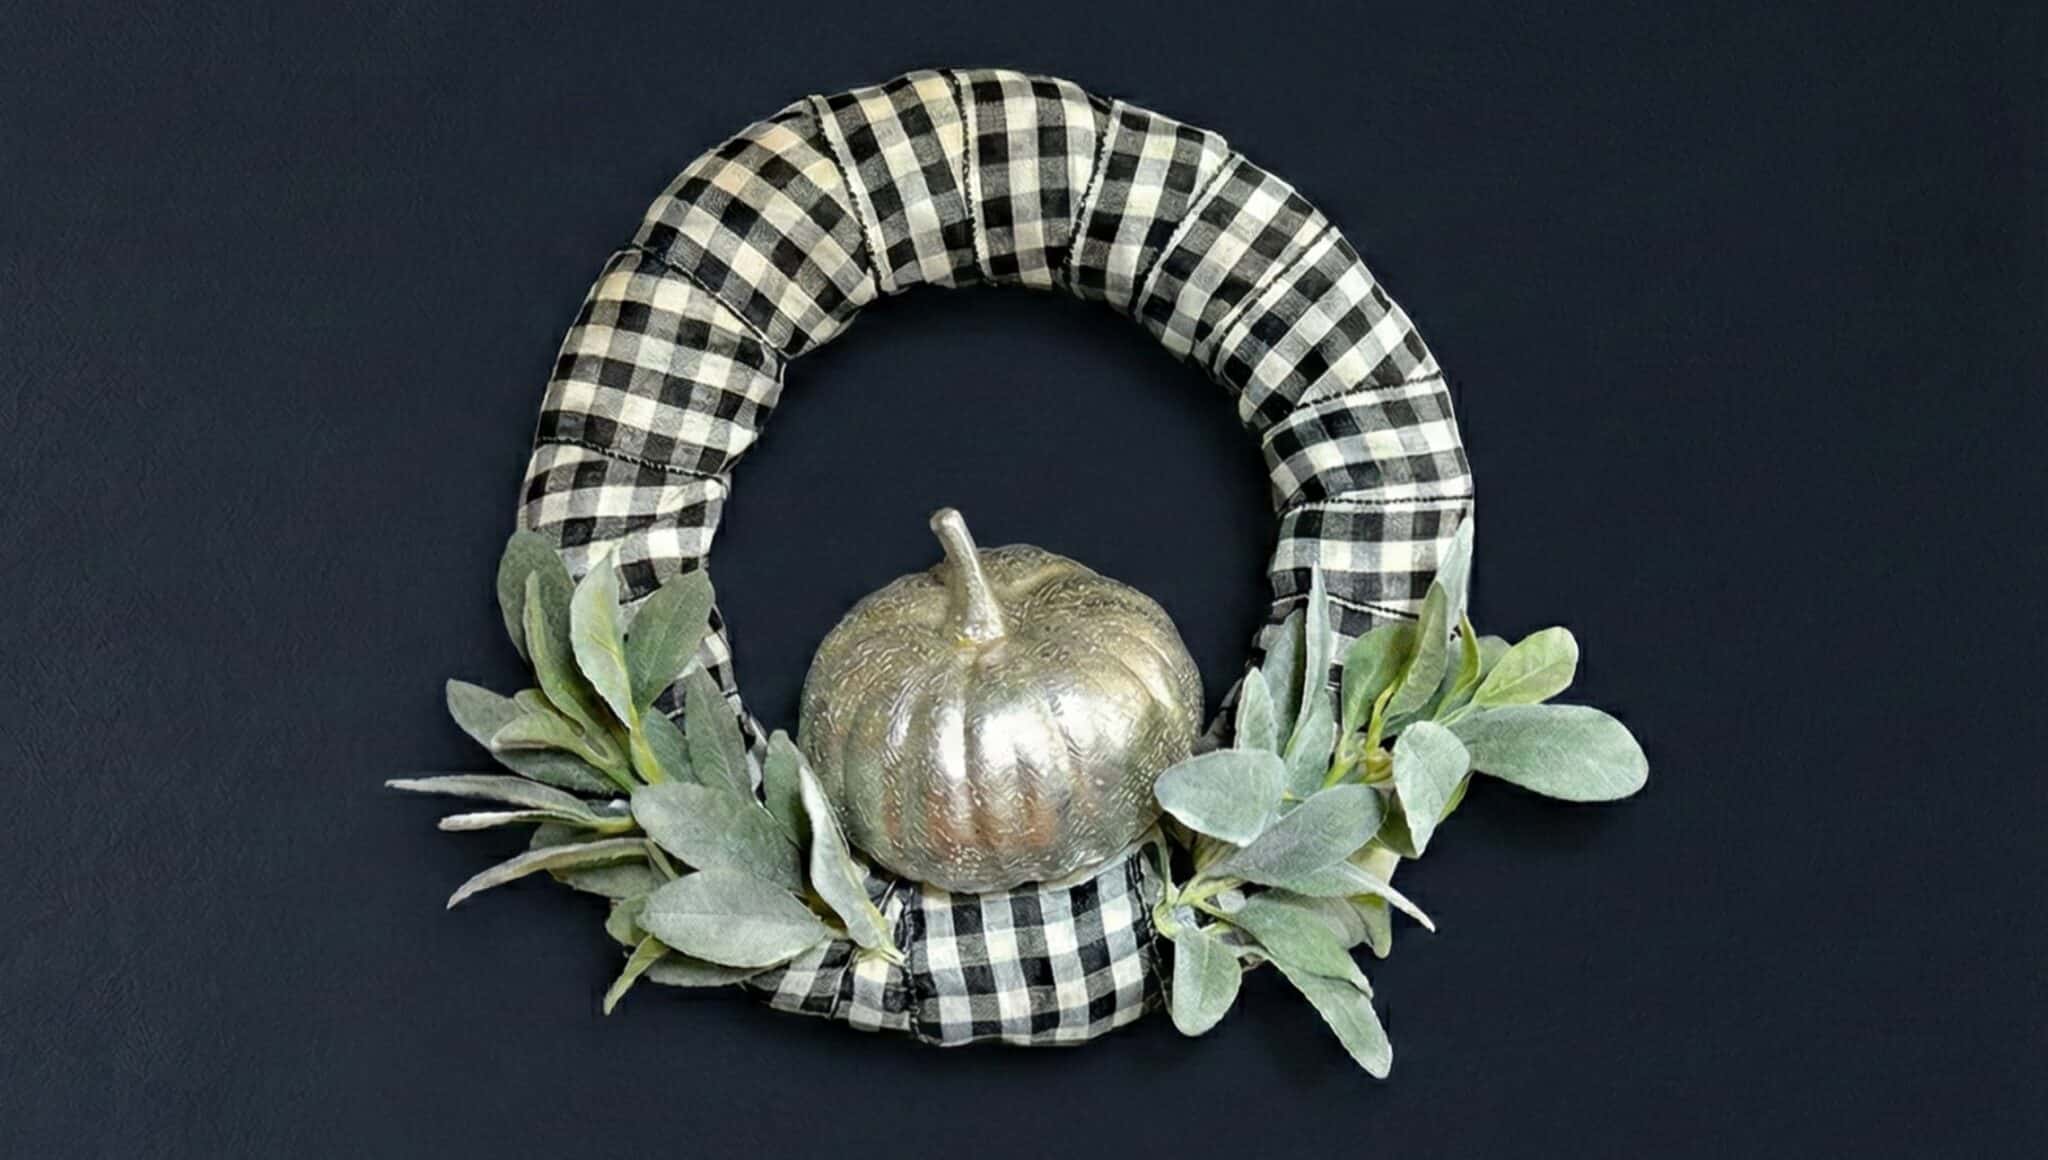
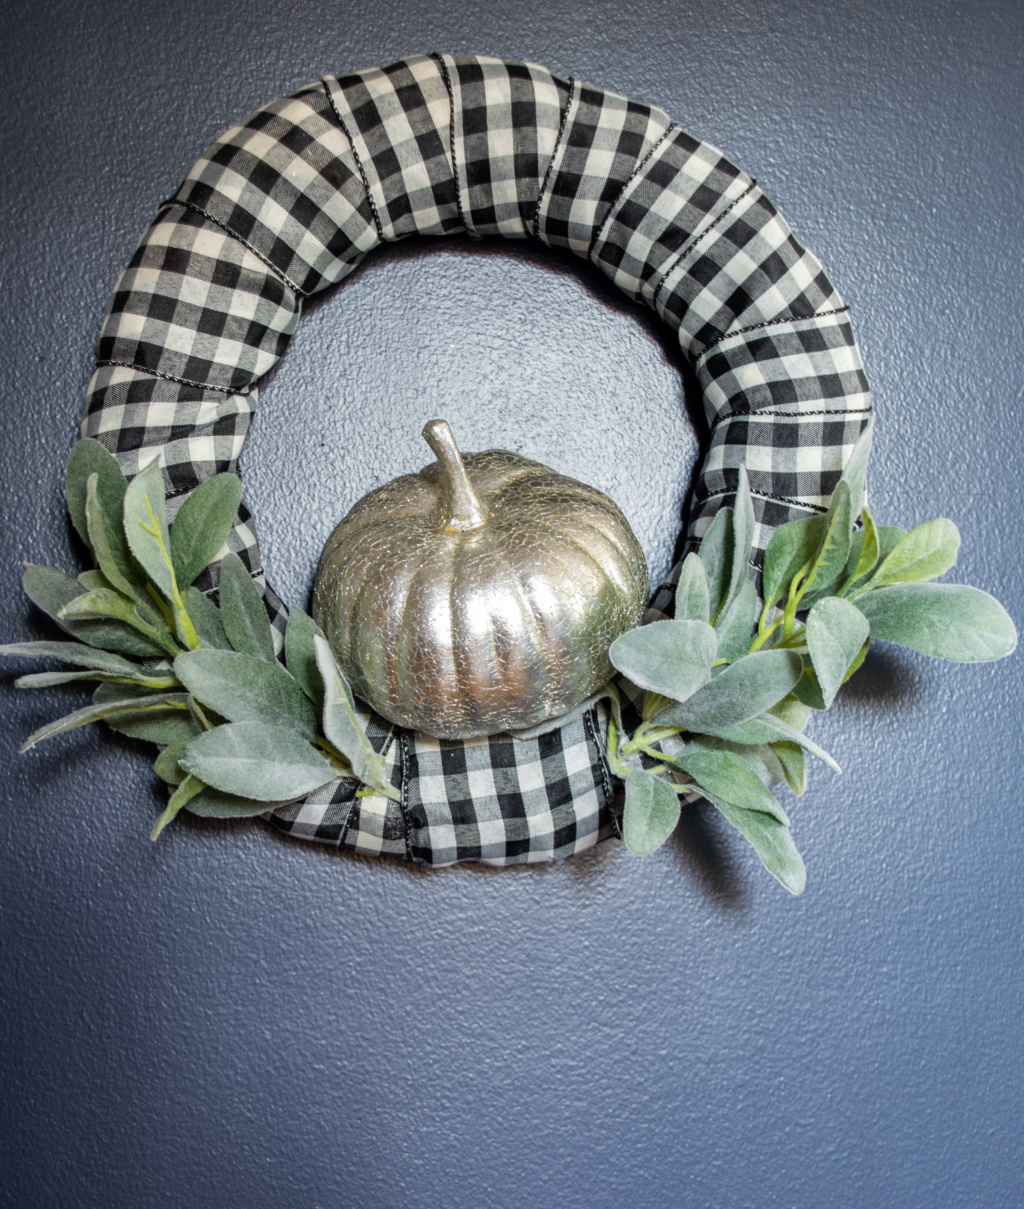
Here’s the fall/Thanksgiving option. I love the gold pumpkin. If you keep your ribbon neutral, like I did, you can go with any color gourd. Or apples would really cute on here, too. Maybe a few fall leaves?
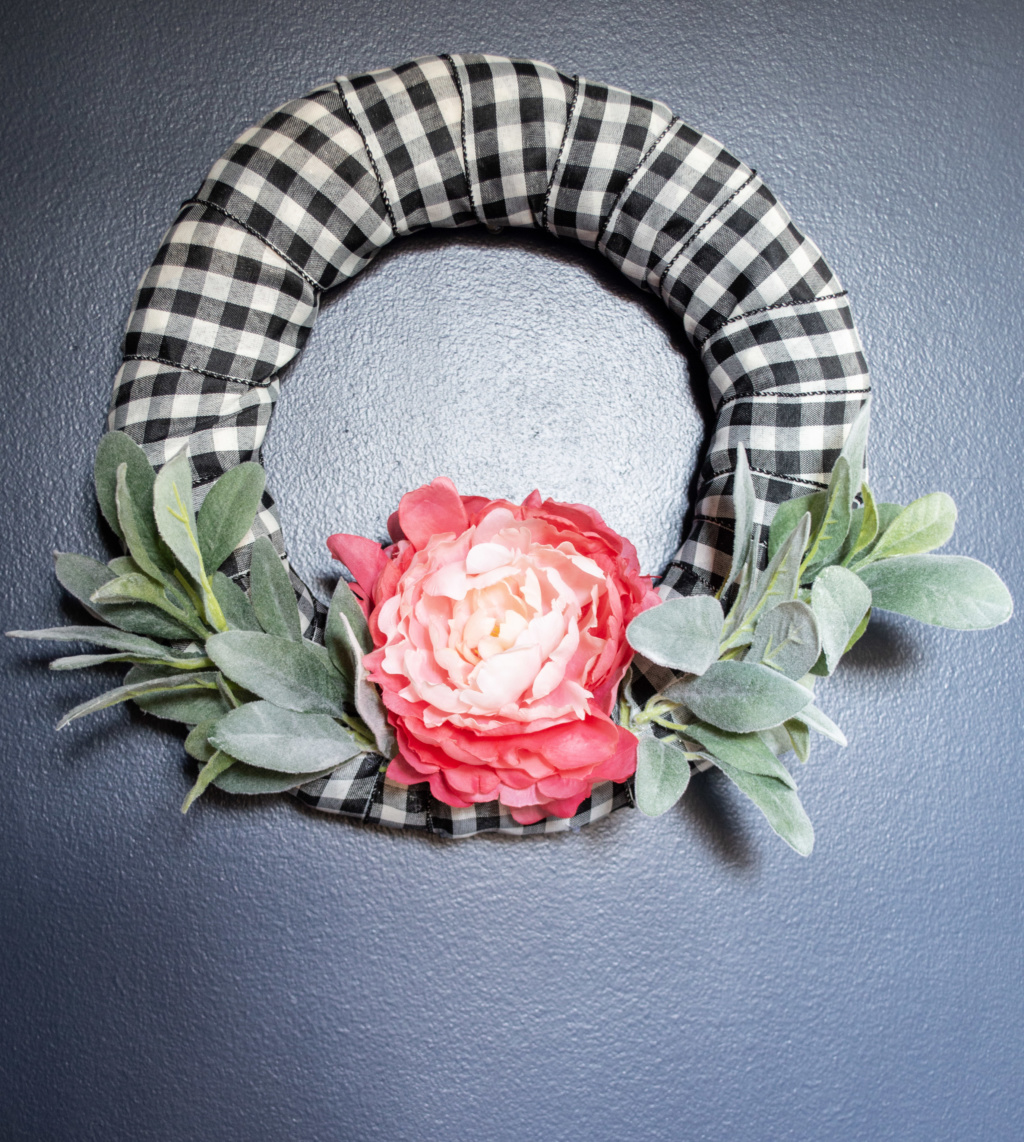
And here’s Spring/Summer. I LOVE this one. I’ve had that pink peonie hanging around every since this wreath fell of the door and broke. And the navy blue walls of my bedroom are making me want to paint my front door Navy blue. Which would be weird since the whole house is blue.

For Christmas, I added an oversized sparkly red ornament and instead of using the velcro, I just hung it from the top of the wreath with the ornament hanger thingy. I used a little bit of extra ribbon to cover the piece of velcro on the bottom.
Now that I’ve got three options for this diy wreath, I know that I will be on the look out for other items that I can add to it for different holidays and seasons!
Does this velcro/wreath idea already exist? Probably, but let me bask in my crafty genius for a little while, ok? While I gaze at my wreath.
Psst… If you want another easy wreath, check out this simple fall wreath tutorial!
Make More Crafts That Make People Say WHERE DID YOU GET THAT?!

My 10 Favorite Craft Projects
If you loved this craft, you’ll love “Thanks, I Made It!”
I pulled together my 10 all time favorite craft tutorials that I’ve made for myself and get tons of compliments on!
There are super simple to follow tutorials in an eBook format, so no annoying ads :-)!
There’s even a bonus tutorial on Macrame knots that will you get started with macrame even if you have no clue what you’re doing!
If You Liked It Then You Shoulda Put a Pin In It!
