I strongly believe that one of the biggest hurdles to being a creative person every day is that you don’t have the proper materials on hand and accessible. When you get the urge to make something you shouldn’t have to make a list of supplies, drive to the store, wander around the store, check out, drive home, hit up Amazon for everything the store didn’t have, take a nap cause you aren’t getting half the stuff for two days anway…
No creativity is going to happen when you have all of that annoying crap to do first. Right? By the time you’re ready to create, the moment has passed and whatever brilliant thing you were going to make is not ever going to be made.
It never made it into the world.
So you can understand why it is so important that we all have craft supplies on hand. Today I’m going to show you what I keep on hand for art painting supplies because painting is a great way to express your creativity and make something.
***This post contains affiliate links, if you click on and make a purchase, I may receive a commission at no additional cost to you.***
Art Painting Supplies You Should Keep At Home to Catch the Creative Bug
Before I get to the list, I want to tell you that there are probably a million other things that you could keep at home for when you feel like painting. Oil paints, for example, I’ve never used, so I won’t talk about those, but if that’s your jam, then you should have a set at home.
The things on the list are the things you’d find in my craft room. Or on my dining room table and also sometimes in the bottom left kitchen drawer under the silverware. In case you need to know where to look if you ever stop by.
Watercolor Painting Supplies
Watercolor Paints
Watercolors are the best for when you just want to get right to the creative part. They are easy to set up, easy to clean up.
My current favorite watercolor paint is this Winsor & Newton set.
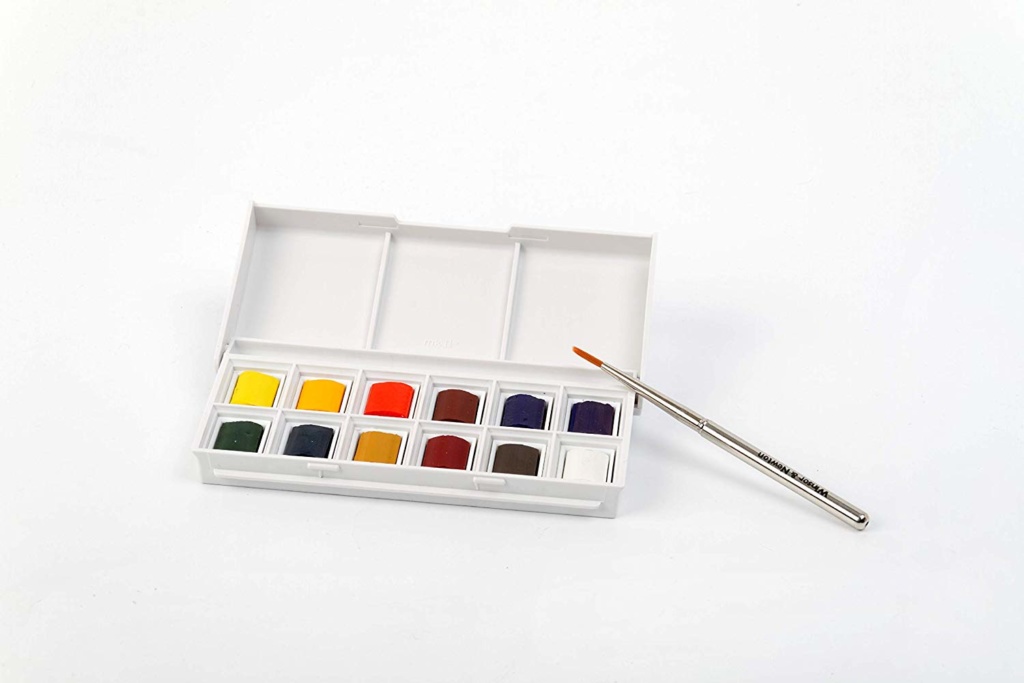
It’s small, so it fits anywhere. You could keep this in your purse if you really wanted to. The top opens up to a little compartmentalized tray so that you have a place for mixing in your paint and water.
There’s even a teeny tiny little brush.
The colors are really pretty and saturated. I used this little paint set to make the Watercolor Painting Tutorial for this Evergreen Forest. Or, I should forests.
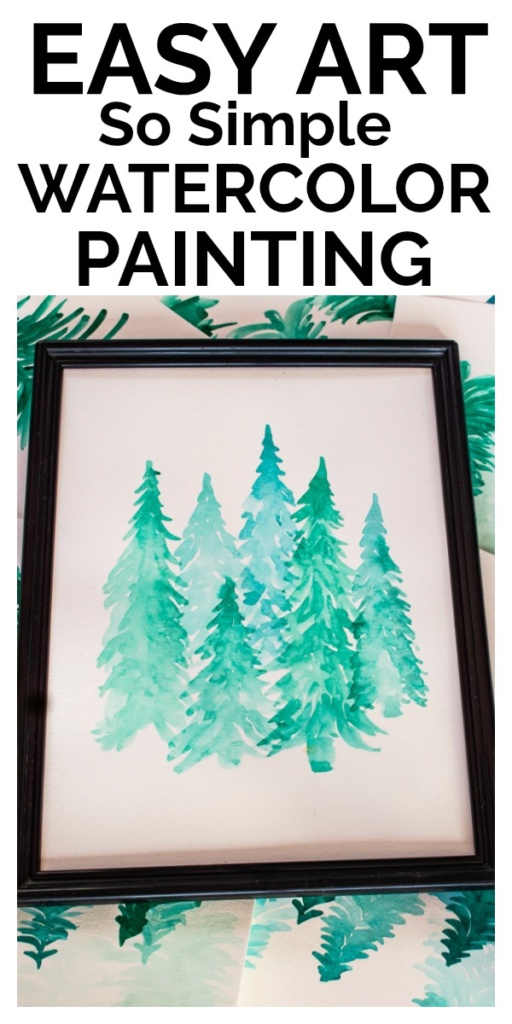
I made that painting a LOT. And I still have plenty of green paint left.
There’s no reason, however, you can’t use an even cheaper alternative, like this watercolor set from Artists Loft:
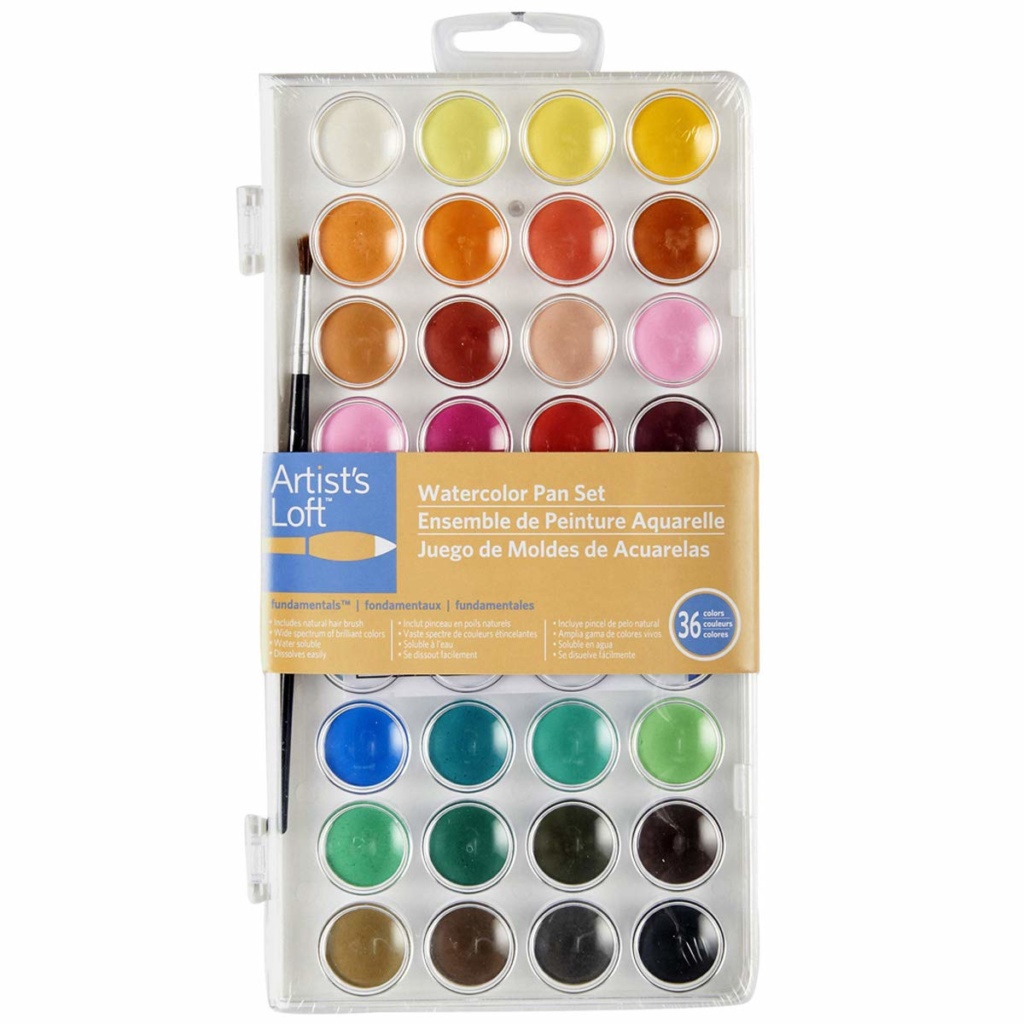
This was the first watercolor paint set I bought and it does just fine. There are lots of colors in there to choose from which is kind of nice. The color isn’t quite as saturated as the set from Winsor & Newton. I would say they are more of a pastel shade so if that’s the look you’re going for, then this would be perfect.
This is a good one to pull out when the kids are around and see if you can get them to paint with you. Not an easy feat in my house, but perhaps you have some crafty kids who understand that Mom likes a friend to paint with sometimes.
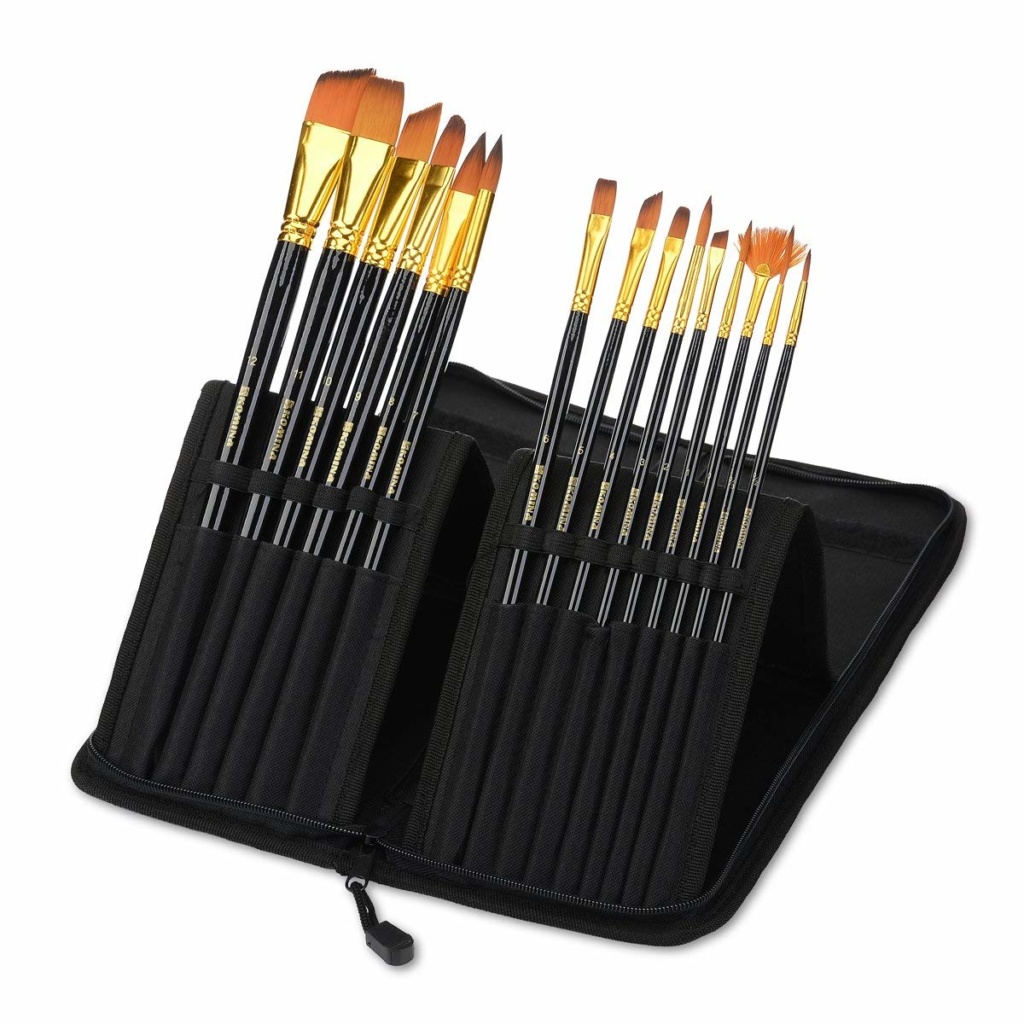
Watercolor Brushes
I started out with inexpensive watercolor brushes that I got from the bottom of my daughters craft supply drawer.
They got the job done, but it doesn’t feel very creative when you have to pick bits of paint brush bristles out of your painting.
So I recently upgraded to these brushes. They aren’t terribly expensive, but they are a HUGE improvement.
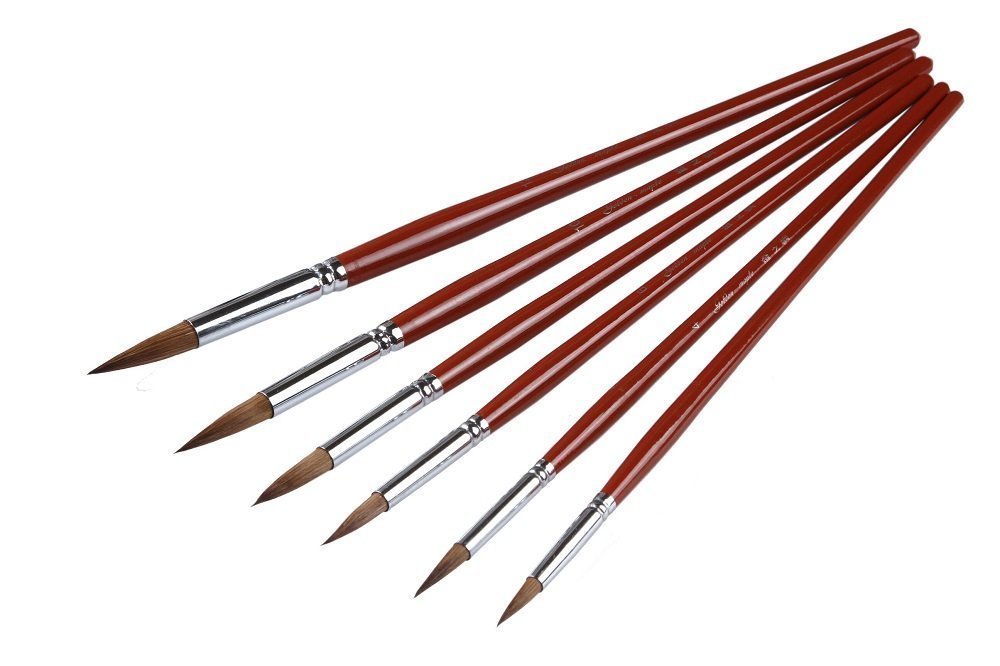
First of all, they hold water better. Which sounds nit picky, but the more you practice with your watercolor paints, the more you will see why this is important. The amount of water you use with your paint is what will determine the depth of color and how translucent the paint is.
Secondly, these brushes do not leave behind bristles. So no creation interruptus to pick out bits from your beautiful masterpiece. They also go right back to that nice point shape after you wash them off and coax them back to a point.
Watercolor Paper
This is my favorite watercolor paper from Canson:
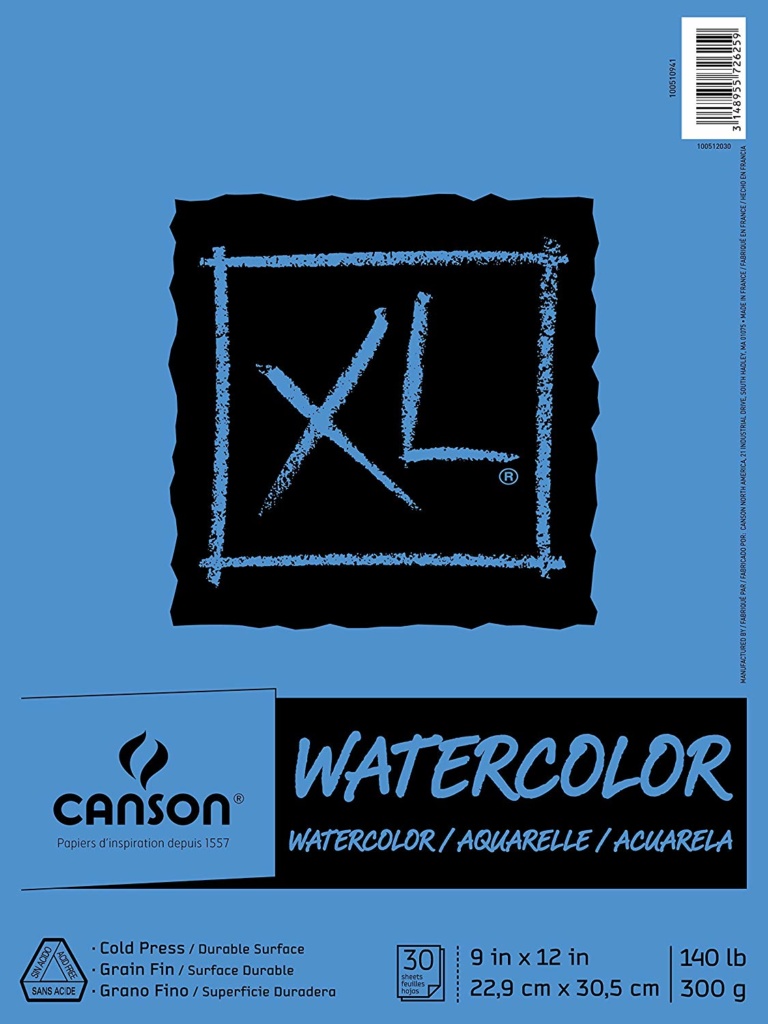
If you can only splurge on one thing to keep on hand for painting, splurge on some decent paper. I like this 140lb paper.
When I first started playing with Watercolors, I used the wrong paper. It would pill when I added water to it and it was frustrating enough to not want to paint so much.
After taking a Watercolor Painting Class on Skillshare (which was awesome, but don’t feel like you have to buy a class to dabble with watercolors. There are tons of great free tutorials out there), I bought the Canson paper that the teacher recommended.
Game changer. It’s not super expensive, either, so totally worth the extra couple of dollars. There’s no pilling, the color looks beautiful on it. I can’t imagine ever using anything else.
I’ve also used these little canvasses for an Abstract Watercolor Painting and they worked out well:

Check out this post for tips on where to start with Watercolor Painting.
Acrylic Painting Supplies
Currently I am in love with Acrylic Pour Paintings. I’m working on figuring out the process of doing them well and when I do, I will be sure to post a tutorial. The materials that I use for an acrylic pour are different than what you might you use for a regular acrylic painting. I’ve got a bunch of inspiration for other ways you can use acrylic paints in this Acrylic Painting Ideas post.
Acrylic Paints
For my acrylic pour paintings, I use these acrylics that I found on Amazon. They are the least expensive I could find and I went with the least expensive because I am experimenting and I don’t want to waste expensive paint on experiments.
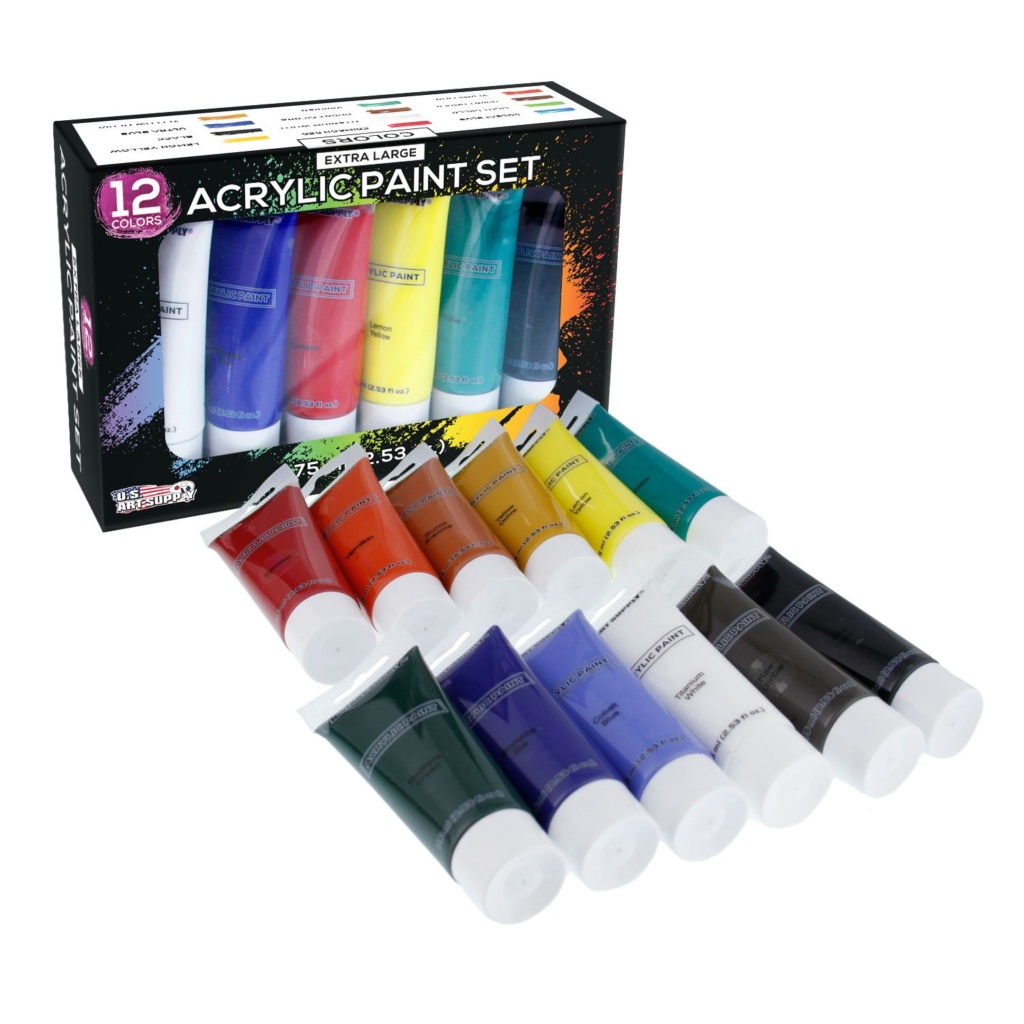
They work just fine for the application I am doing, but there’s no reason you couldn’t use them for other Acrylic Painting ideas as well.
Acrylics are on the pricier side, so I think it’s smart while you are learning or if you’re just really messing around, to use the less expensive paint.
Canvasses
Because acrylic paint is heavy, it is important that you use a tight, firm canvas. Especially if you are planning to do acrylic pour paintings.
Acrylic pours use a LOT of paint and flow medium which is heavy. If the canvas isn’t tight, the heavy paint may cause it to dip in the middle which actually will affect the look of your painting.
I’ve used these canvasses and they stand up fine to the weight of the paint:

You could also try the 5×5 canvas boards from above. The small size is great for experimenting with new color combinations.
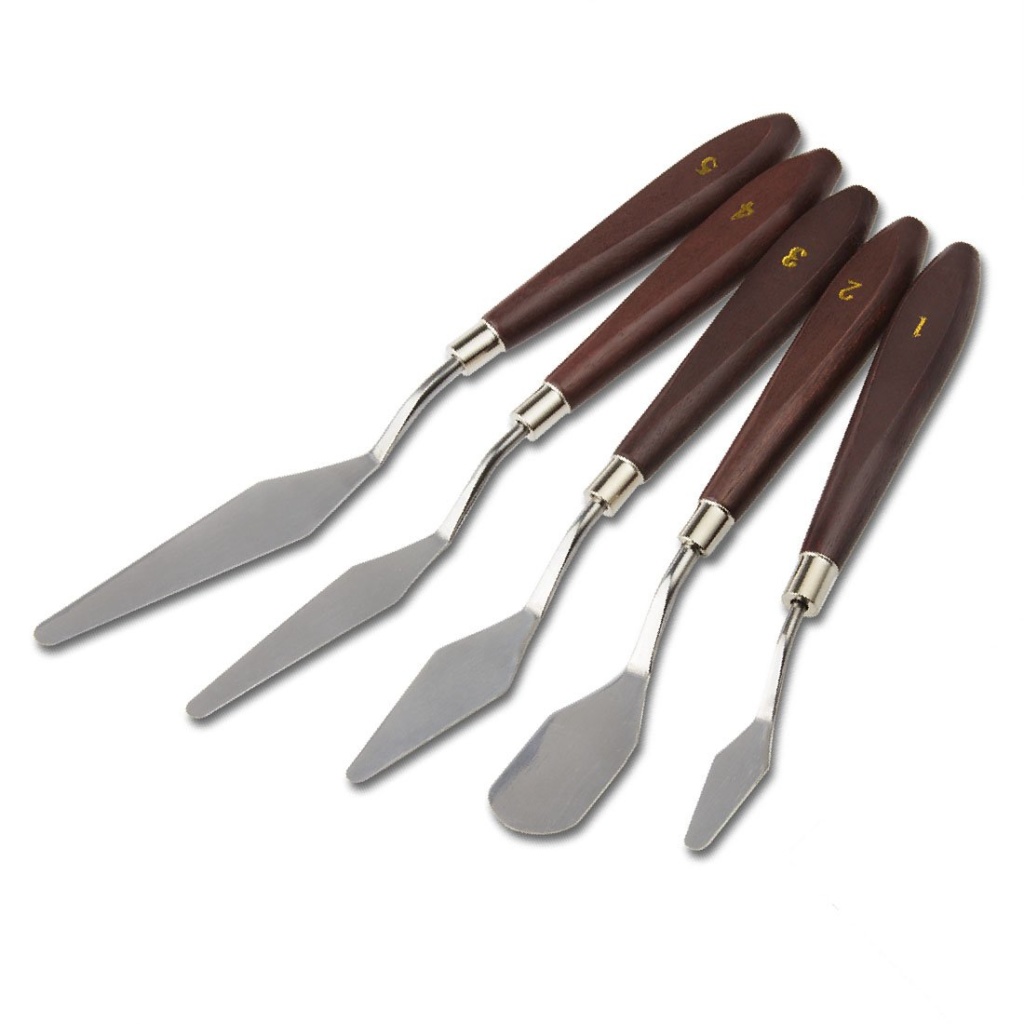
Acrylic Brushes
I don’t actually use brushes for acrylics as I’m going with the pour technique, but these are highly recommended:
Check out the full article about recommended acrylic brushes on Architecture Lab.
You may also want an acrylic palette knife when working with acrylics:
Acrylic Pour Supplies
If you’re interested in trying acrylic pour painting (you should! it’s so fun and super duper messy!), then you will need some additional items.
- Plastic Cups (grab them at the Dollar store!)
- Floetrol or other Pouring Medium
- Craft Sticks (or other disposable stirrer)
- Gloves
- Plastic of some type to cover your floor.
Acrylic pouring is not really a quick and easy “I feel like making something right now” project, but if it’s something you’d like to try someday, you can see that having the supplies on hand is essential.
Miscellaneous Art Painting Supplies
You probably have some great art painting supplies lying around your house and you don’t even know it. If you get a little creative you can “paint’ with lots of different things at that are are already lurking in your home.
Sharpies
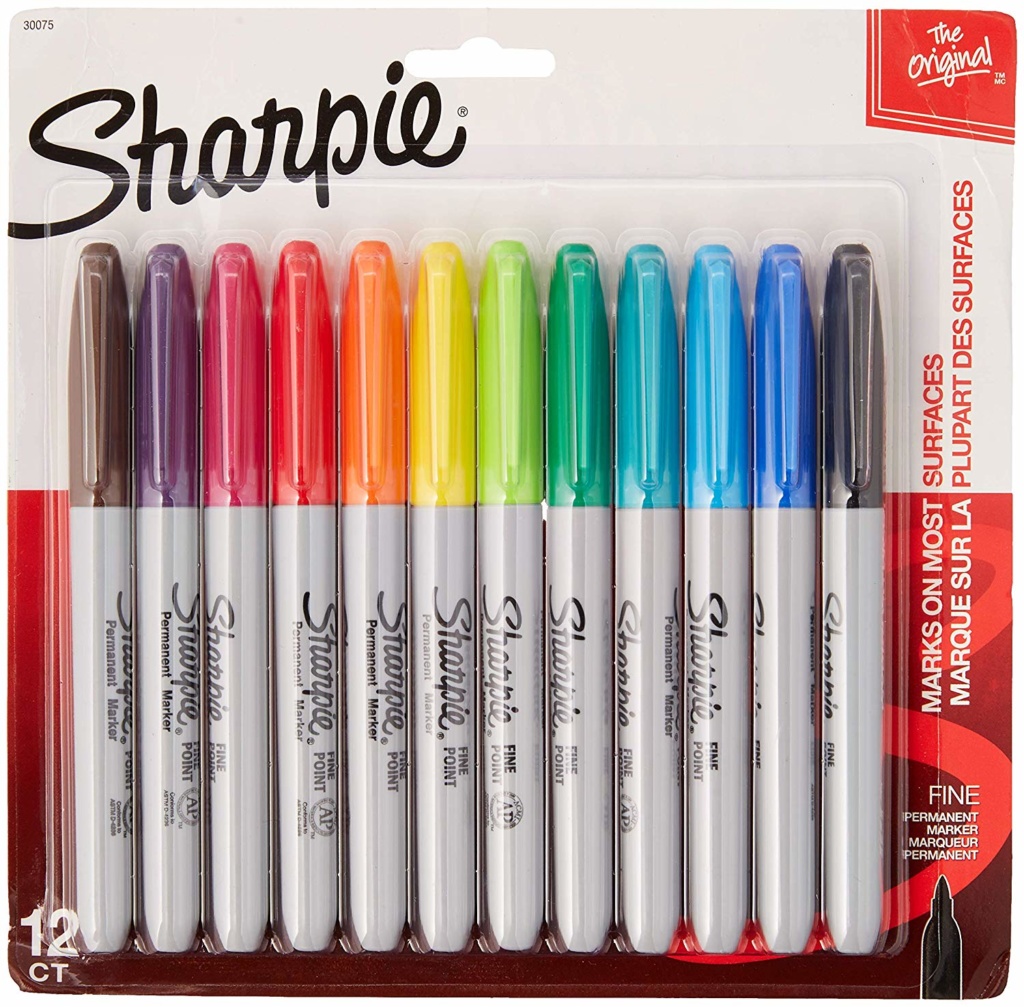
If you have Sharpies and some 91% Rubbing Alcohol you can paint. Ok, you also need something like a Q Tip and something to paint on, like a ceramic tile, but this is one of my very favorite easy painting ideas:

Nail Polish
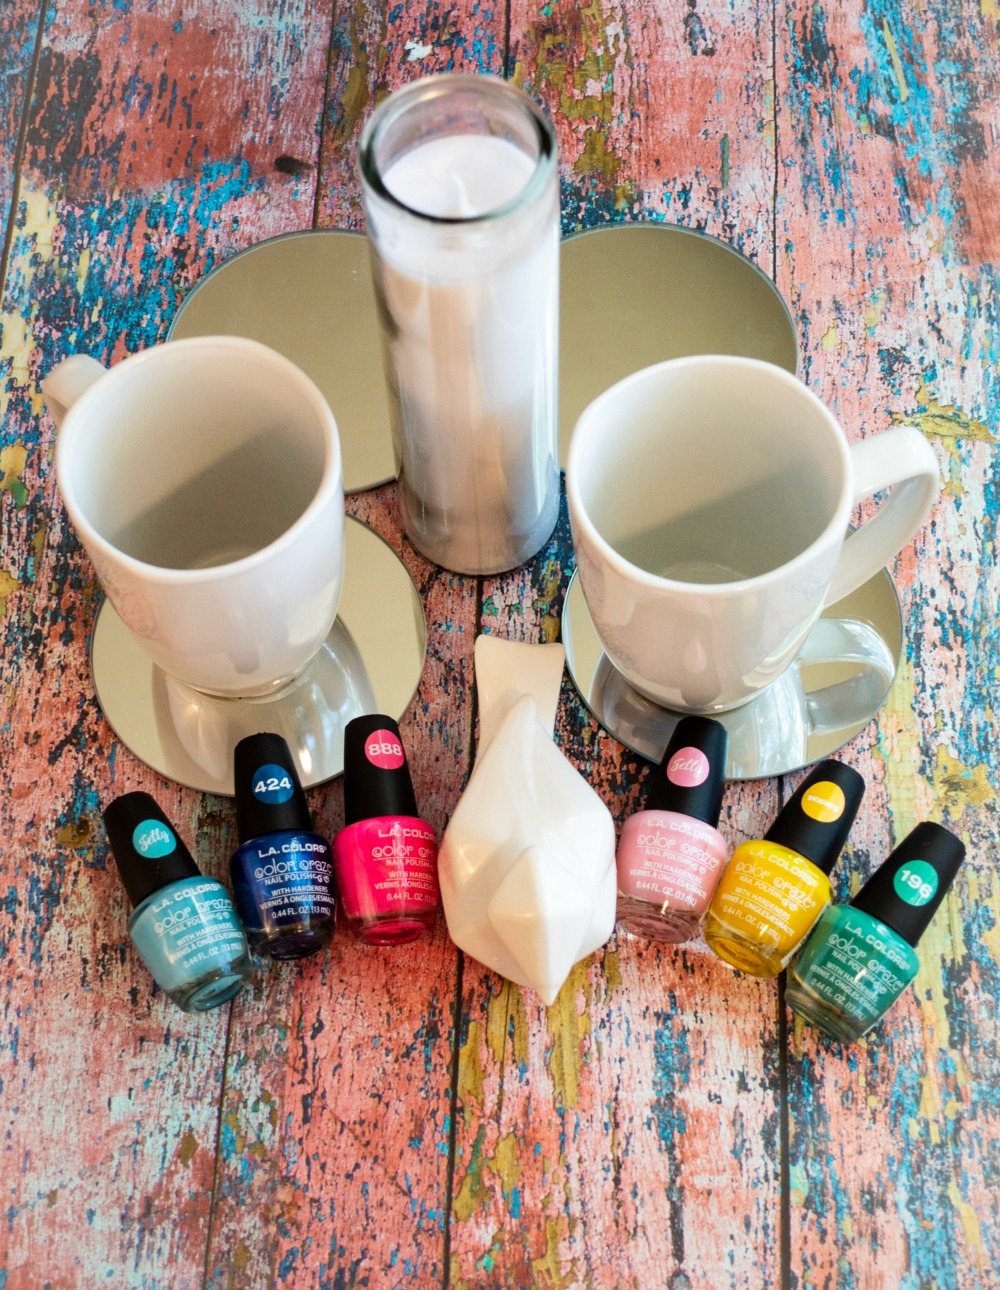
You know you have a shoe box full of nail polish that you don’t use somewhere in your bathroom, don’t you?
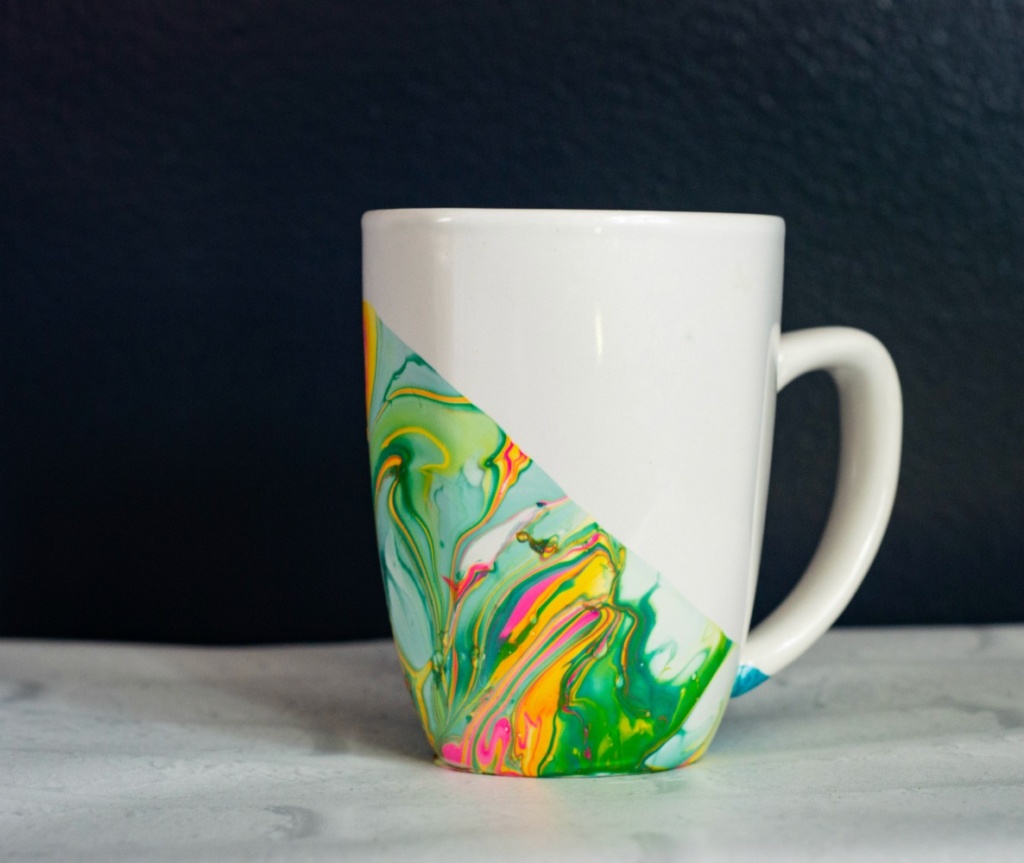
Grab it and try marbling some stuff with it. It’s super easy and also a tiny bit messy, so be aware of that before you get started. There’s a full tutorial for Nail Polish Marbling in this post.
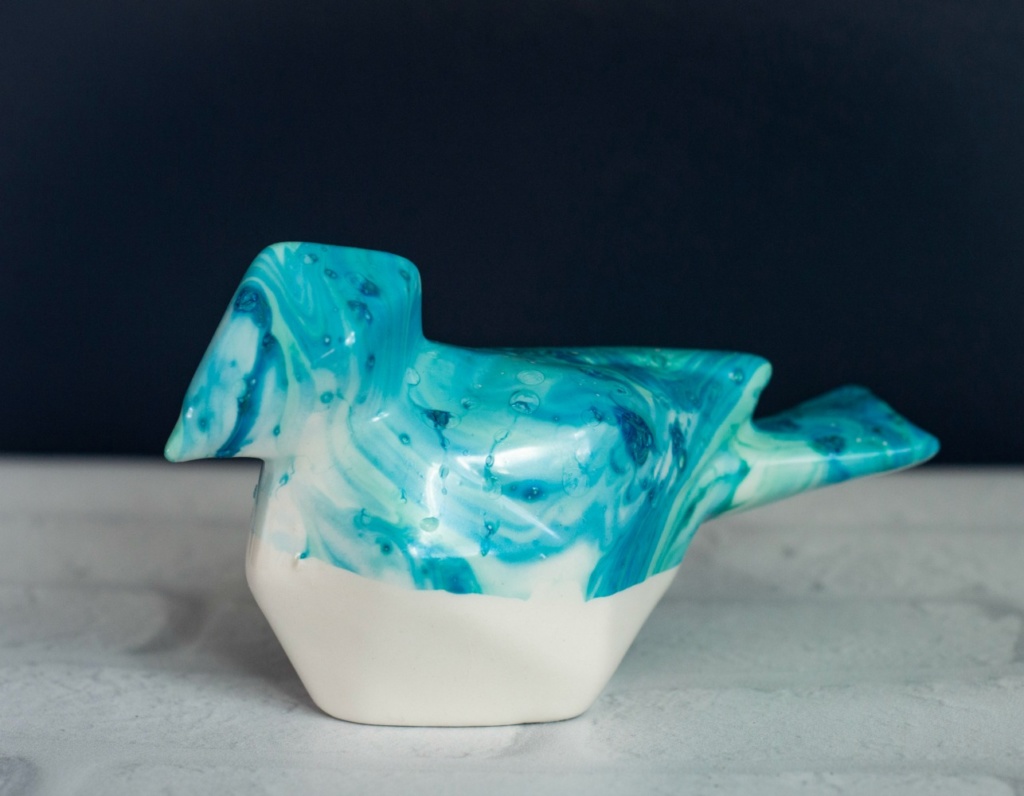
And if you want more Nail Polish crafts, I have those too!
Food Coloring
Did you know that you can make edible paint with Food Coloring? I mean, you actually probably do know that because you have more than likely decorated Easter eggs at some point, but you may not have thought about using the some food coloring mixture as paint for things other than eggs, right?
I love this recipe for edible paint. I wouldn’t eat it, by the way because sweetened condensed milk is not Keto. Just so you know. But if you little ones and you’re concerned about them getting paint in their mouths (and they will. they will get paint everywhere), then this is a fun option!
I wouldn’t encourage them to eat the paint. This isn’t a parenting blog, but I think this is more of a “just in case they put it in their mouths” type of thing, not a “snack time” type of thing.
Random Things to Paint On
You’ve got your watercolor paper, which is actually pretty versatile, you can use it with acrylics, too. You’ve got some canvasses. But don’t hold yourself to just those things as your blank canvas.
How about a handmade card that you watercolored?
You can paint on wood or glass or ceramic.
Have you jumped on board the Painted Rock bandwagon? They are so much fun to do.
![]()
If you’re using Sharpies, then you could even do clothing or sneakers as your canvas.
Keep your eyes open for things around the house that are begging to be painted!
Now What?
Well, you probably want to go run and paint stuff, right? But you can’t til you have the supplies on hand, which was the point of this whole post. So grab what you need from Amazon or the Craft store and keep it all handy so that when you get the urge to create, you’ve got your art painting supplies ready to go!
If You Liked It then You Shoulda Put a Pin In It!