I had the clay out for the cute little light up Christmas trees I made this weekend, so I figured while I was at it, I should just keep creating. I’m so glad I did! I made these adorable little DIY Clay Christmas Ornaments for my tree and I love how they came out.
They were also a super simple and easy craft. And since I already had all of the materials I needed, they were basically free.
**This post contains affiliate links. If you click one and make a purchase, I may earn a small commission. Thank you for supporting Lifestyle for Real Life.**
A So Simple Christmas Craft – DIY Clay Ornaments
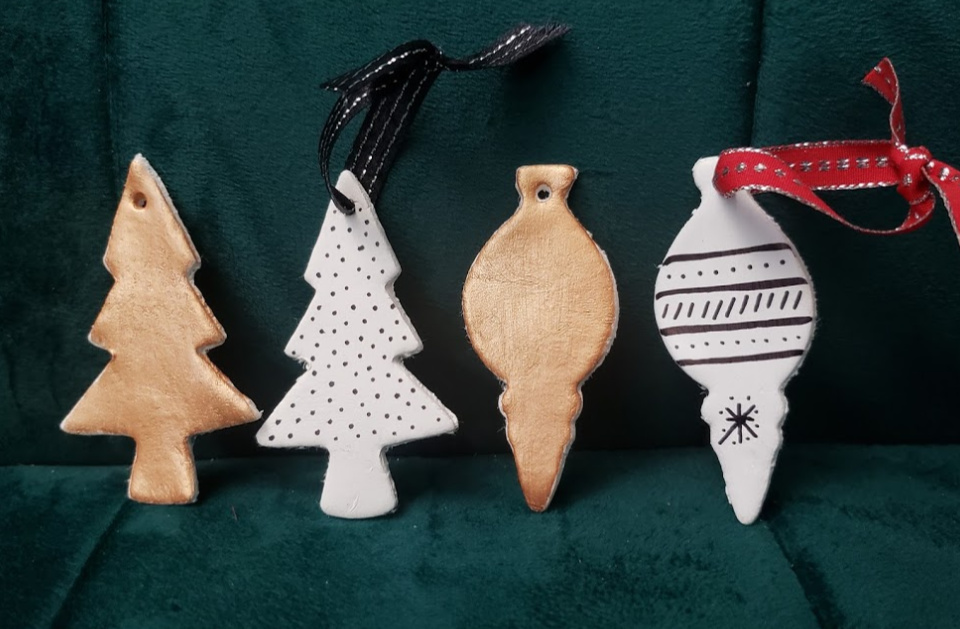
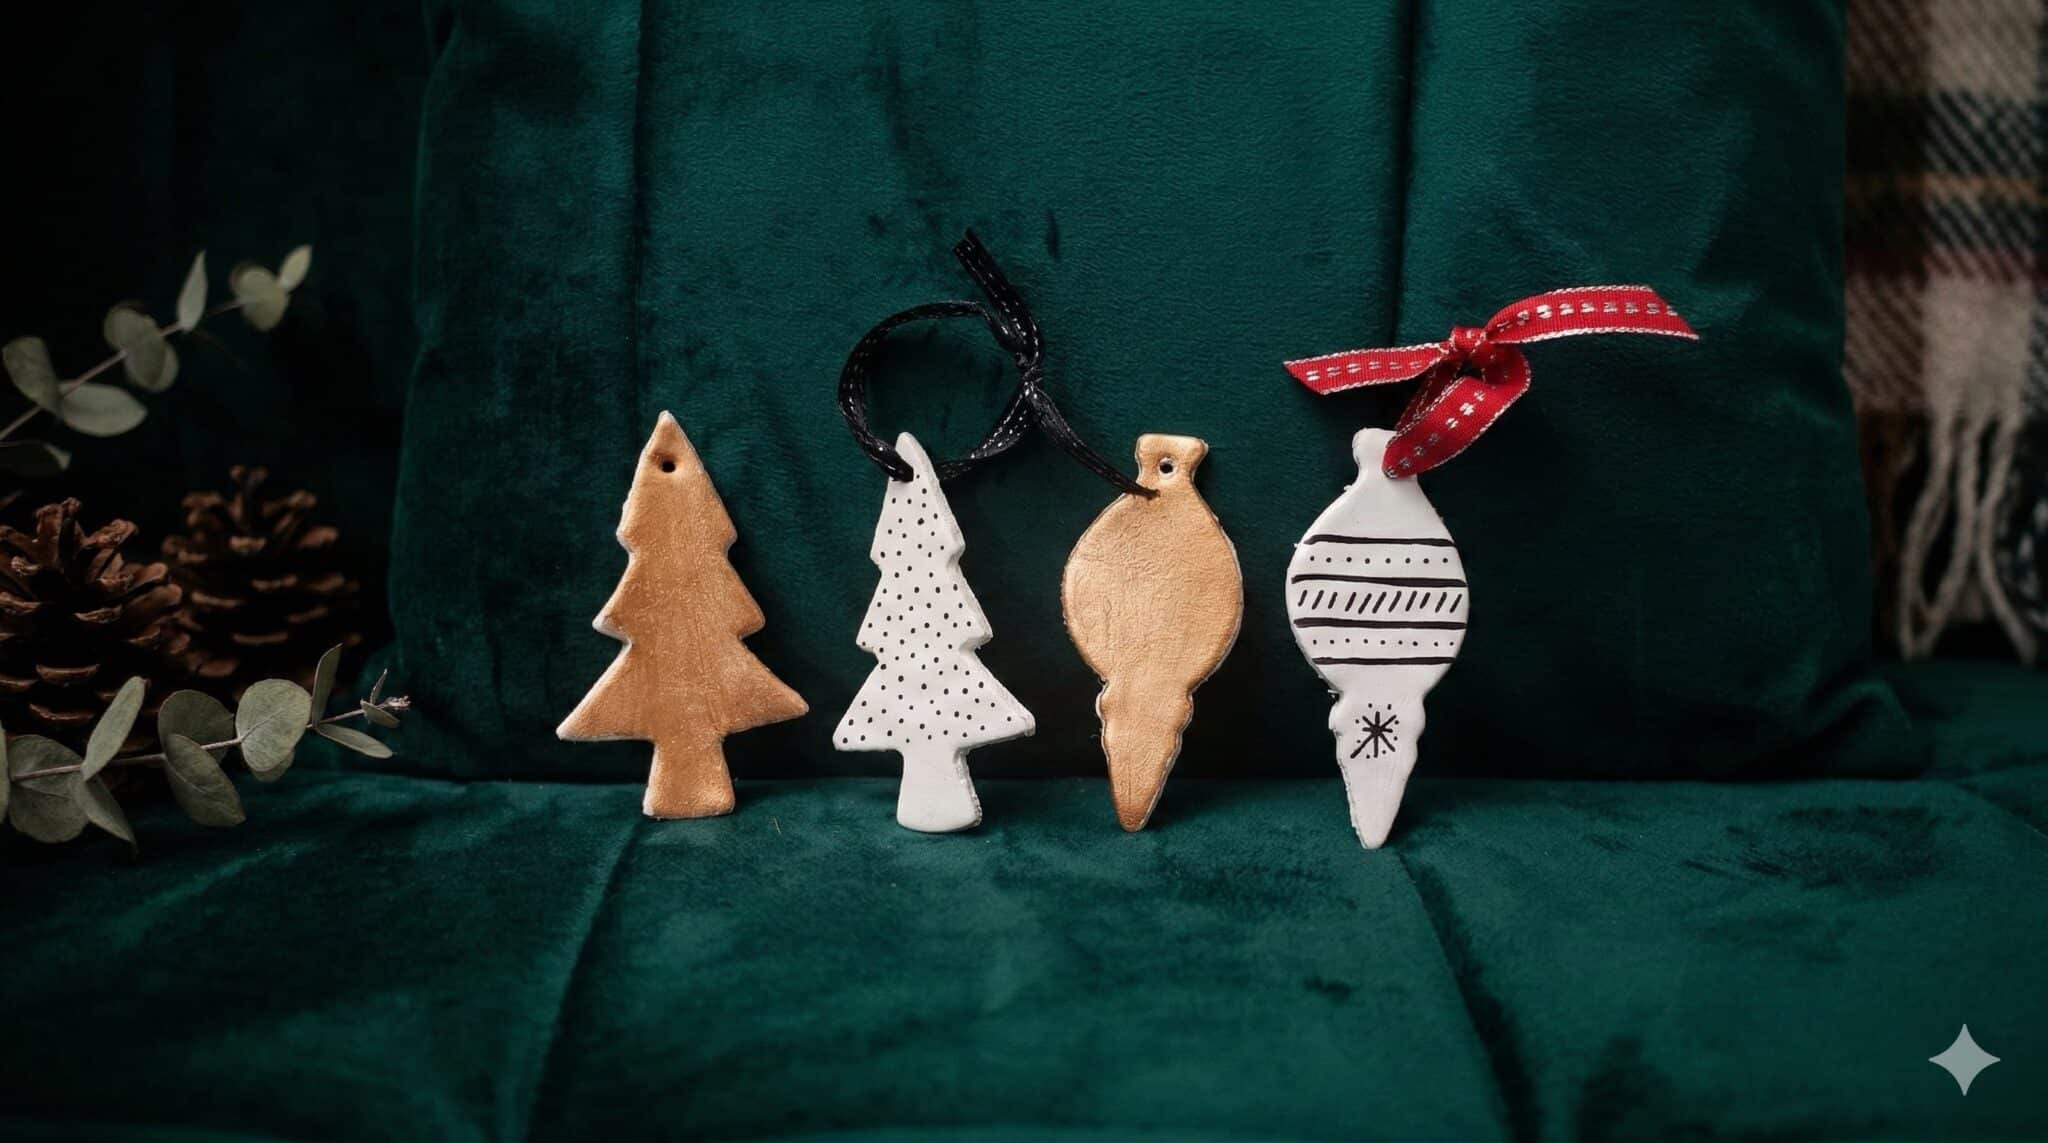
They are cute, right? My tree is (will be, it’s not up yet) black and white with some gold. It’s prettier than it sounds.
Or it was last year.
So I did a couple of “gold” (ok, fine they are copper, but that’s my favorite craft paint) of gold ones and I couple of black and white ones.
I like the graphic-ish-ness of the black and white ones, but once you’ve made the clay ornaments, you decorate them in any way you wish.
Here’s the low down on what you need to do.
Step #1 Gather your materials
- Air Dry Clay
- Christmas Cookie Cutters (I love the metal ones because you REALLY need them to cut through the clay)
- Gold (or copper) Craft Paint
- White Craft Paint (sort of optional)
- Black Sharpie
- Some skinny ribbon of your choosing so you can hang your ornament
- A rolling pin (or other cylinder you can roll your clay out with)
- A skewer so you can make a hole for your ribbon
I am a bit of a craft hoarder, so I had all of that stuff. The clay and the cookie cutters are the essentials, though. You can improvise on the rest of that stuff with whatever you have in the house.
Step #2 – Roll out Your Clay
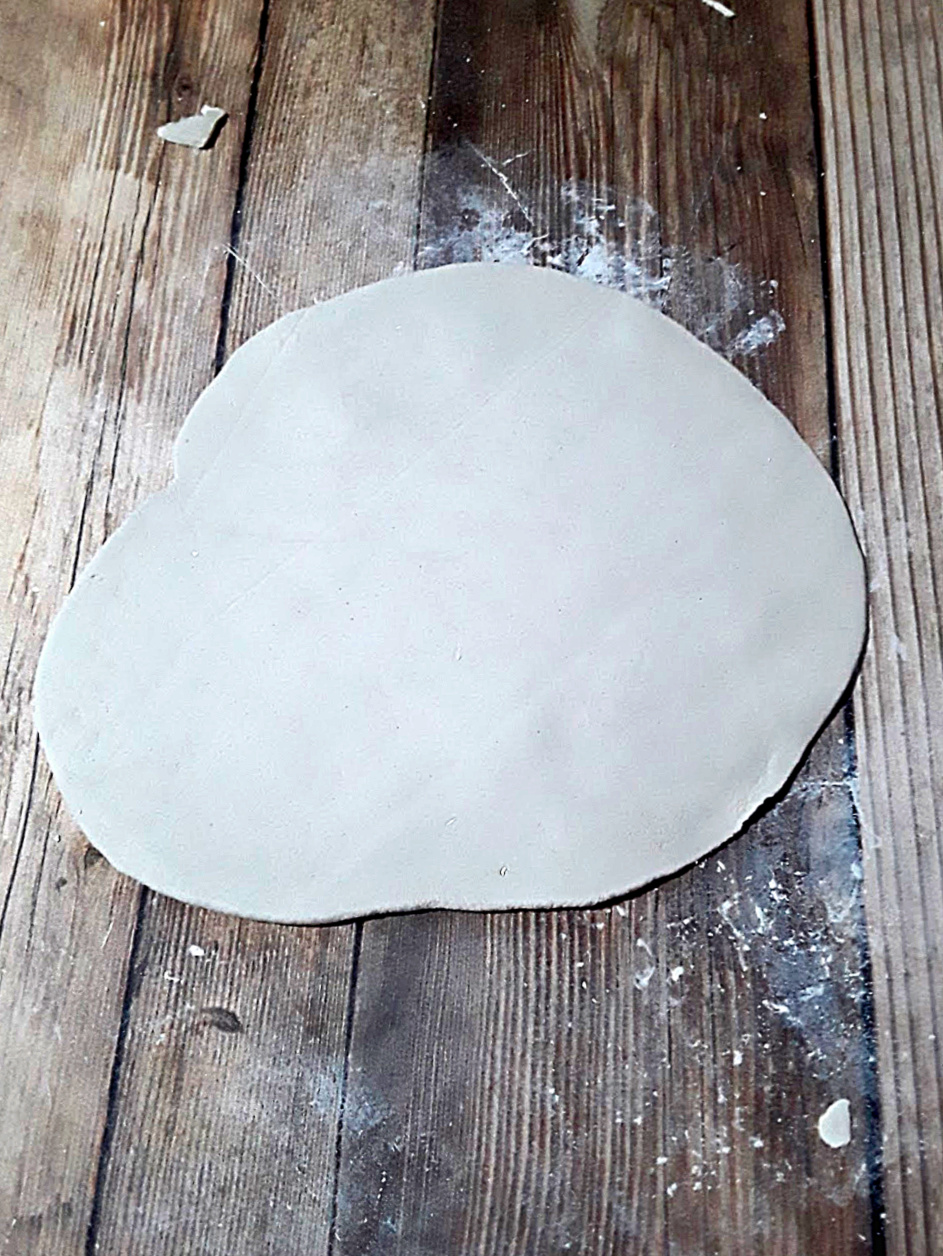
You want to get your clay “warmed” up. Just rub it around in your hands for a couple of minutes til it’s warmed up and malleable.
Plop your clay down on the counter (ps, that’s a vinyl photo backdrop that I’m working on, not actual wood. Don’t attempt this on actual wood. It won’t work out for you).
Roll out the dough with your rolling pin (or, if you’re like me and can’t find the rolling pin, you can substitute a can of Raid. Yes, that’s the only other thing I had in the house that would work for rolling out clay) to about an 1/8 of an inch? Pretty, thin, ok? It’s not particularly important how thin, but the thinner the clay, the lighter the ornament on the tree and the faster the clay dries.
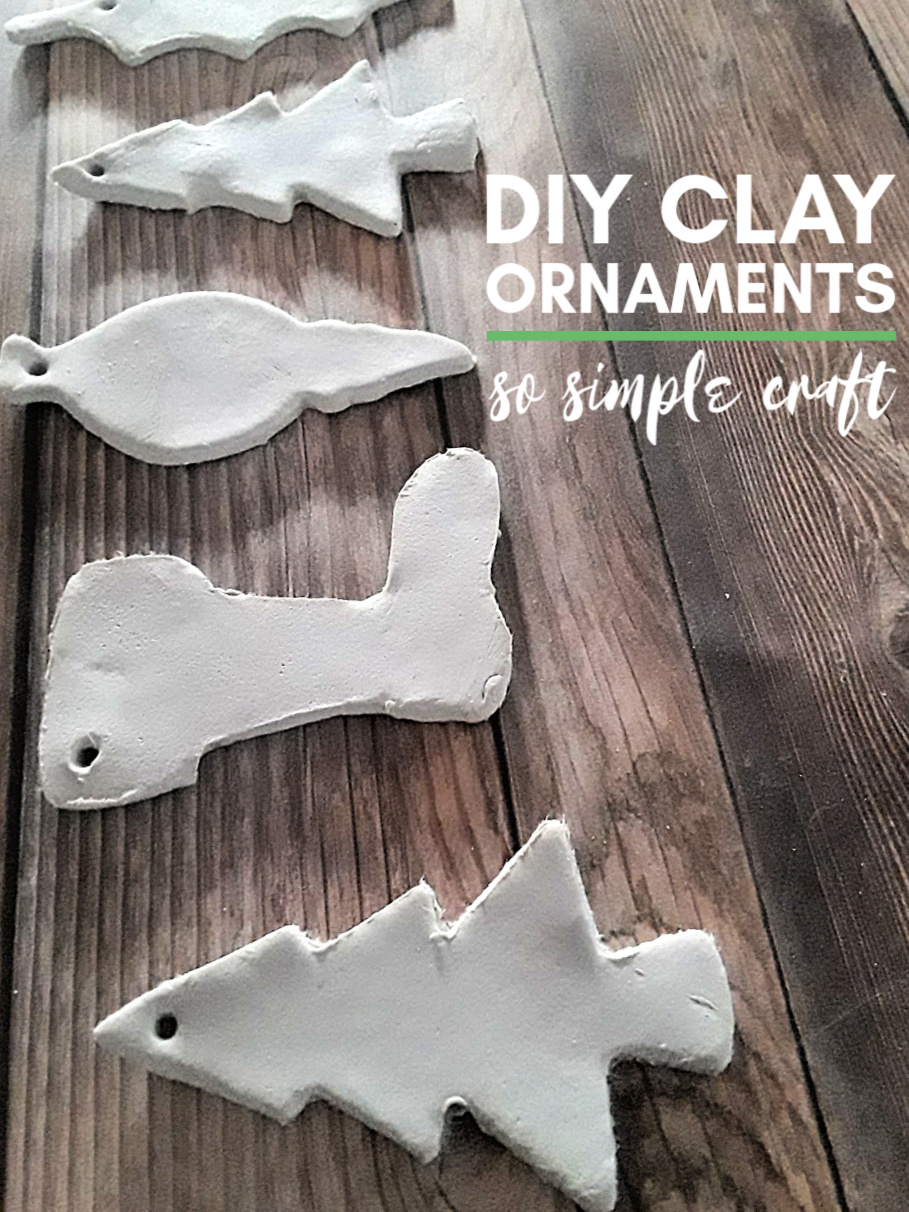
Step #3 – Use your Cookie Cutters to Cut Out Your Ornament Shapes
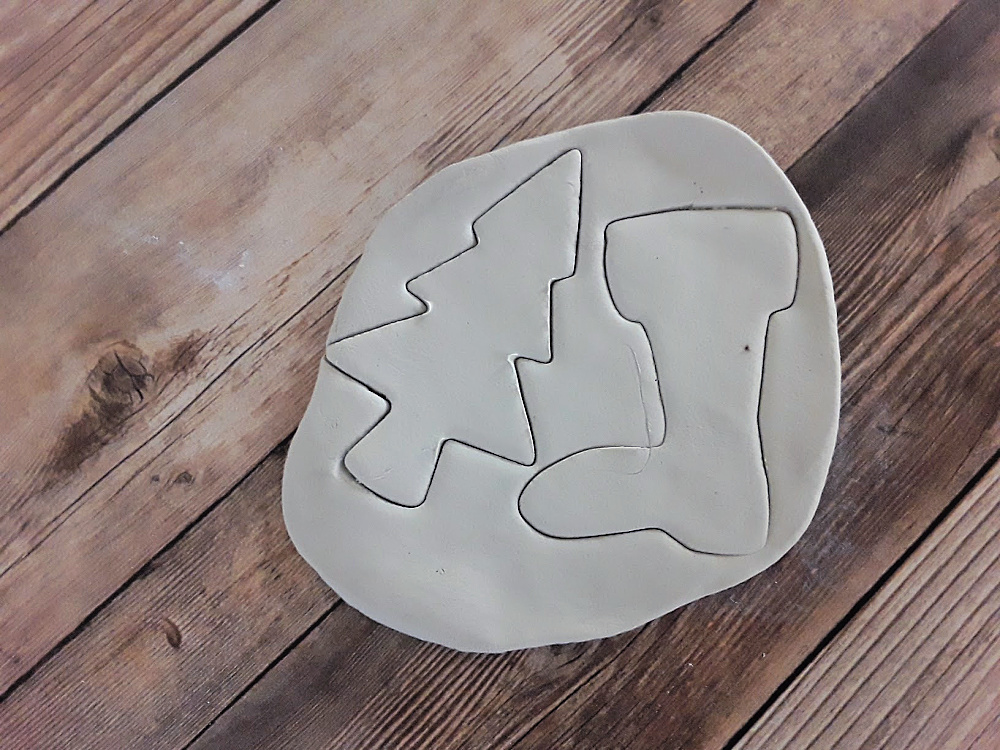
There’s actually a little bit of science to this step. Ok, not science, skill, I guess is a better word.
This isn’t like cutting out cookies where it doesn’t matter what the edges are like because they are going to bake and puff up and then you’re going to eat them and shaggy edges don’t make them taste any less delicious.
That stuff does matter when you are making ornaments. You need to make sure that you are pressing down VERY firmly and getting ALL the way through the clay. Then, tear the excess clay up and away from the cookie cutter.
This will give you the cleanest cut. You’ll still be left with this weird hairy fuzz on the edges of your ornament, but you can smooth that out with your fingers.
Step #4 – Poke a Hole in the Top-ish of Your Ornaments
Umm, grab your skewer and poke a hole in the top-ish of your ornament.
Step #4 – Allow Your Ornaments to Dry
There’s actually a little bit of science to this step.
JK, no there isn’t, just let them dry over night.
Step #5 – Decorate Your Ornaments

There’s absolutely ZERO science to this part. I’ll let you know what I did and then you can do whatever you like!
I painted all of the ornaments first. They dried basically white, but I wanted them Really Really white, so I did quick coat of white craft paint. Except for the copper ones.
I painted those… copper. Cause there’s no point painting the white and then painting them copper. That’s just silly.
I used a black sharpie to make the polka dot tree and I used the very same black sharpie to design the little ornament shaped ornament.
Step #6 – String Some Ribbon Through the Hole
I had some leftover ribbon from these wood burned ornaments I made a million years ago, so I used that as a hanger for my ornaments.
You could use twine or wire or just some string. Whatever you have on hand that will fit through that hole will do the trick.
Just something to hang it from the boughs of your Christmas Tree.
And That’s It!
You could make enough of these ornaments for your whole tree if you really wanted to. I love this idea for someone who has just moved into their own place and has no ornaments. You could even have an ornament making party and everyone makes 2 ornaments. One for themselves and one for your tree.
OH, I love that idea! You should do that.
So sentimental. And not ugly like the one’s your kids will make someday when they are in school.
PS! If you have kids who love Elf on The Shelf, check out this post that combines Elf On the Shelf with the 12 Days of Christmas!
And if you want another DIY ornament idea, try these Marble Ornaments!
If you love super simple and easy crafts you should sign up for my newsletter! I’ll let you know every time I make something new and I’ll send you past projects that you will love.
Make More Crafts That Make People Say WHERE DID YOU GET THAT?!

My 10 Favorite Craft Projects
If you loved this craft, you’ll love “Thanks, I Made It!”
I pulled together my 10 all time favorite craft tutorials that I’ve made for myself and get tons of compliments on!
There are super simple to follow tutorials in an eBook format, so no annoying ads :-)!
There’s even a bonus tutorial on Macrame knots that will you get started with macrame even if you have no clue what you’re doing!
If You Liked It Then You Shoulda Put a Pin In It!