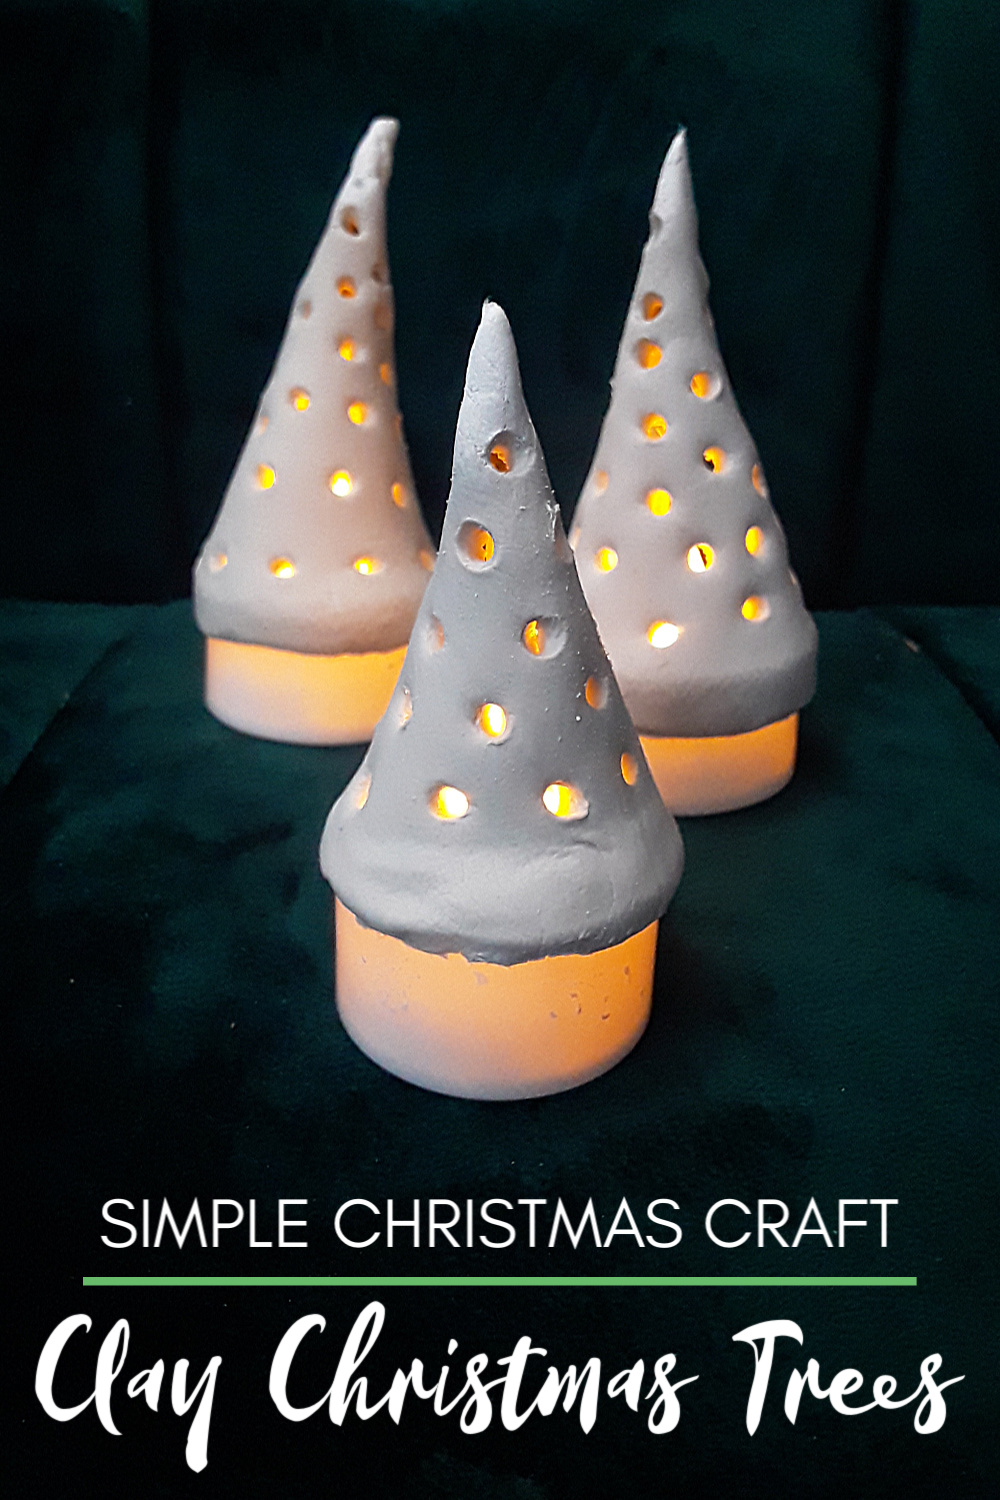
I saw the cutest little air dry clay Christmas Trees with little tiny star cut outs placed upon fake tealights so that the golden light shone though the wholes in the shape of starts.
I immediately wanted to make them but the tutorial involved creating a pattern and I buying a teeny tiny start cut-er out-er, neither of which I was interested in doing.
I already had the air dry clay and the fake tea lights, I wanted to make something now, not futz with a pattern and wait for a teeny tiny star cut-er out-er to arrive from Amazon.
So I did what I usually do.
I winged it. They came out pretty freaking adorable, if I do say so myself.
**This post contains affiliate links. If you click one and make a purchase, I may receive a small commission. Thank you for supporting Lifestyle for Real Life.**
DIY Christmas Craft – Air Dry Christmas Tree Tea Lights
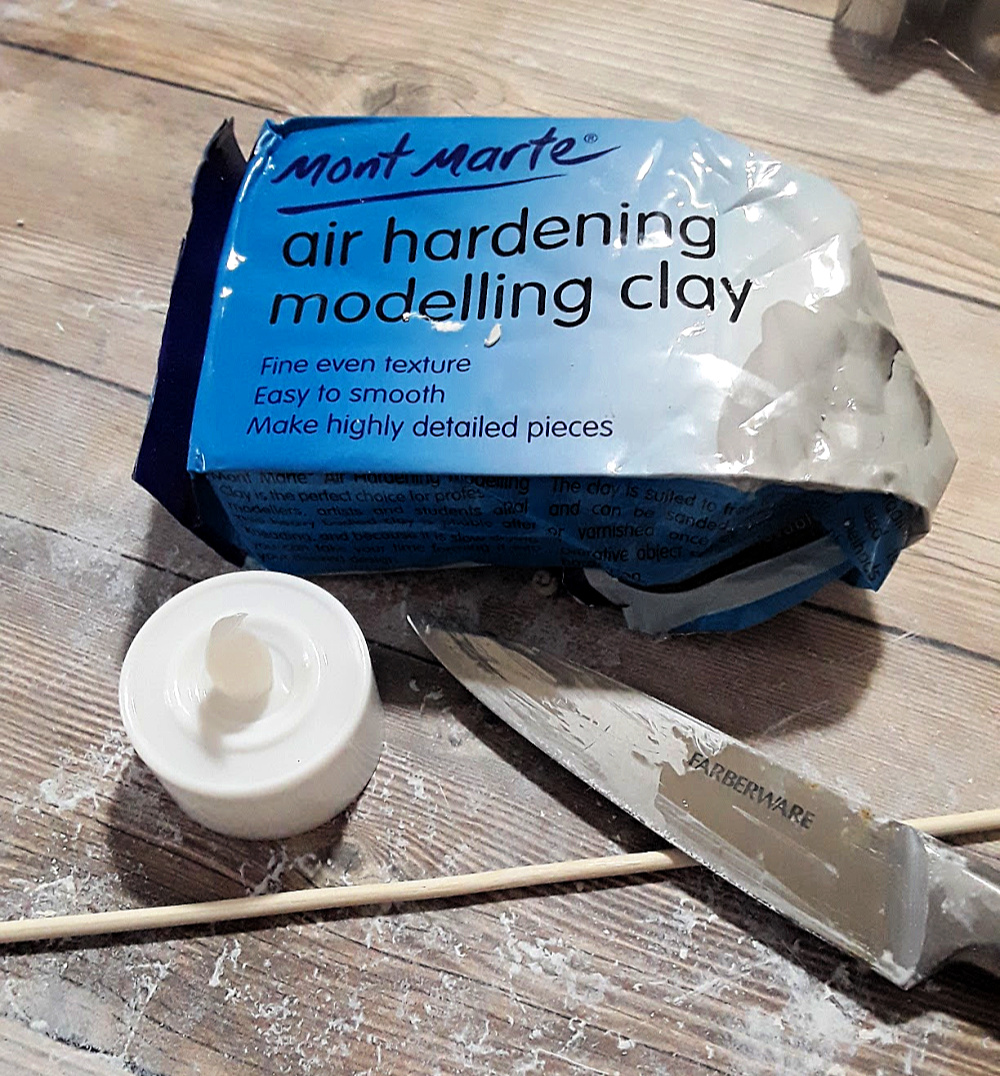
First, a disclaimer. This was the first time I’ve worked with air dry clay. I didn’t realize the clay that I bought was the color of, well, clay, and not white. So I had to paint my little trees after they dried.
I recommend getting WHITE air dry clay and not the fancy Mont Marte stuff I used.
Other than that, the air dry clay was pretty fun to work with, but it dries FAST. Be prepared to get this project done in like 15-20 minutes and don’t think you can leave it and come back to it. You can, technically, but it’s a thousand times easier to work with the clay when it’s moist and sticky.
The upside to that is you can totally make 3 trees in like 15-20 minutes.
You ready? Let’s go.
Materials
- WHITE air dry clay
- A knife of some sort
- A skewer
- A rolling pin or other cylinder to roll out your clay
- A “fake” tealight
Instructions:
#1. Gather your materials. In case you feel like you can’t do this craft because you don’t have a rolling pin, I actually used a can of Raid. So, improvise if you have to. Except on the tealight. You don’t want to use a “real” tealight that you have to light. You want the faux flame here.
#2. Knead your clay. This involves smushing and rolling the clay for a little bit until it is easy to work with. This is the “art” part of arts and crafts. There’s not a magic amount of time you need to do this for.
#3. Roll out your clay. Rip of a chunk of clay from your brick of clay. I don’t honestly know how to describe how much clay you are going to need. Take a little bit more than it seems like would be necessary and if it’s too much, no biggie.
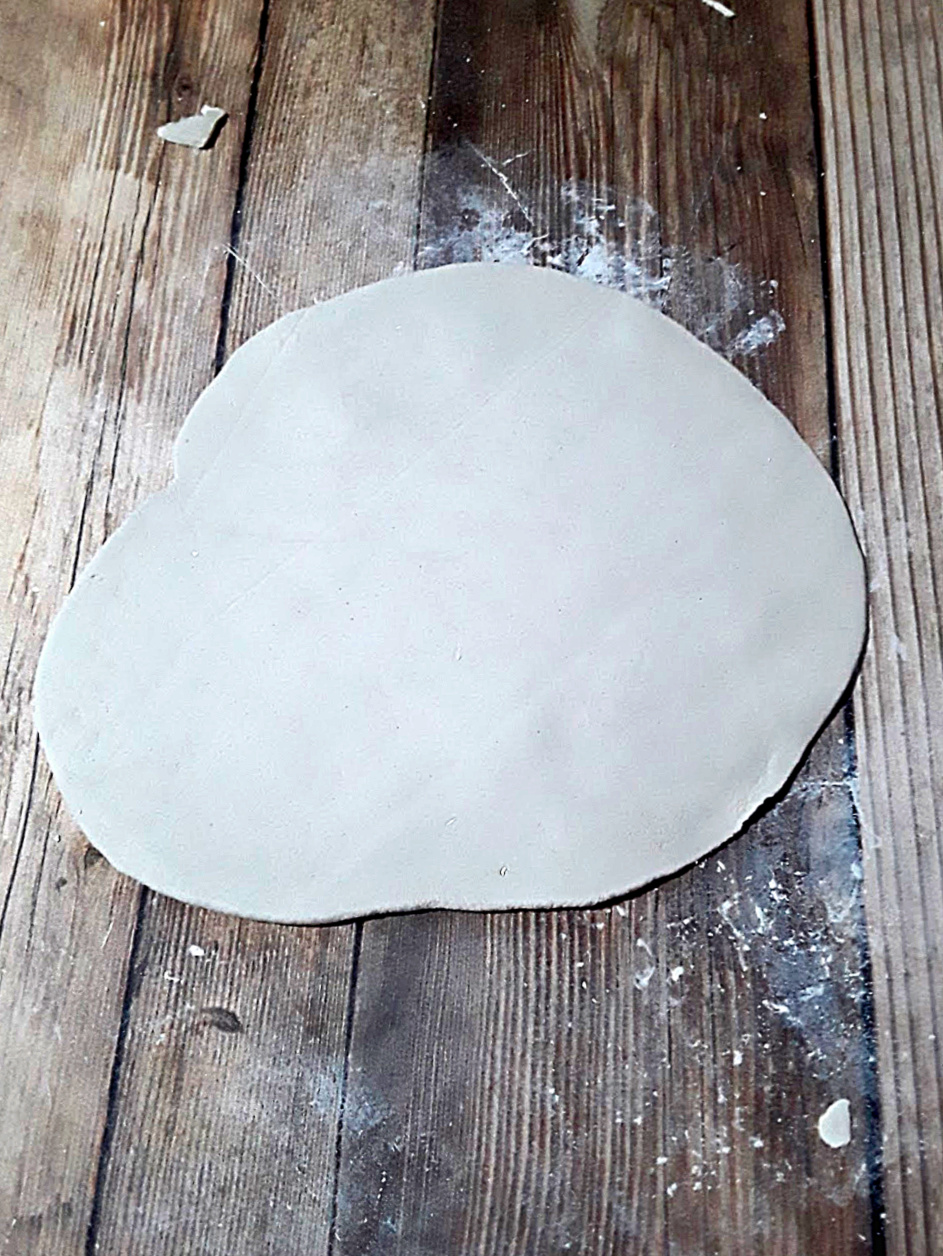
Also, if it’s not enough, no biggie. You just have to add more and roll it out again
Rolling out clay is like rolling out bread. Don’t roll in long rolling motions. Just bank and forth, rotate the clay a 1/4 turn and roll a little more. Rotate another 1/4 turn and roll a little more.
You want to get the clay pretty, pretty thin. Like an 1/8 of inch? About that. Just, thin. Ok?
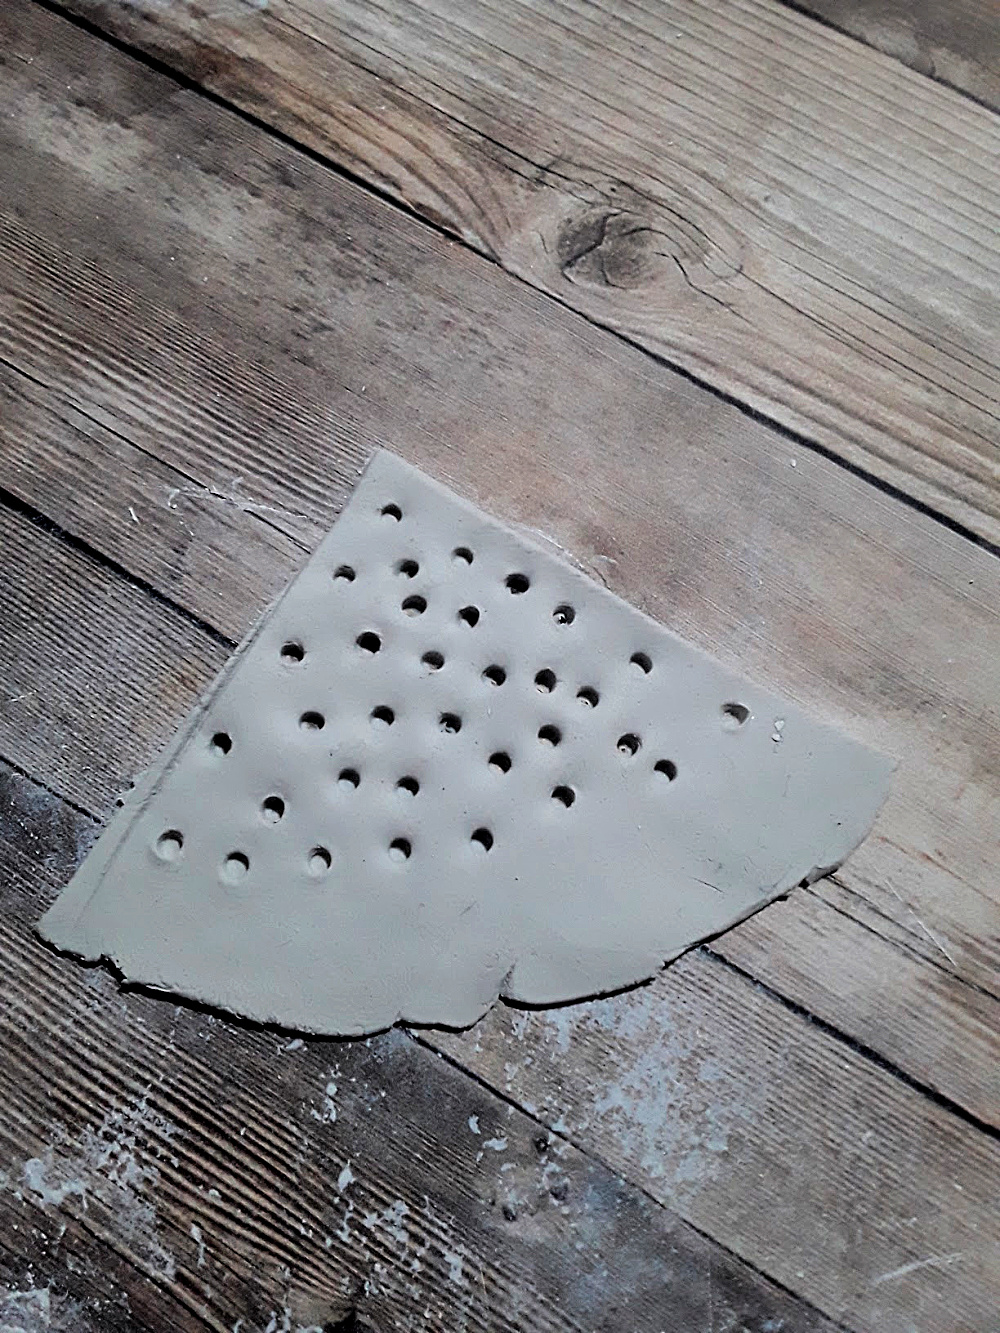
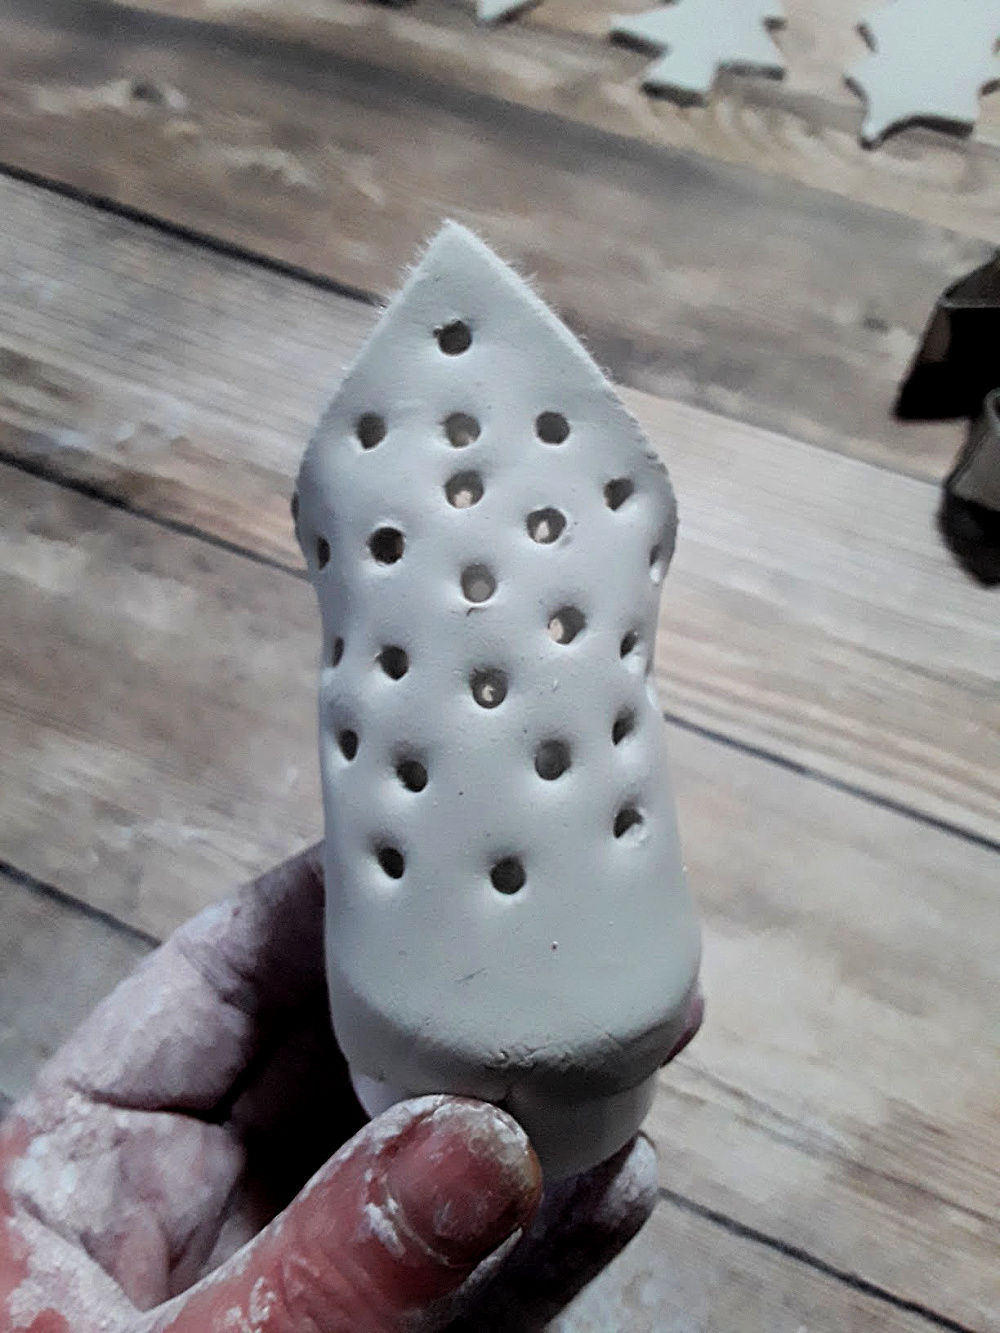
#4. Ok, now your going to make a cone-like shape with your knife. It looks like this:

#5. Now your going to poke some holes in your clay with your skewer. Use the dull end of the skewer. We’re going to touch up the holes later with the pointy end. Each tree that I made, I started with a pattern for the holes and about 1/3 of the way through, I just went haphazard. So you choose your method of placing poked holes.
#6. Wrap your clay around your tealight.
At the back of the tealight, you’re going to close up some of the clay so that it looks sort of like this:
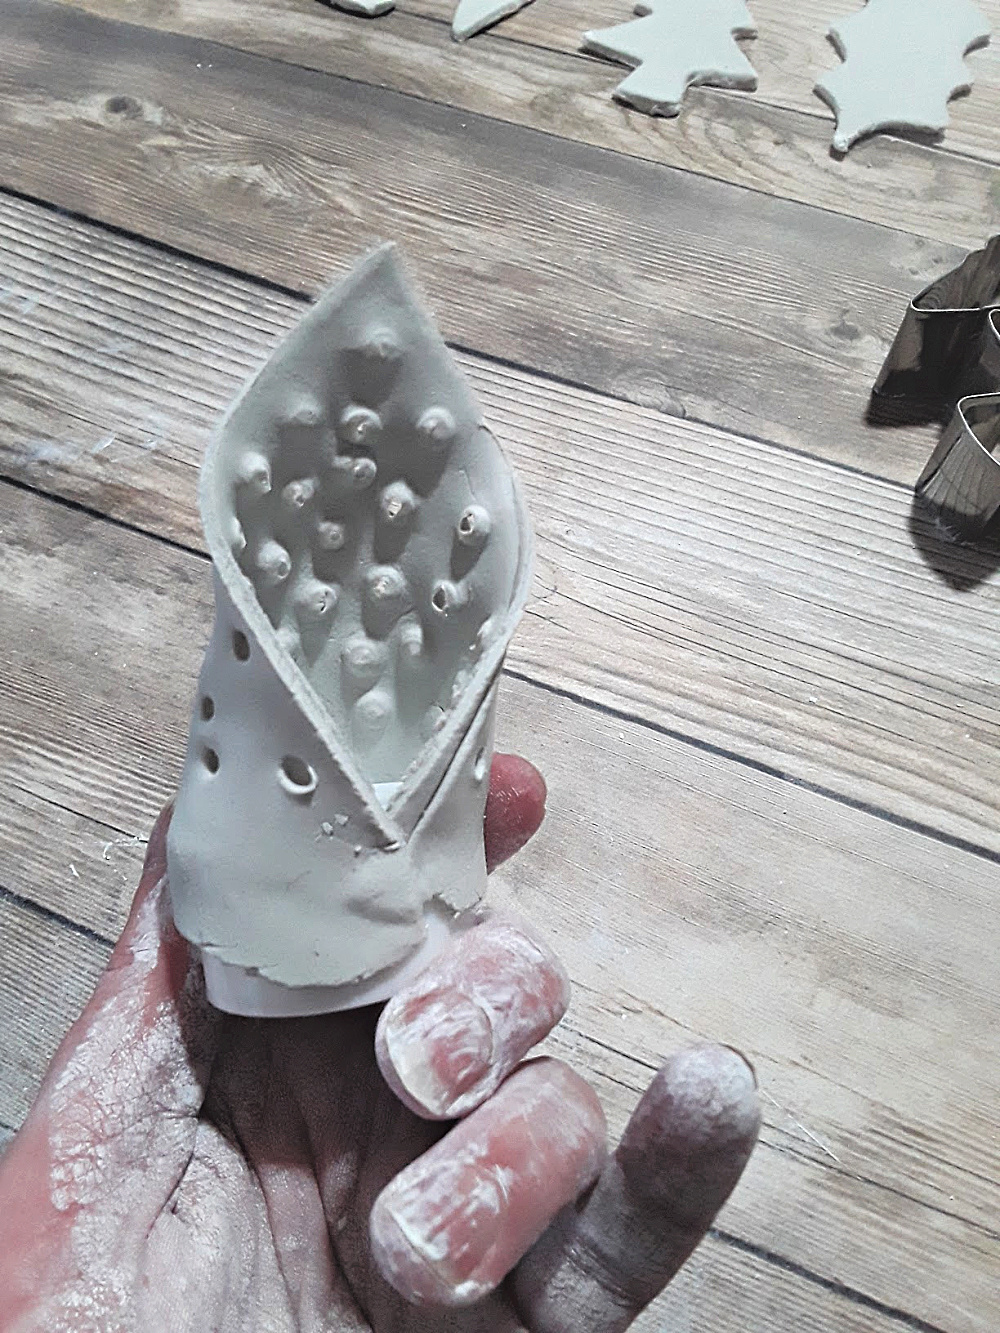
Then you’re going to pinch the top closed:
This is more “artsy” type of work. Do you best. Wrap it around, fidget with it, smooth, pat it, rearrange it… Until you have something that looks like a tree. Remember it’s clay so you can mess with it until you’re happy or can crunch it back into a ball and start over.
You can’t really mess this up unless you take too long and it starts to dry out, but you won’t do that.
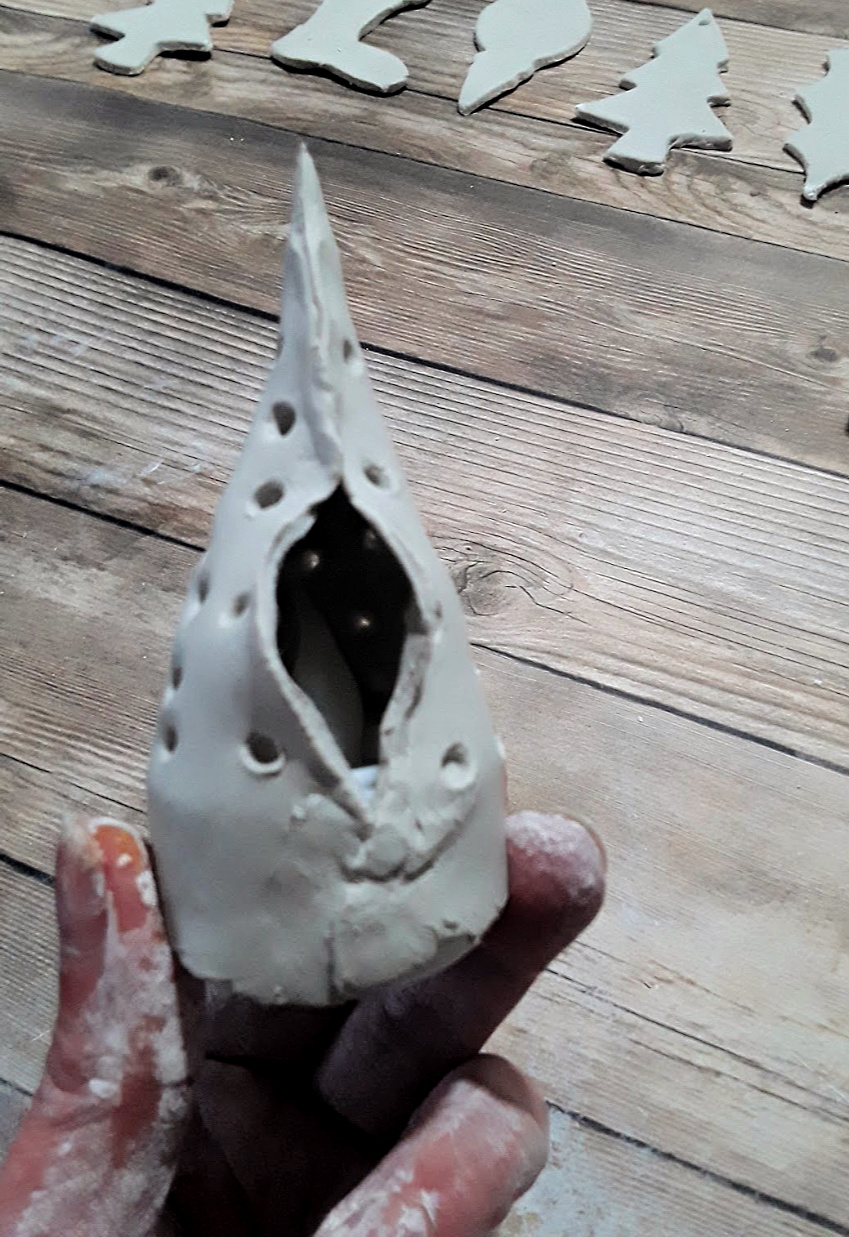
#7. Trim some of the excess from around the tealight. I used my knife to make the clay that is around the tealight a little more uniform looking.
#8. Let the trees dry.
And, have no fear. The trees don’t actually adhere to the tealights, so when the tealight battery goes, you can remove the tree and pop it on another tealight.
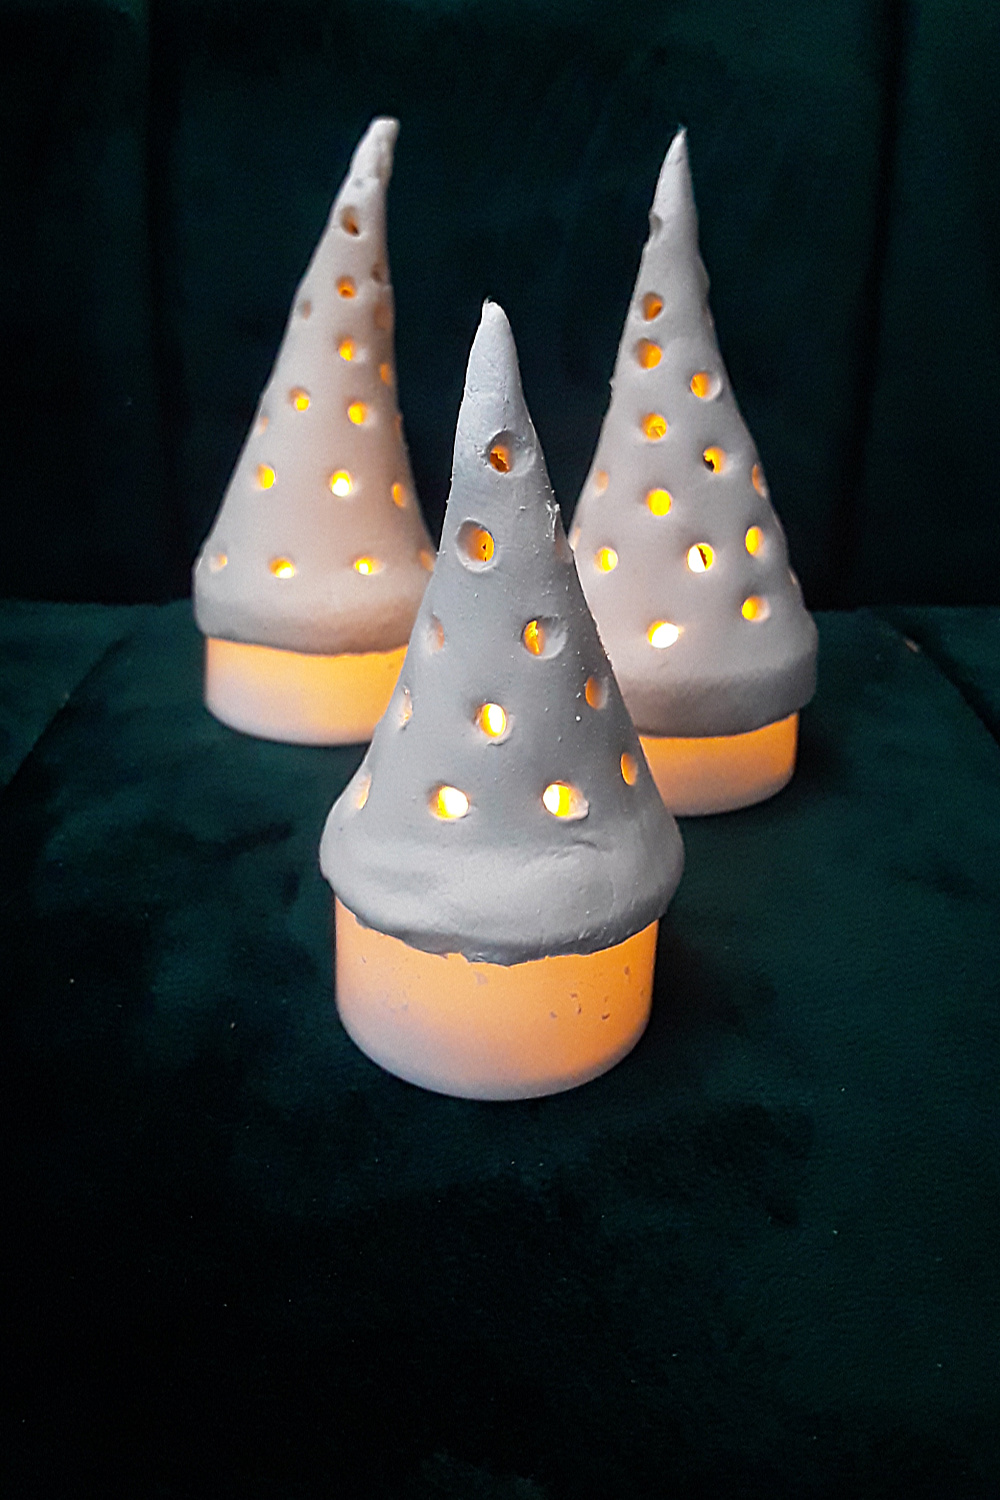
So cute, right?
Make More Crafts That Make People Say WHERE DID YOU GET THAT?!

My 10 Favorite Craft Projects
If you loved this craft, you’ll love “Thanks, I Made It!”
I pulled together my 10 all time favorite craft tutorials that I’ve made for myself and get tons of compliments on!
There are super simple to follow tutorials in an eBook format, so no annoying ads :-)!
There’s even a bonus tutorial on Macrame knots that will you get started with macrame even if you have no clue what you’re doing!
Looking for more handmade Christmas Crafts? Check out these:
DIY Marbled Christmas Ornaments
DIY Wood Burned Christmas Ornaments
If You Liked It Then You Shoulda Put a Pin In It!