I don’t know if I’ve gotten across to you completely that I’m terrible at crafts. I’m sure I haven’t, in fact, because that would be dumb. You come here to get a craft tutorial and then I say, here’s this one and, by the way, I’m actually terrible at this. I mean, I SELL an ebook about my 10 favorite crafts . Telling you I’m terrible at them is not a good business move. Except, that it kind of is. I’ll explain this, I promise. As I tell you about this Upcycled Succulent Planter that I made today. This post contains affiliate links. If you click one and make a purchase, I may receive a commission at no additional cost to you.
You may know that I am officially a reformed plant killer. I have adorable little succulents that I did research on and they are THRIVING, people. They are actually GROWING! It’s quite remarkable. I wanted to make a new little container for my succulents, so I did some research on DIY Succulent planters. I found some super cute ones and they inspired me to go out and find something to upcycle as a succulent planter.
I knew my upcycled planter had to have a couple of important features. It had to be roomy enough for the succulents. They like some space to grow. I also didn’t want something with a glass cover. Succulents need air to breathe. And most importantly, I wanted something that already had some holes in the bottom because the one thing succulents REALLY like is soil that can drain and dry ALL THE WAY out before you water them again.
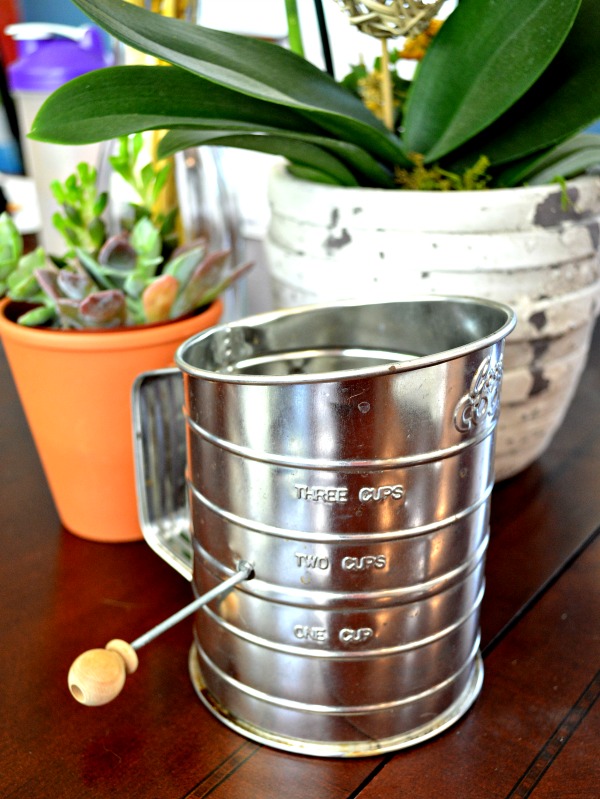
So I went searching at my local thrift store. I found cool stuff that didn’t have holes in it. I found a really cute colander that I actually bought and I will probably use for something else. Maybe even as a colander! And then, I found a flour sifter.
It was cute-ish. I don’t think it’s old, but it feels old-timey. It was super shiny metal and I knew I would want to do something to remedy that, so it had potential as an upcycle and not just a, I bought this thing and stuck succulents in it.
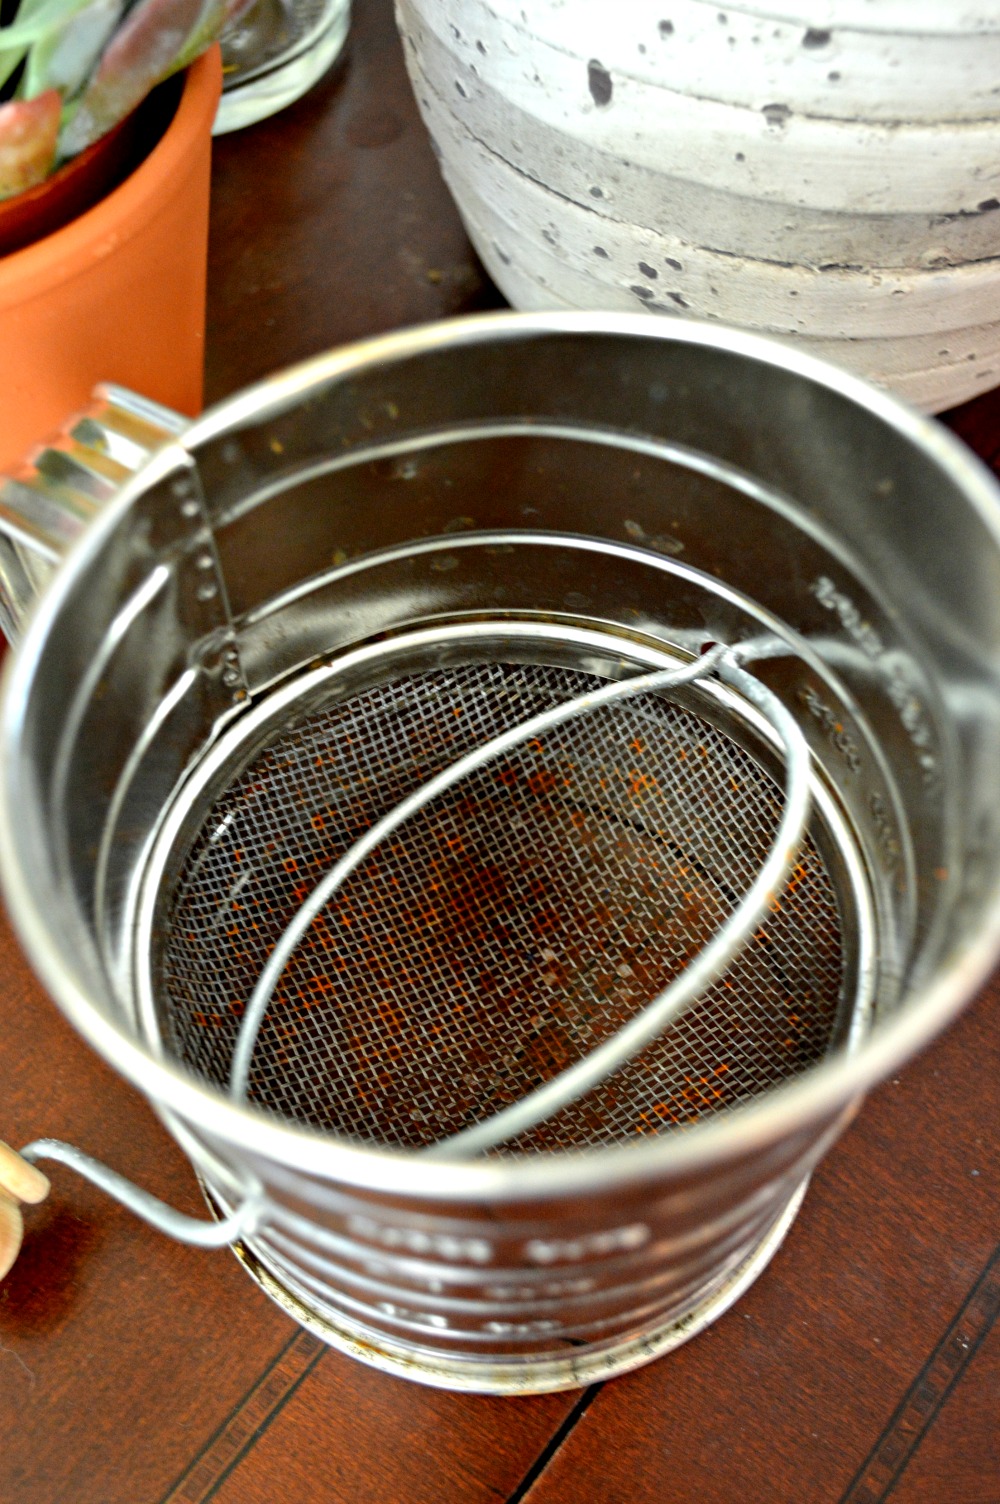
BUT. Most importantly. The inside of a flour sifter is a mesh colander, basically! So it’s got the built in drainage holes I really wanted! WIN!
Ok, so here’s where the story goes a little sideways.
I’m actually not a creative person. I can’t look at something and go, I know exactly what I should do with that. Which is perfectly fine. You don’t need to have that skill in order to be a maker, a crafter, a creative, a diyer, whatever. You just need to do a little research.
So I popped on Pinterest and looked for upcycled flour sifters. Believe it or not, I found a bunch. But the projects I found were mostly just, I bought this thing and stuck succulents in it, type of deals. Not what I was looking for.
After Pinterest failed me, I did what I should have done in the first place and contacted DIY-er extradoinare and my best indoor friend, Laura Kelly of Little Yellow Wheelbarrow. She does have that thing where she can look at something and say, I know exactly what you should do with that. (Check out these amazing planters she made with her own hands!) And she gave me about 5 different ideas and of course, I said, yeah, I’ll take the easiest of those and slap some paint on this bad boy.
Because that’s the easiest thing to do, right? Who could POSSIBLY mess that up??
Have no fear, I did indeed, MESS THAT UP. Here’s what the sifter looked like approximately 24 hours ago:
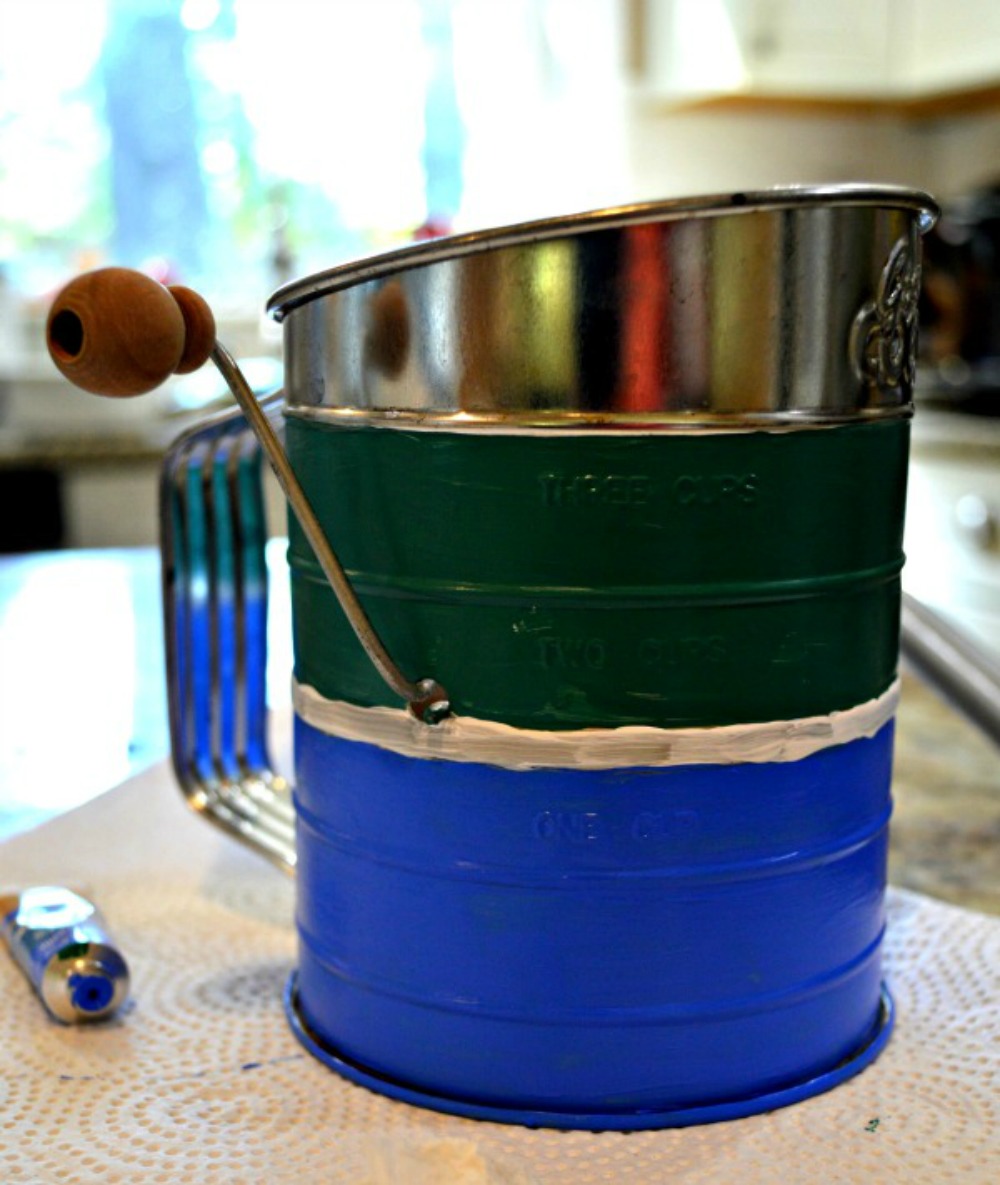
It’s ugly. It’s not well thought out. That green is hideous. It’s not at all what I imagined in my head. I can’t paint a straight line free hand. I HATE it.
I got back in touch with Laura and told her I was tossing my blog out the window and that nothing I ever do comes out right and that no one should ever even listen to ANYTHING I say because I don’t know what I’m doing!
And then she looked at what I had made, gave me some pointed feedback and sent me back to the drawing board. Or painting board in this case.
I think where I went wrong with this project is that I wanted it to be a more than it really needed to be. I wanted there to be something to write about. Meaning, there would be a tutorial involved. A step by step for you. I wanted to sound like an expert to you.
But, first of all, I’m not an expert. I just like to try stuff and if it works out, awesome. But sometimes it doesn’t. And second of all, you don’t always need a tutorial. (I’m going to write one anyway, by the way, but this is mostly story time, ok?) Sometimes, you just slap some paint on a thing and it’s perfect. Sometimes you don’t even do anything to the thing! You do in fact buy a thing, throw some succulents in it and call it done.

What is my point? My point is, you don’t have to be good at this to make stuff. You just have to enjoy doing it. And sometimes you’ll make something brilliant. And sometimes you’ll fail. But it doesn’t mean you shouldn’t try.
The ebook I mentioned, My Ten Favorite Crafts, I promise you those are things you can make even if you have no skills. Cause I have no skills and I made them all.
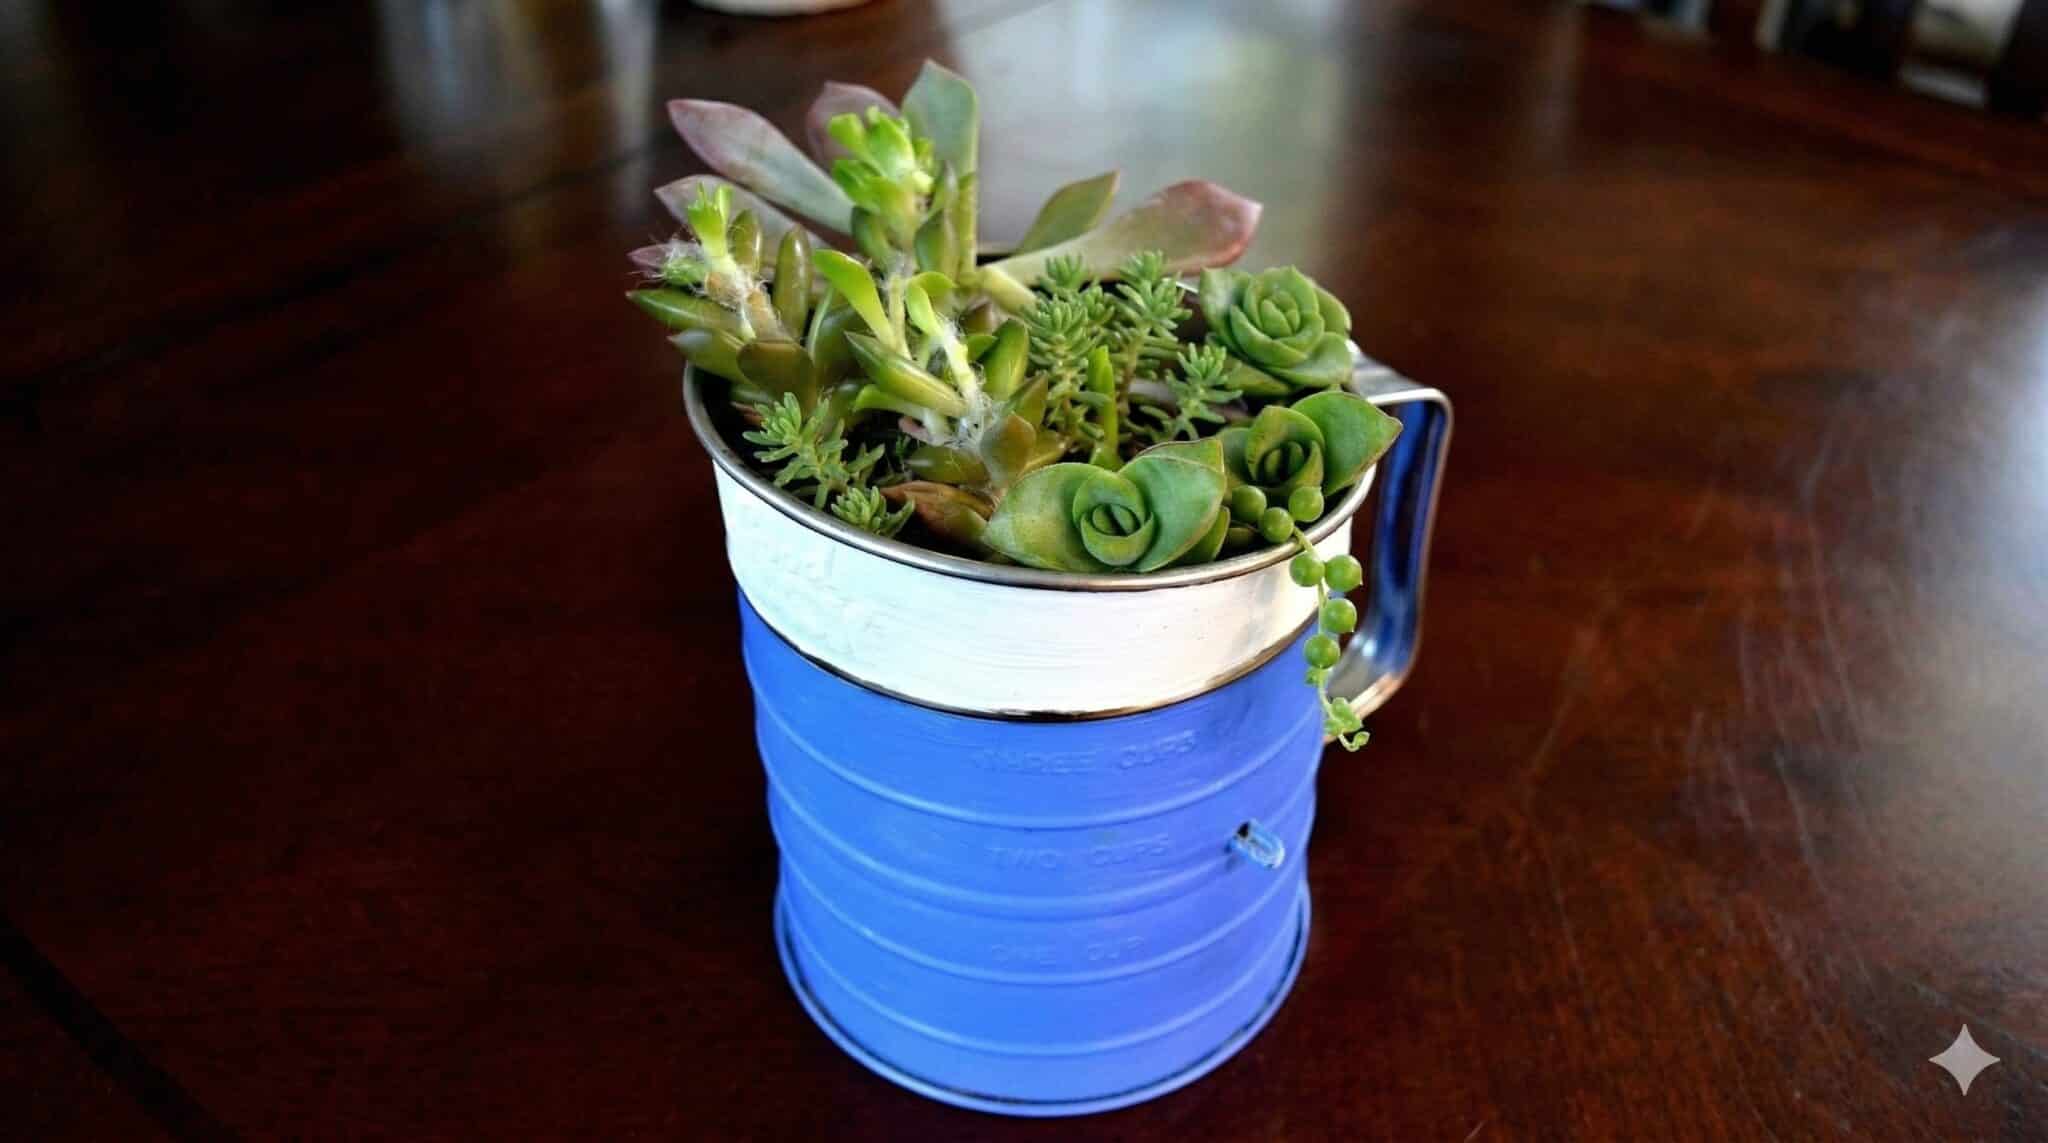
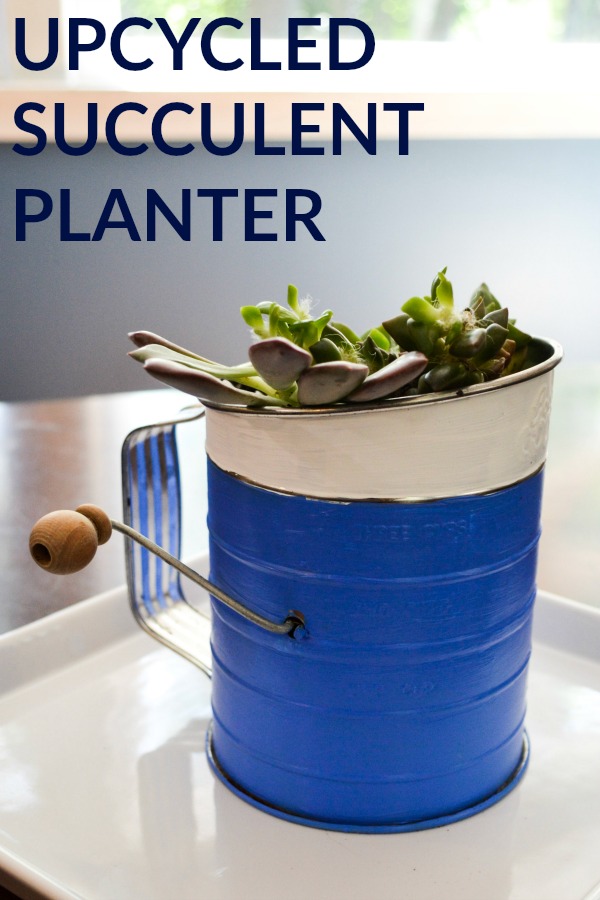
Upcycled Succulent Planter from a Flour Sifter
Materials:
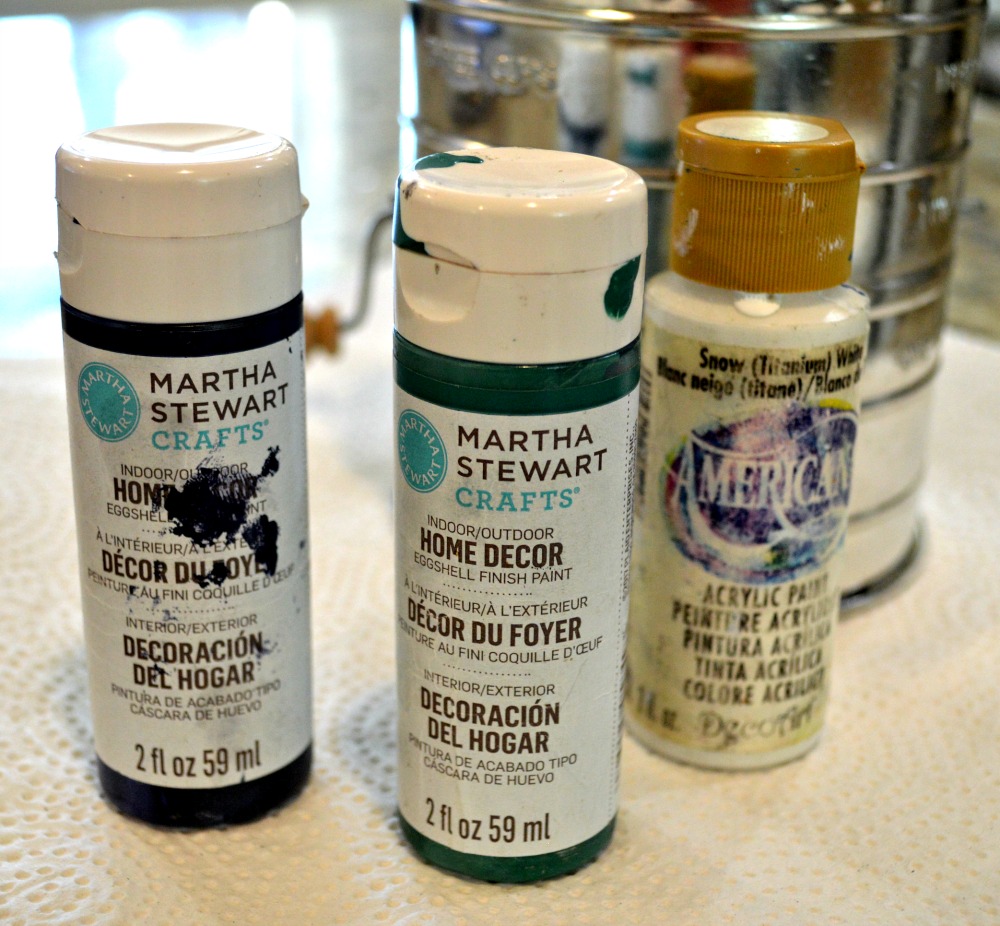
Paint colors of your choosing
Paint brush (nothing fancy, just make sure it’s not so small that it’s going to drive you crazy trying to cover your planter. Ask me how I know. Yup, I used a tiny one and then light dawned and I realized, get a bigger brush lady. It will be way easier).
Planter (a flour sifter in my case!)
Krylon Sealer (only if you feel like you need it. Don’t feel like you can’t do this project without buying this. It will be nice and protected from scratches if you use this, but it’s more optional than not).
Step 1: Choose your container. Remember, it’s important that you choose something that either has something that can be used as drainage holes or holes can be added to it. Succulents like their soil to dry out. The Flour Sifter I found was perfect for this.
Step 2: Clean your container. You can see in the picture above that there is some rust inside my sifter, I scrubbed that and cleaned the whole thing. It actually still had flour on it. Which is kind of gross, but whatever. It’s clean now.
Step 3: Paint your container. I started with three colors and then tossed the ugly green! I let everything dry before I started repainting with the blue and then the little bit of white at the top.
Step 4: Allow to dry. Umm, no further instruction needed. I hope.
Step 5: Seal your container. This is optional. If you’re fussy and you want it to be safe and protected, do this. If you’re like me and not fussy in any way, feel free to skip it.
Step 6: Add your succulents. I actually grabbed a few rocks from outside and put them in the bottom of the sifter. They’ll help even more with drainage and they saved me from filling a lot of empty space with succulent dirt.
Look at that, I made a 6 step tutorial out of something that I could have summed up in one sentence.
The moral of this crazy story is. Don’t think I’m better at this than you are because I wrote a tutorial about it and therefore it’s probably hard and requires a special skill. It’s not and it doesn’t.
You can do this and I really want you to.
If You Liked It Then You Shoulda Put a Pin in It!
Tina, you just made my day!! Please let me know when you make it and send me pics!!!
Marybeth
I love this post! Like you, I’m not the greatest crafter, but I love giving it a whirl!
Hi Katgirl2007,
Well good morning to you, too! 🙂 I actually appreciate the honesty. I wish you didn’t feel the need to couch it with an unnecessary and obviously insincere apology. I think your kittens are adorable. Stupid is such a mean word though. What didn’t you like about the post? I really want to know.
Marybeth
Sorry but this is one of the most stupidest posts.